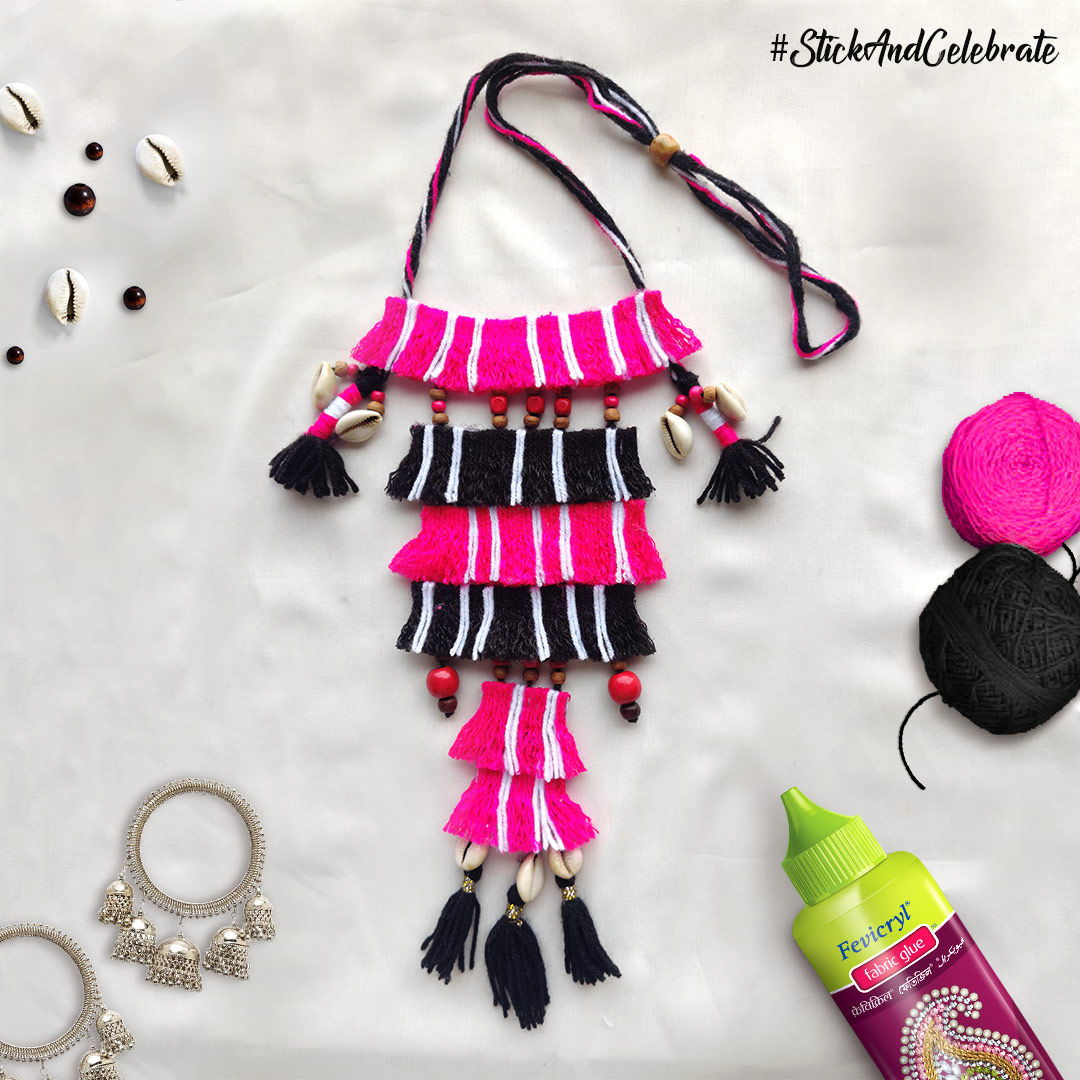
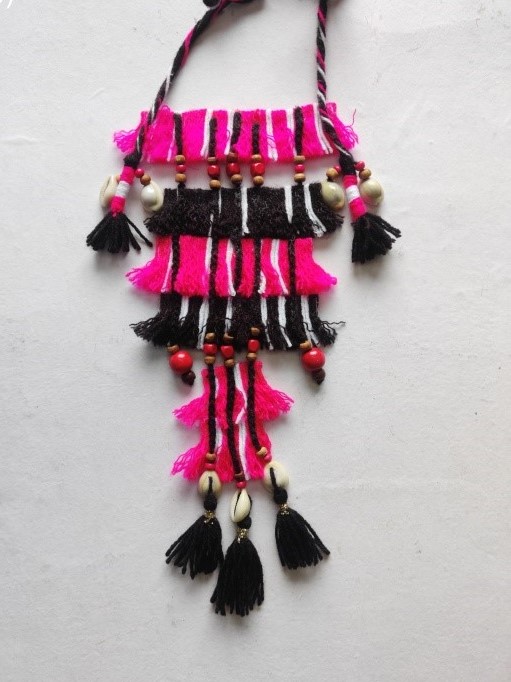
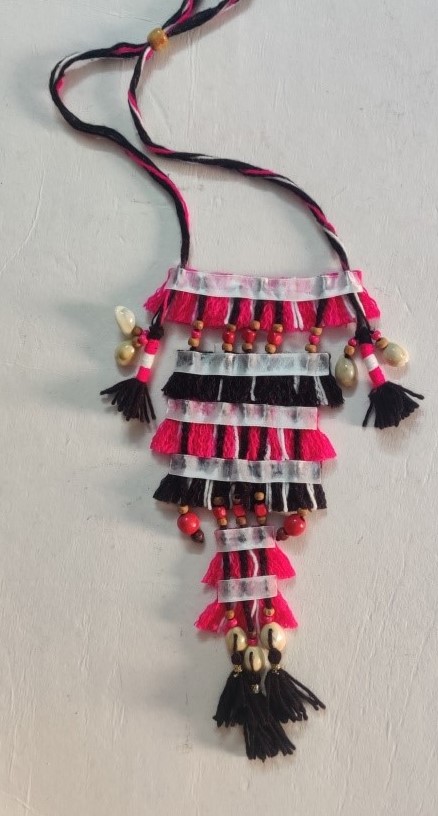
Tassle Neck Piece

You Will Need:
Fevicryl Fabric Glue, Fine Art Brush Flat, Woolen yarn (any 3 shades), Buckram, Satin Ribbon, Golden Silver Yarn, Wooden Beads, Conch Shells, Fabric Scissors, Needle for Wool, Hair Comb, Scale, Pencil, Waste Cloth
Product Used:

Description :
A beautiful beaded multi layered tassel neck piece which can be worn when you attend an artist event or step out for an evening cocktail with your girlfriends – completely made using Fevicryl Fabric Glue.
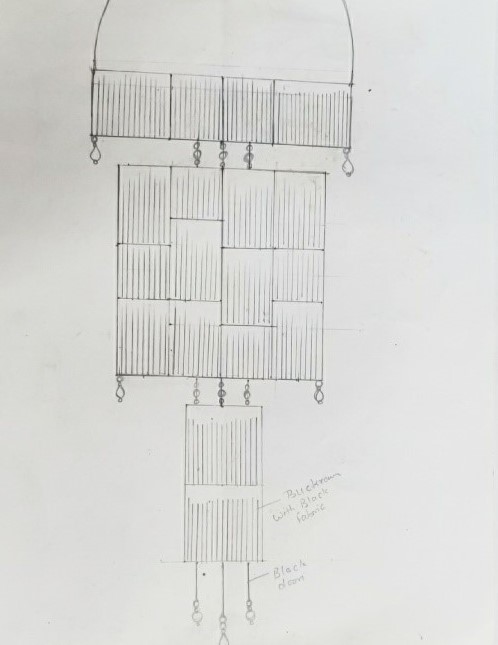
- Sketch out the layout of the neck piece according to your taste and idea on a sheet of paper.
- It is sometimes easier to visualize the end product on paper before beginning to make it.
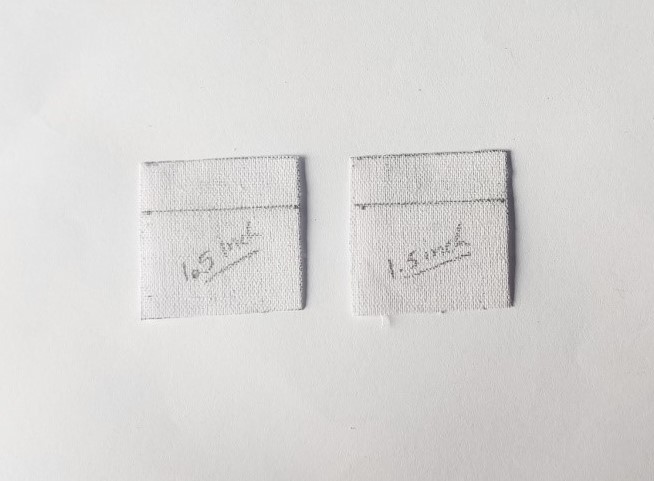
- Take two pieces of buckram measuring 1.5 inch all around.
- Use fabric scissors to cut them.
- Take any two coloured woolen yarn and start rolling them around the buckram piece.
- Make sure to stick only on the top part as shown (front and back)
- Use Fevicryl Fabric Glue to stick them.
- Let it dry.
- Cut the yarn at the bottom using fabric scissors to make them of even length on both sides.
- Once the yarn is trimmed, cut out the leftover buckram piece in the middle leaving the area that was used to stick the yarn on the top.
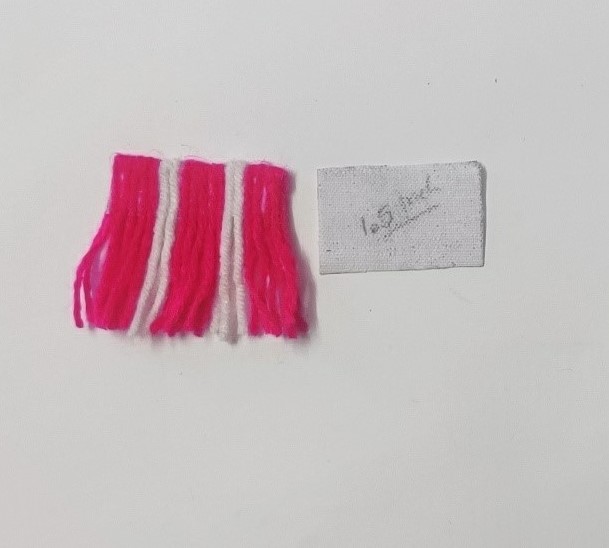
Follow similar process on the other piece of buckram.
The two pieces will look like this once it is completed.
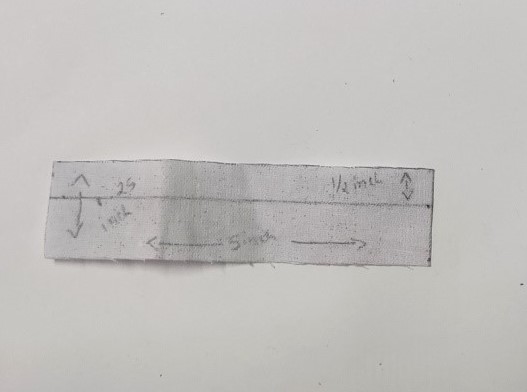
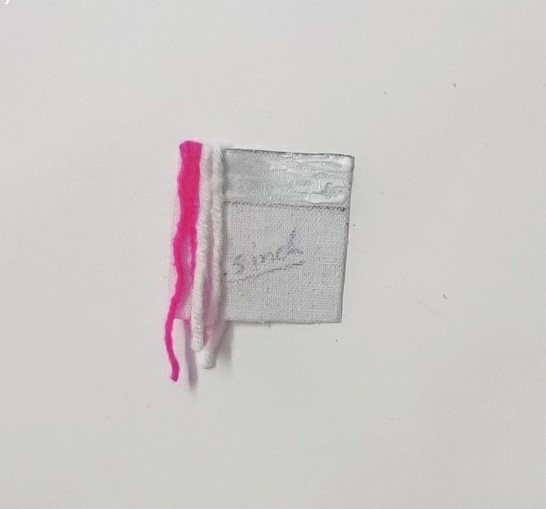
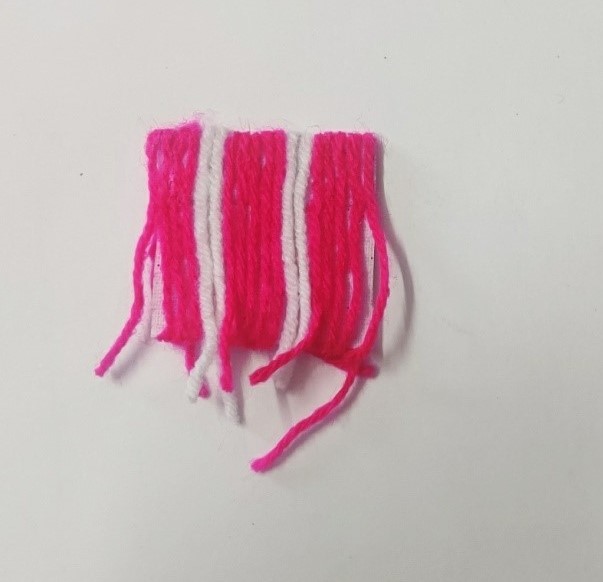
- Take a second piece of buckram measuring 1.25 “x 5”.
- Cut this piece using fabric scissors.

- Turn the piece and draw a line as shown in the image leaving 0.25” from the top.
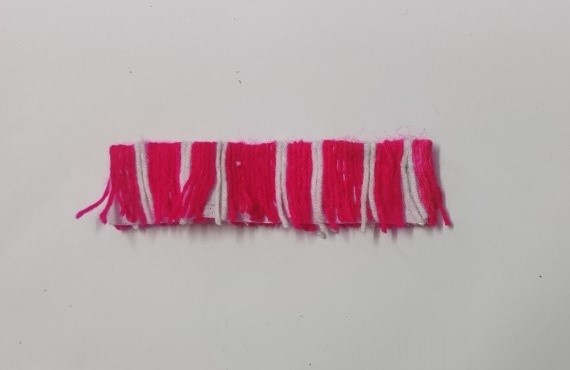
- stick the same two colours of woolen yarn on the buckram piece as seen in the image above.
- Use Fevicryl Fabric Glue to stick them.
- Make sure to stick only the top part of the wool on both the sides.
- Let it dry.
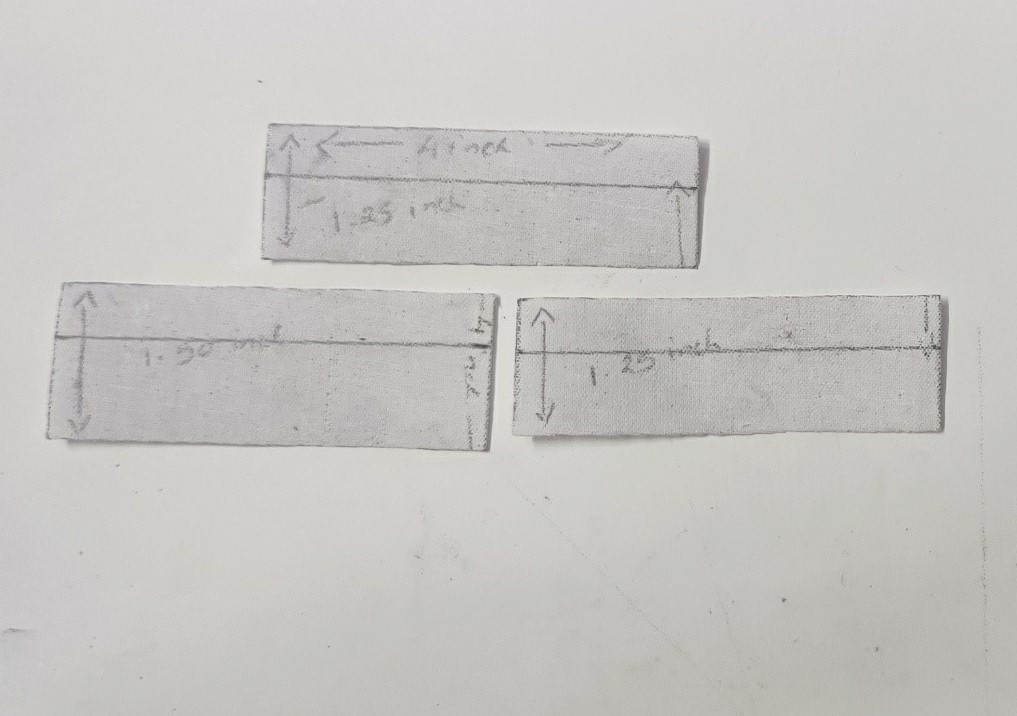
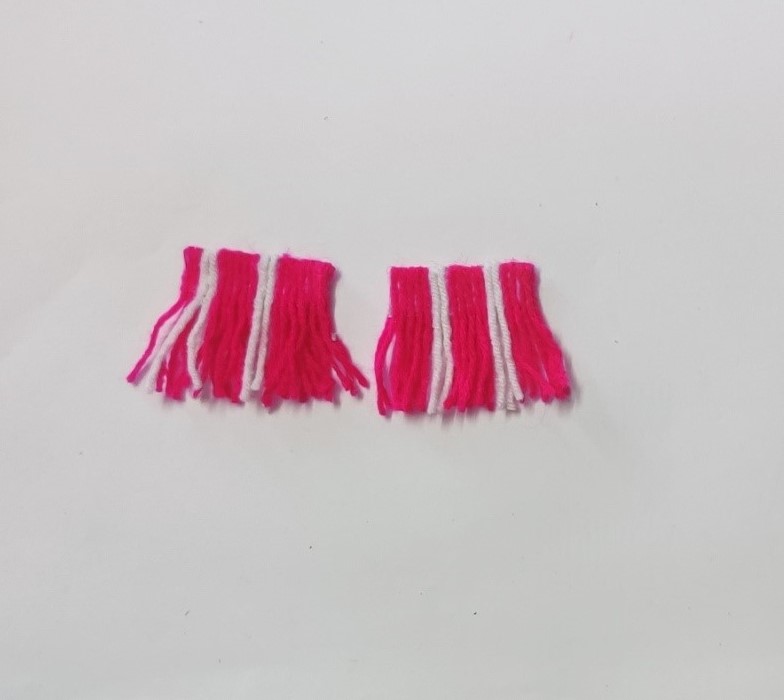
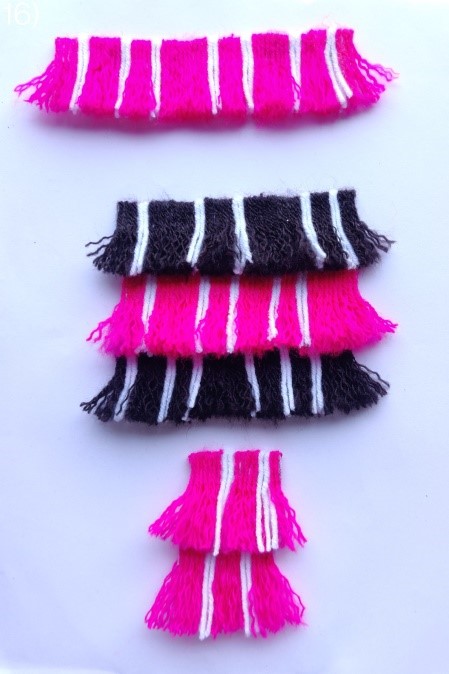
- Two strips measuring 4” x 1.25”.
- One strip measuring 4” x 1.5”.
- Use fabric scissors to cut them.
- Make sure to draw a line at the back horizontally measuring 0.25 from the top.
- Use the third colour on the two strips measuring 4” x 1.25”.
- Stick the edges neatly using Fevicryl Fabric Glue.
- Use the first colour combo for the strip measuring 4” x 1.5”and stick the edges neatly using Fevicryl Fabric Glue.
- Let it dry.
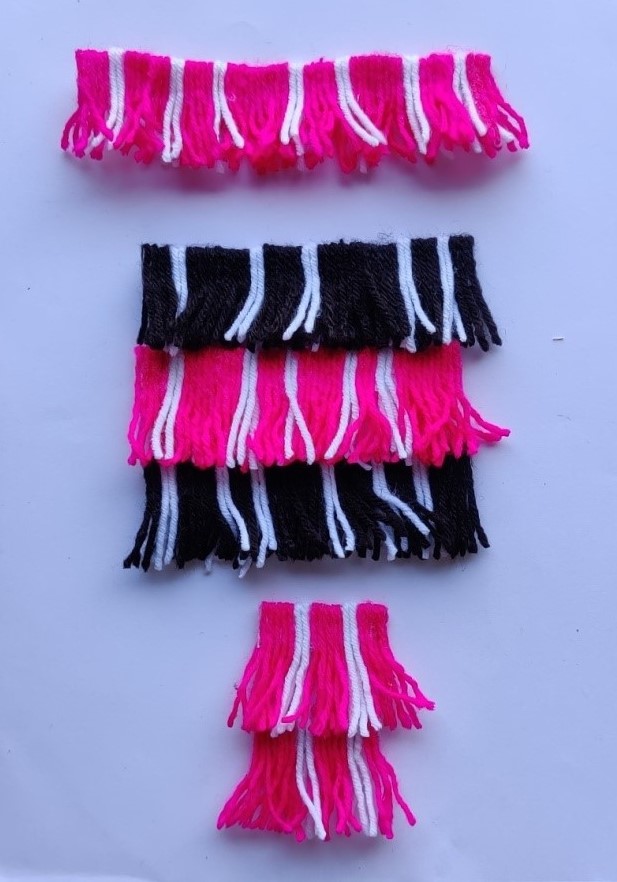
- Trim the yarns if required using fabric scissors.
- When arranged it should look like how it does in the image.
- Take the fine teeth comb and brush the edges of the woolen yarn.
- This will open up the twists in the yarn and will give it good amount of volume as u can see in the image above.
- Do this with all the woolen strips.
- Be careful not to unravel it too much.
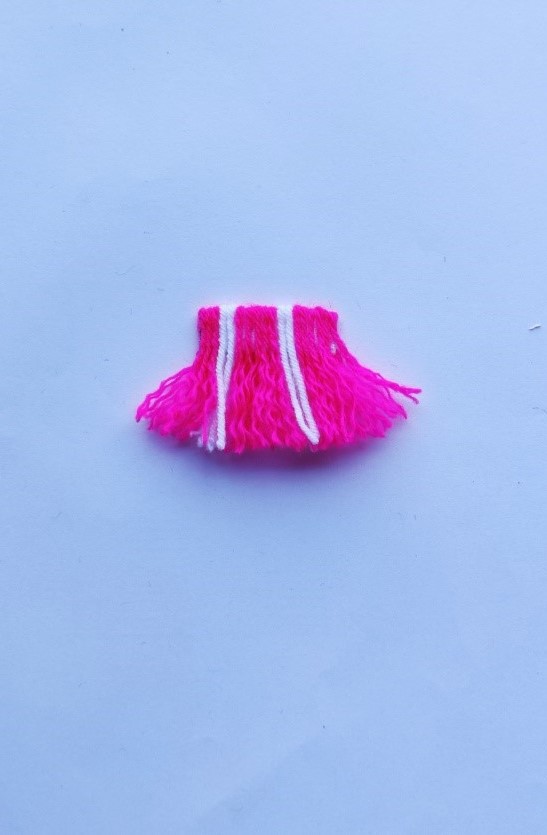
The strips will look like this once the fine tooth comb has been used on them.

- Use Fevicryl Fabric Glue to stick them.
- Let it dry.
- You can add beads in between the three layers as seen in the image above.
- You can attach the conch shell and the tassel at the end as seen in the image above.
- Trim the leftover yarn from the top.
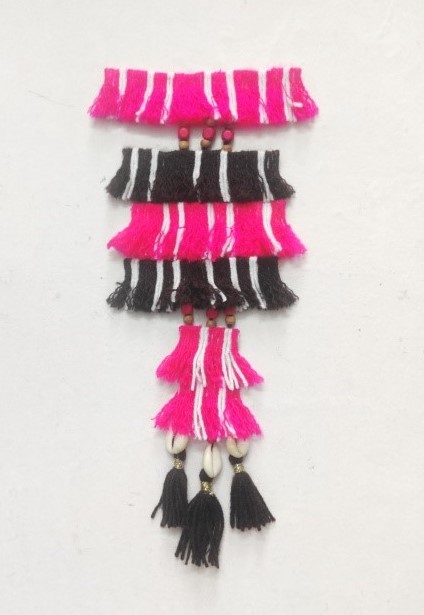
- Similar to the middle yarn, stick two more on each side as seen in the image above.
- Use Fevicryl Fabric Glue to stick them.
- Let it dry.
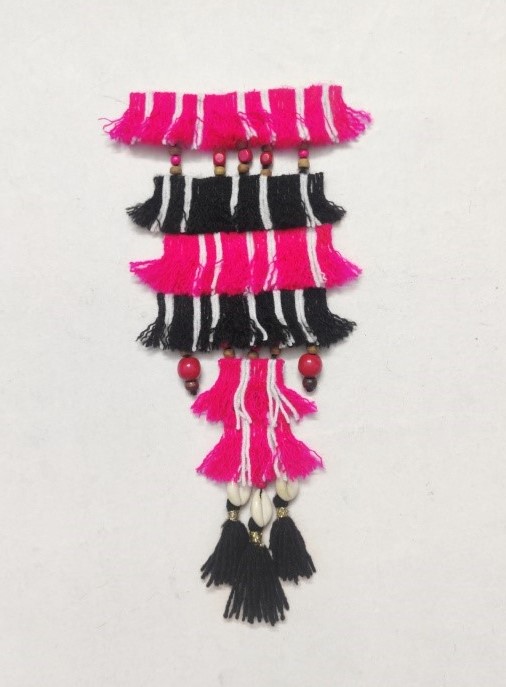
Repeat the same process by adding two more strings with beads on the side and ending it at the 4th level as seen in the image above.
- Measure the length at which u want the neck piece to settle and create a yarn by twisting all the colours of the woolen yarn you have chosen.
- Secure the edges of the created yarn as shown in the image above.
- Stick it to the topmost piece as shown in the image above.
- Use Fevicryl Fabric Glue to stick.
- Stick satin ribbon at the back on each level to secure the yarns.
- Use Fevicryl Fabric Glue to stick them.
- Let it dry.
- Insert a bead to the yarn on the top to create the closing mechanism.
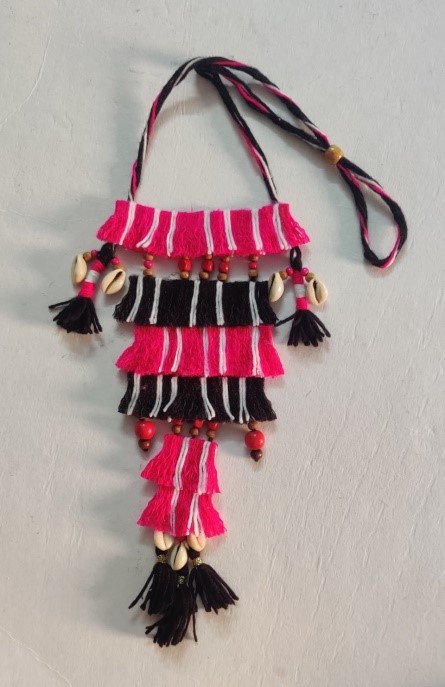
The multilevel tassel neckpiece is ready to be worn and flaunted.


 +91 99676 55545