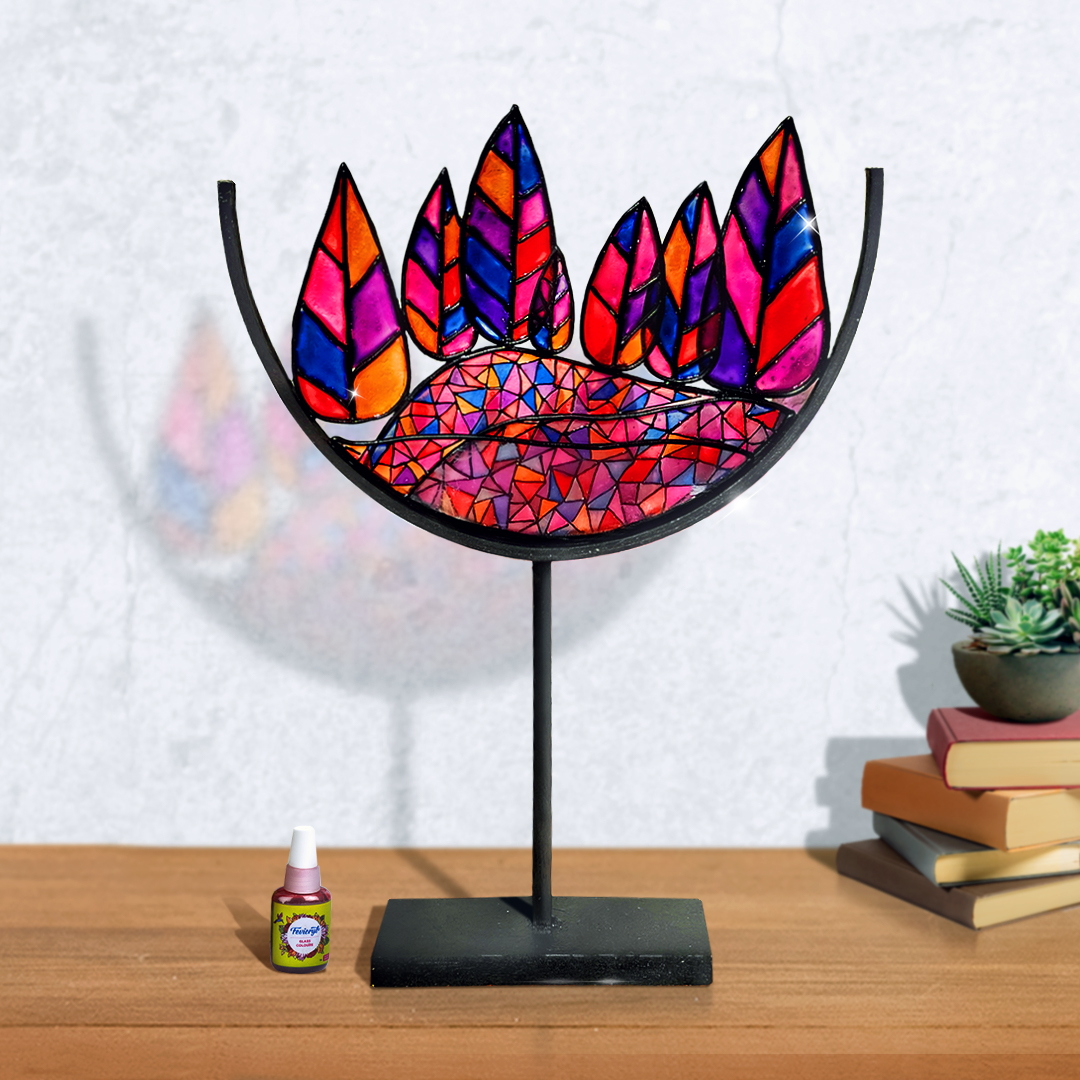
Ring Decor

You Will Need:
Fevicryl Acrylic Colours - Black 02, Fevicryl 3D Outliner - Black 708, Fevicryl Glass Colours Kit - Pink, Sea Blue, Ultramarine Blue, Fevicryl Mouldit, Fevicryl Fabric Glue, Fine Art Brushes, A3 White Paper, Wooden Embroidery Ring Approximately 10” Diameter, OHP Sheet, Scissors, CD Marker, Paper Cutter, Pencil, Wooden Stick, Wooden Block, Colour Palette, Water Container
Product Used:


Description :
We all look for ways and means to enhance our homes, by adding to replacing things around. At times the most basic of things can be doubled up to make interesting art décor pieces. Our DIY here is precisely that, using an embroidery ring and how!

Take an A3 white paper, draw trees and pasture (elements) on it, like you see in the image. Place an OHP sheet over this, mark & cut out the shapes individually using a paper cutter.

Take Fevicryl Mouldit – resin base & hardener, mix well to form an even soft dough. Make thin coils out of and keep it aside. (These would be used in Step 3).

In a very neat manner cut out the elements from the OHP sheet using a paper cutter. Coil and border each of the elements with Fevicryl Mouldit and stick using Fevicryl Fabric Glue to stick. Let it dry.

Paint the borders using Fevicryl Acrylic Colours – Black 02. Let it dry.
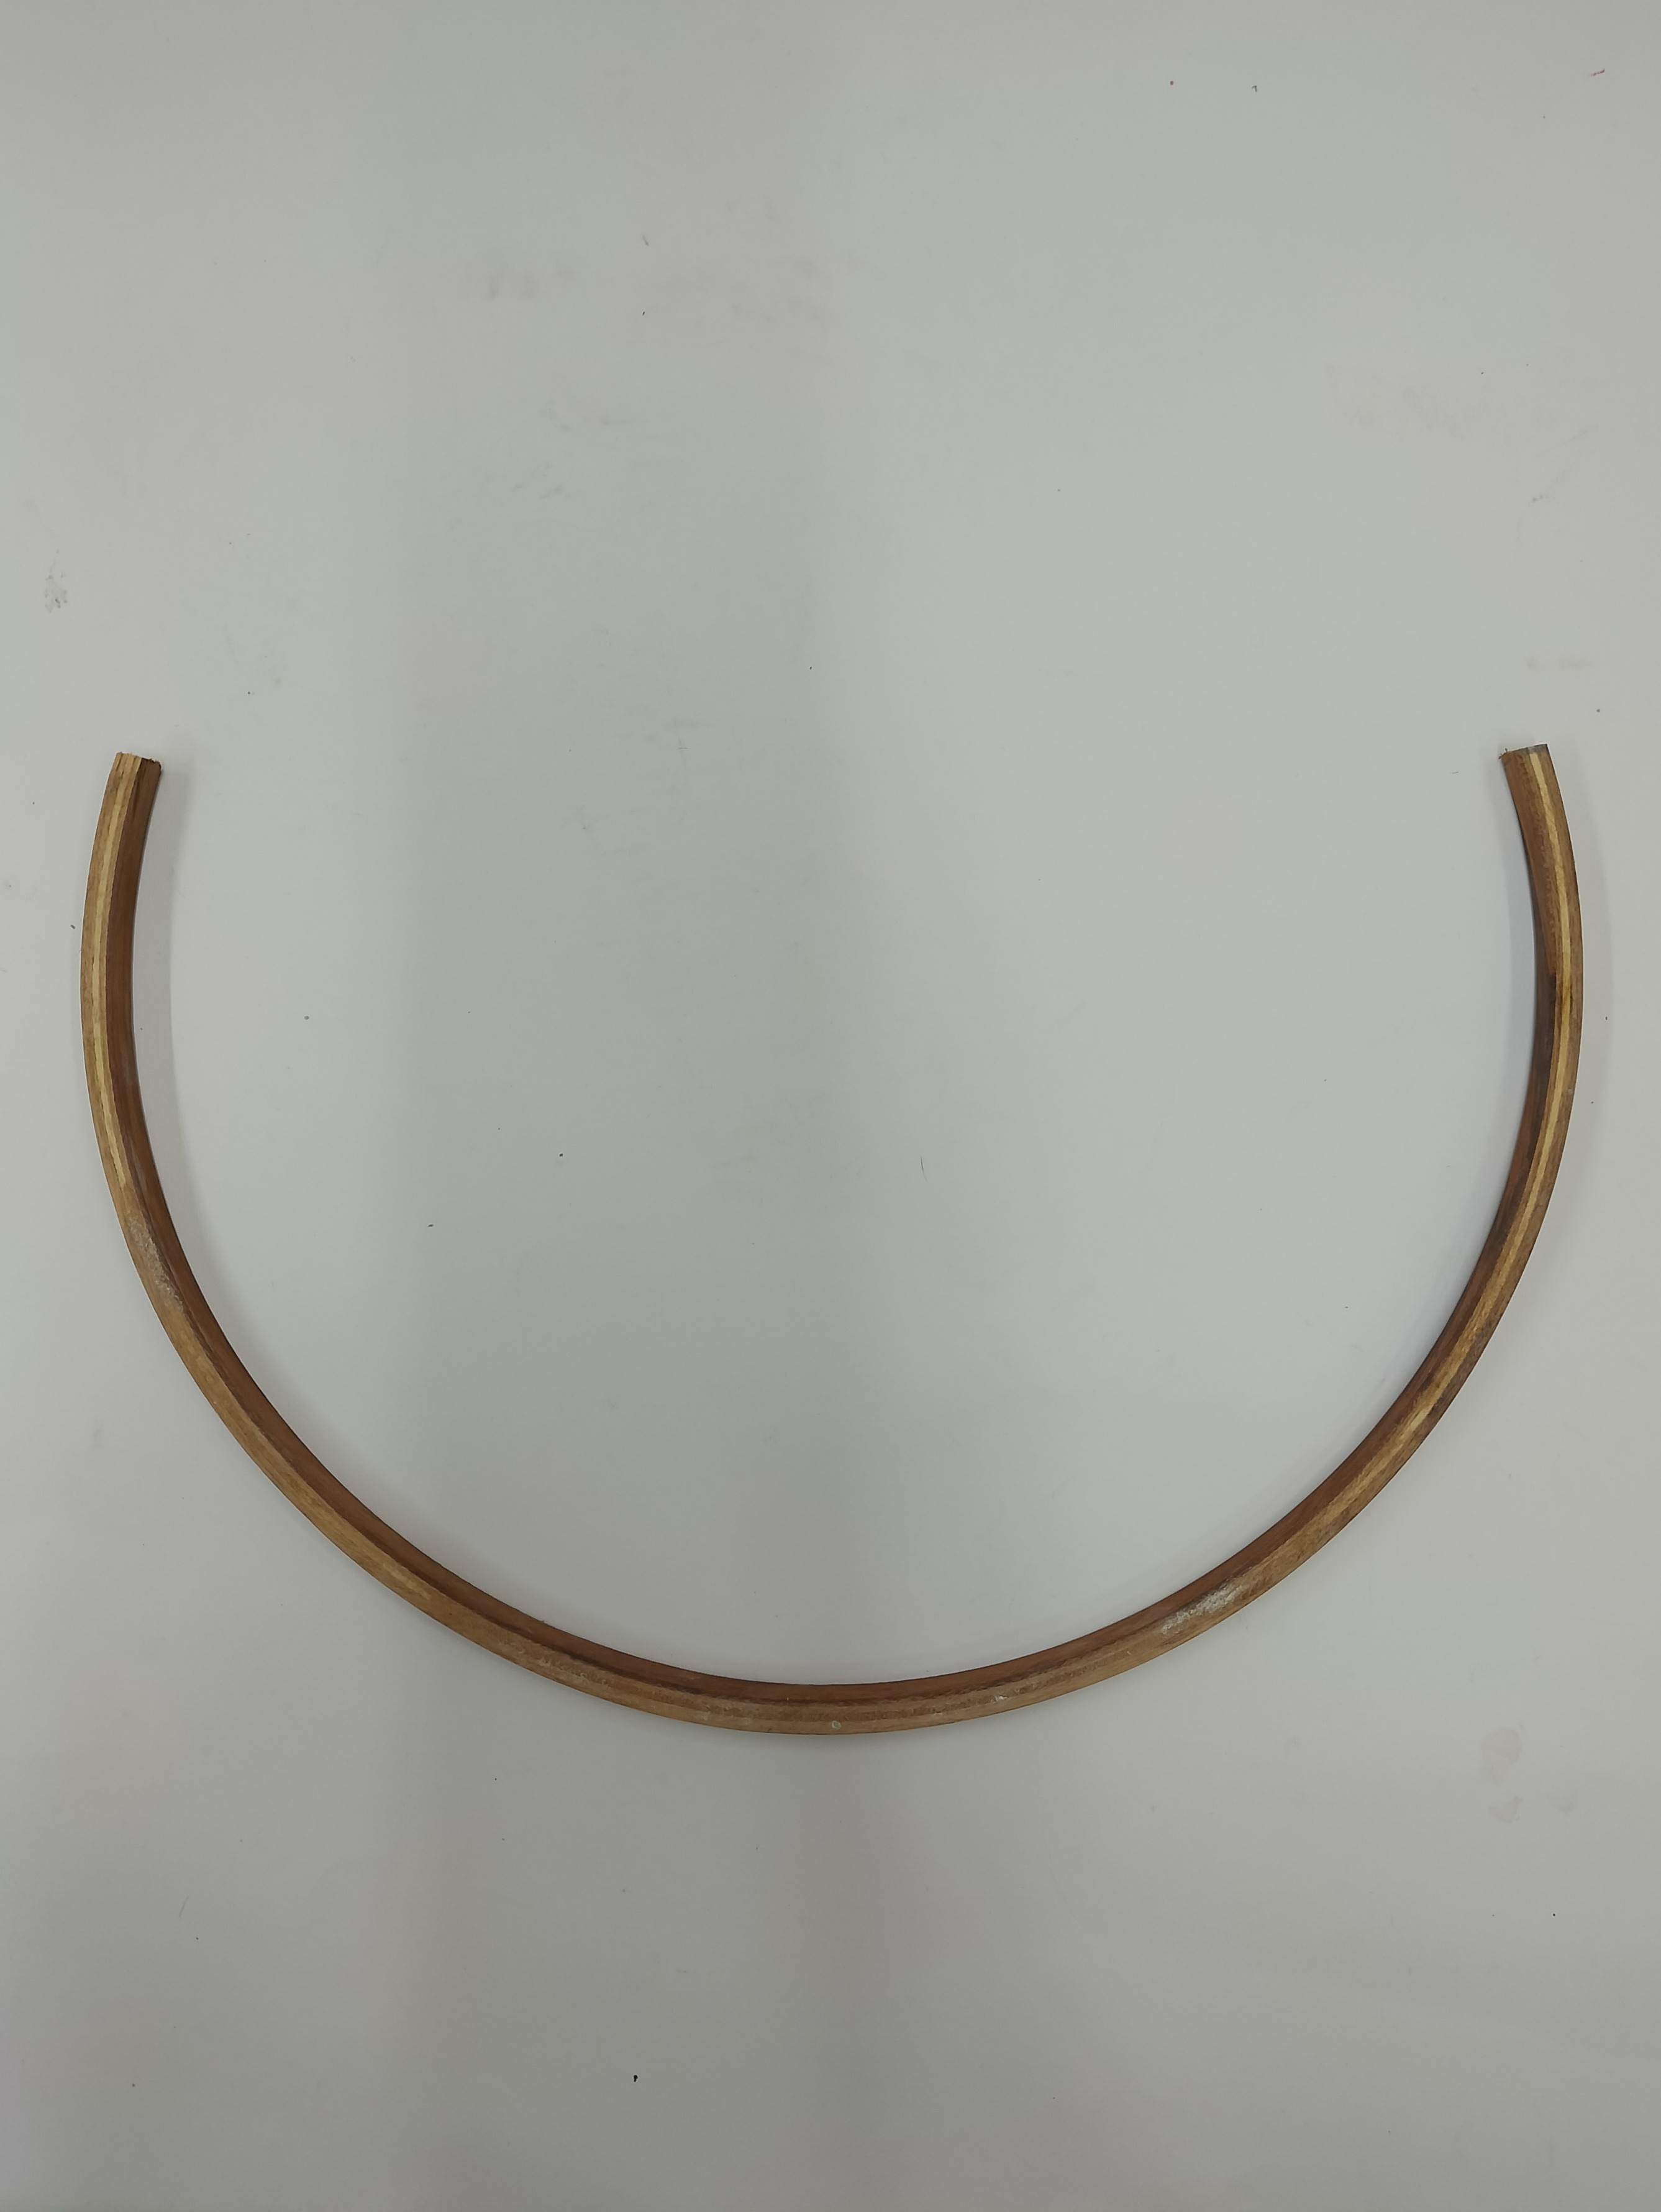
Take an embroidery ring and cut it into half, just as you see in the image.

Mount the half-cut embroidery ring on a block that has a stick attached to it. Refer to the image for accuracy.
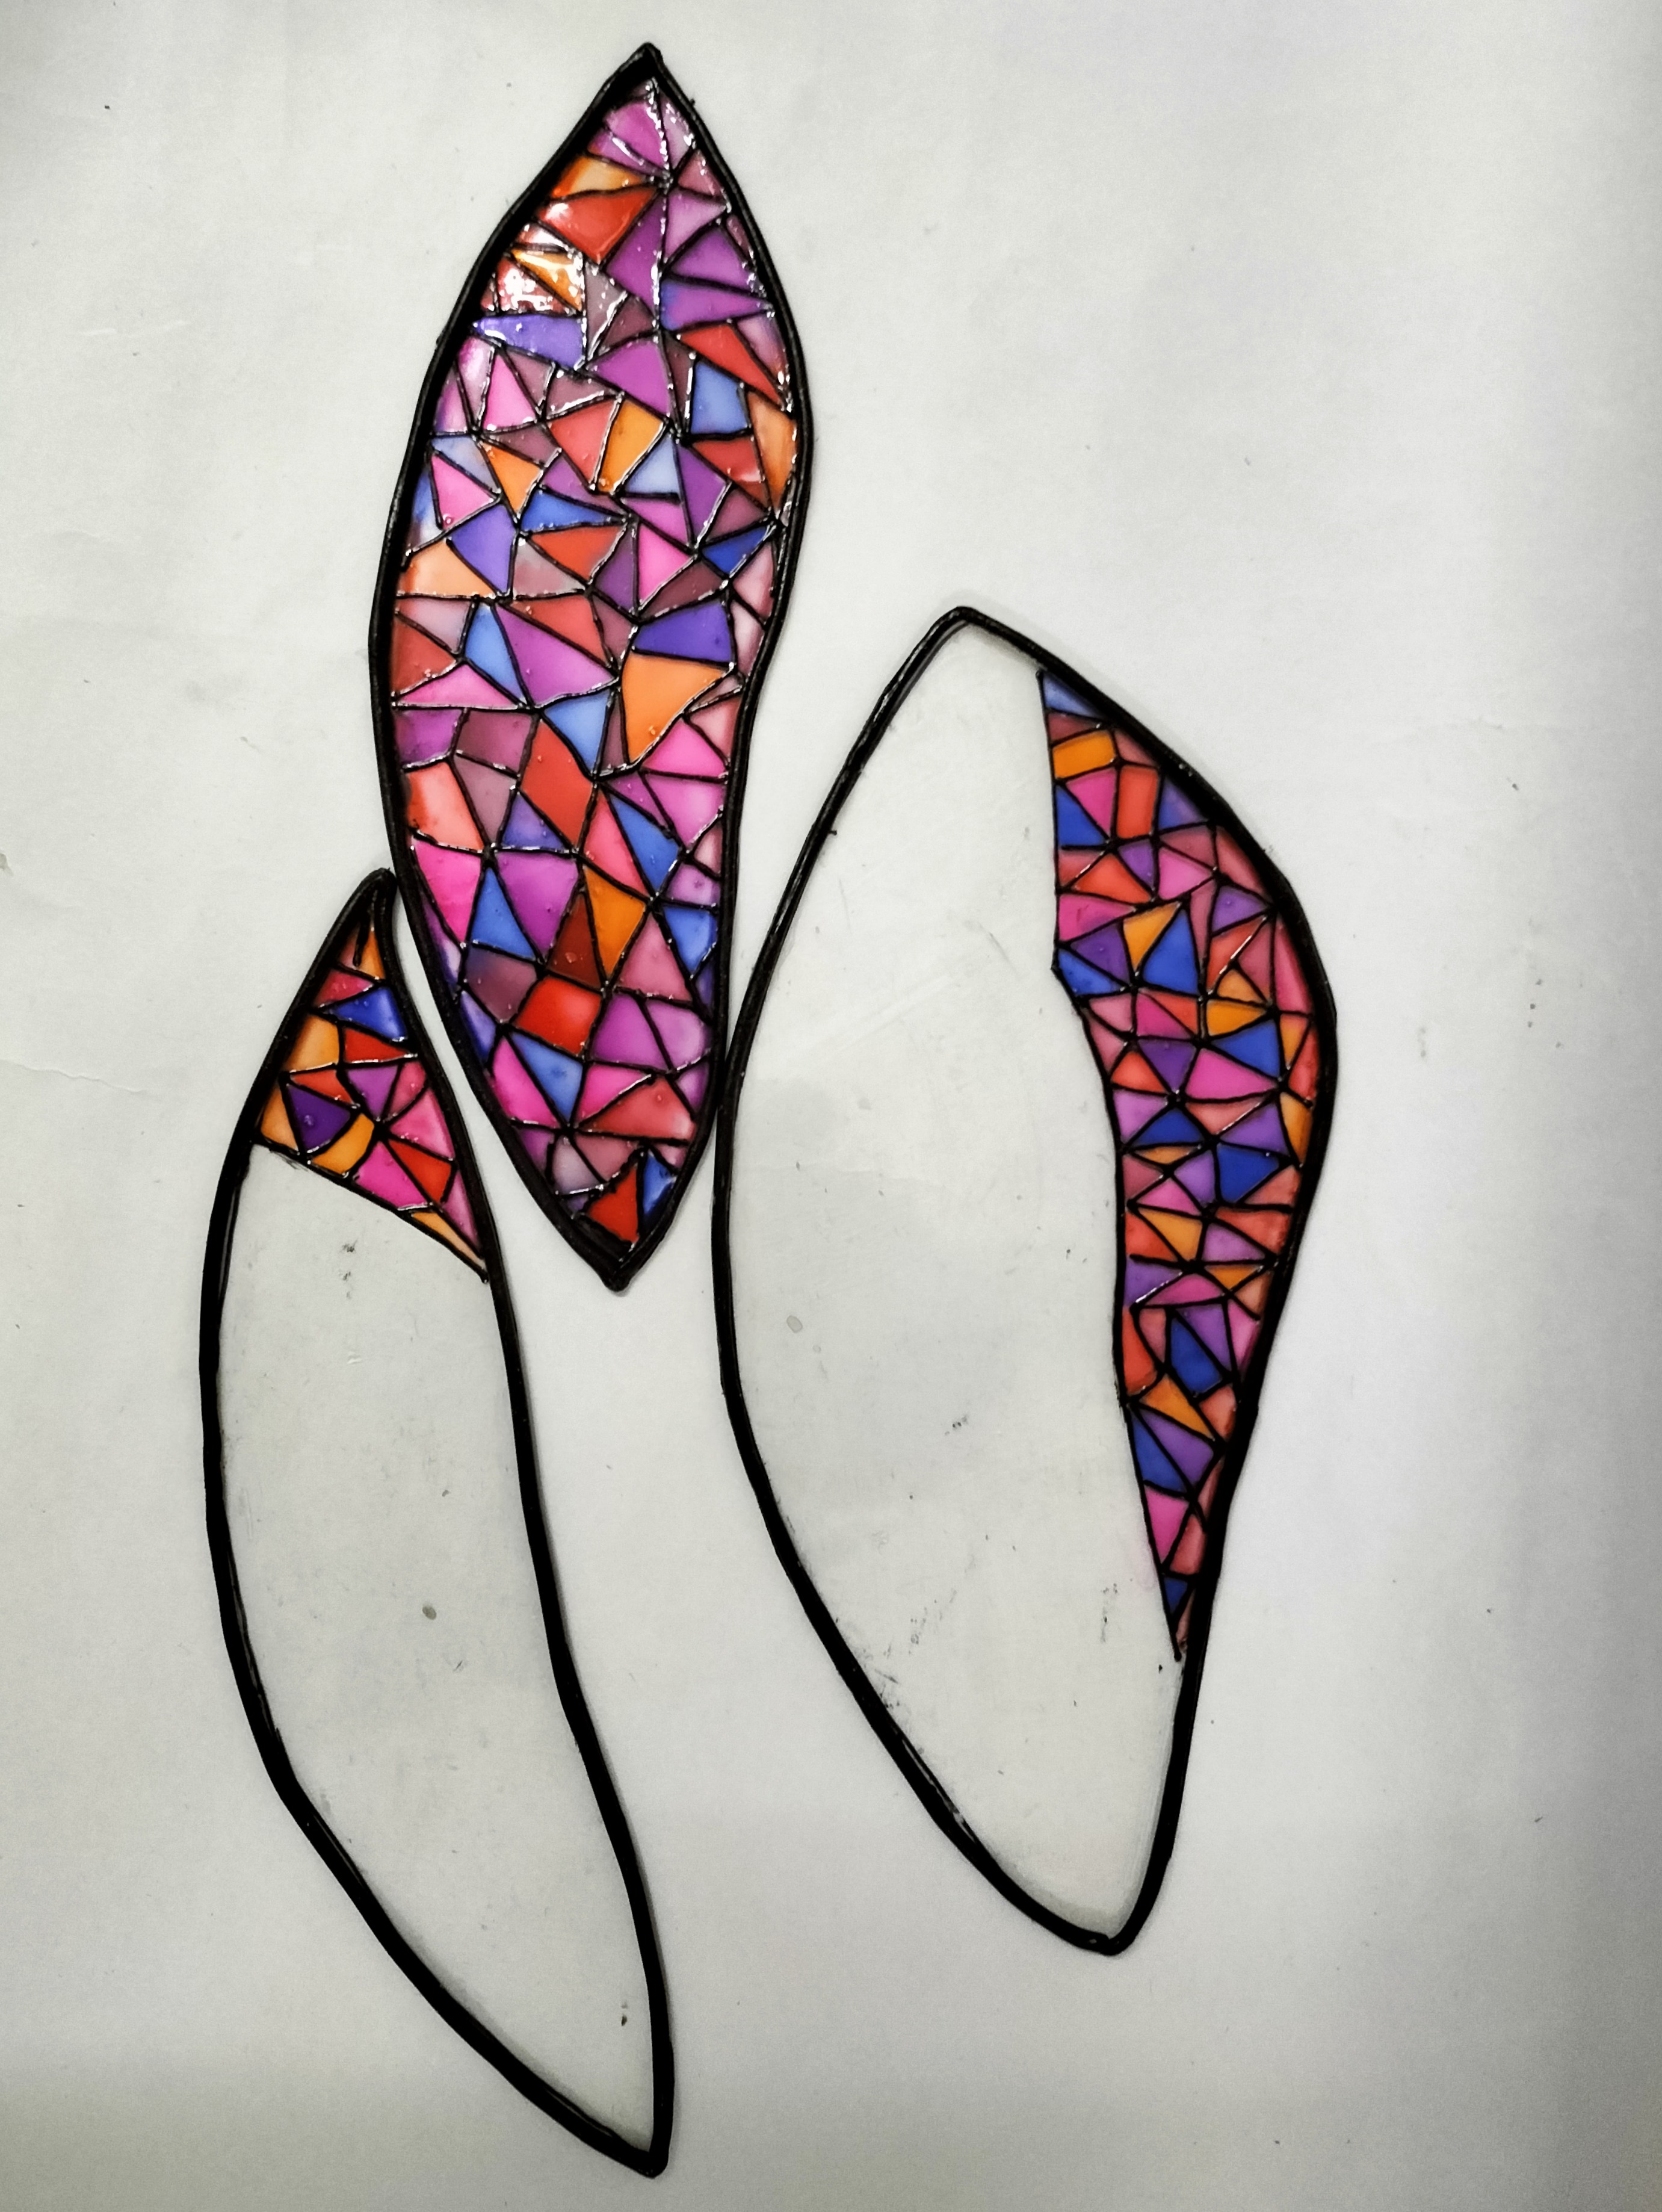
Take the cut elements (the trees & pastures), border each one with Fevicryl 3D Outliner – 708, and begin painting in a mosaic style using Fevicryl – Glass Colours. Let it dry completely.

Assemble the trees and pastures from the rear side of the ring using Fevicryl Fabric Glue. Let it dry. Here you have a unique art piece to be placed in the midst of perfect lighting for the glass colours to gleam and shine!


 +91 99676 55545