Patchwork Paper Bag

You Will Need:
Fevicryl Fabric Glue, Pencil, Scale, Old Newspapers, Cotton Cord, Felt Sheet (4 Colours Of Your Choice), Fabric Scissors
Product Used:

Description :
Here is an amazing DIY of a carry bag with paper and fabric that has been made using Fevicryl Fabric Glue.
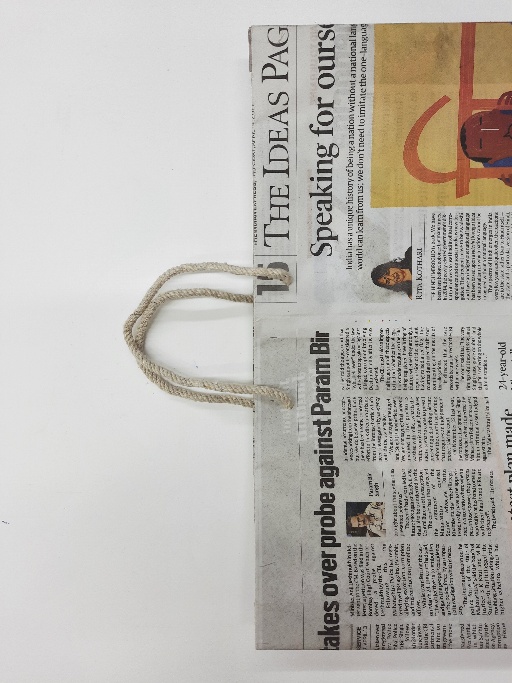
STEP 1 : Base material
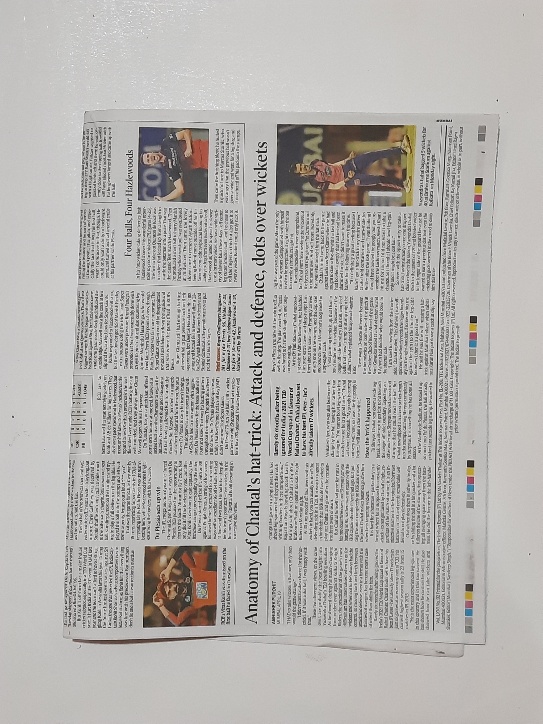
- Take old newspaper as shown in the image.
STEP 2 : Felt sheets
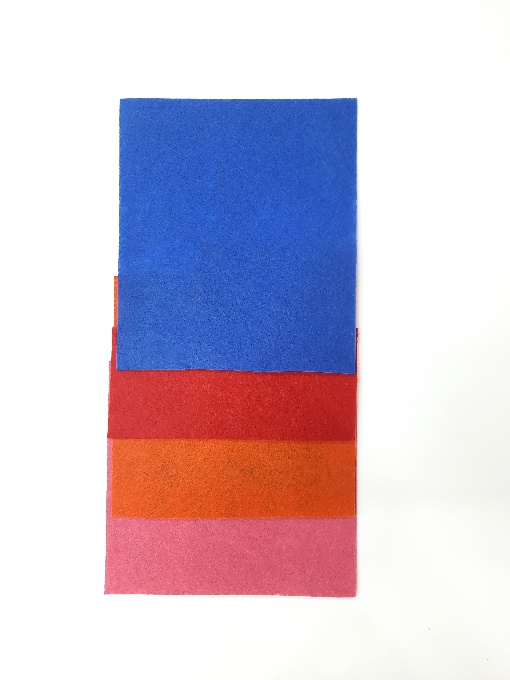
- Take felt sheets in 4 colours of your choice .
STEP 3 : Make felt sheet squares
- Take any 3 felt sheets and cut them in to squares measuring 8”x8”, 6”x6” and 5.5”x5.5”
- Use fabric scissors to cut them.
STEP 4 : Circles and trims
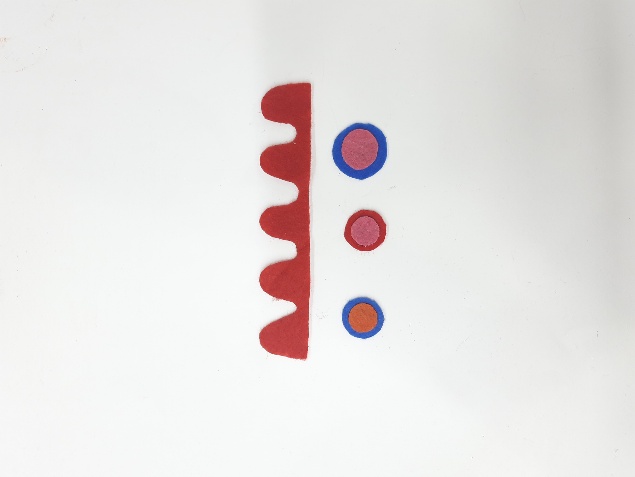
- Take the felt sheets and cut circles measuring 1.5”, 1” and 0.5” in diameter
- Take a 2”width felt strip and make curvy cuts on them as seen in the image.
- Cut 4-5 such strips
- Stick the smaller circles on the bigger circle using Fevicryl Fabric Glue.
- Let it dry
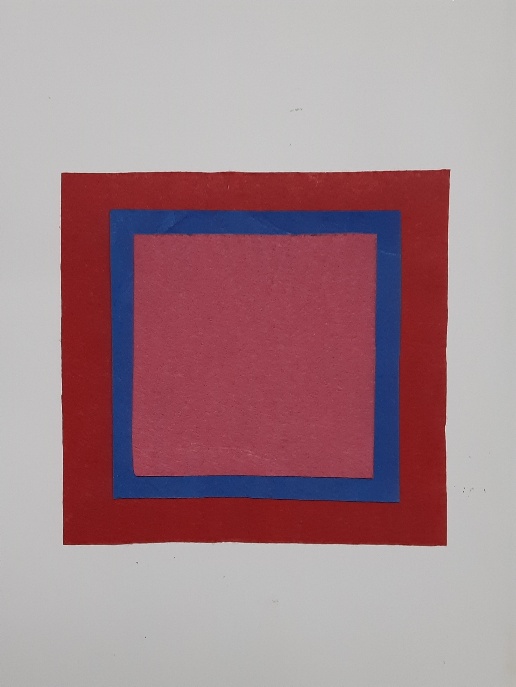
STEP 5 : Cutouts
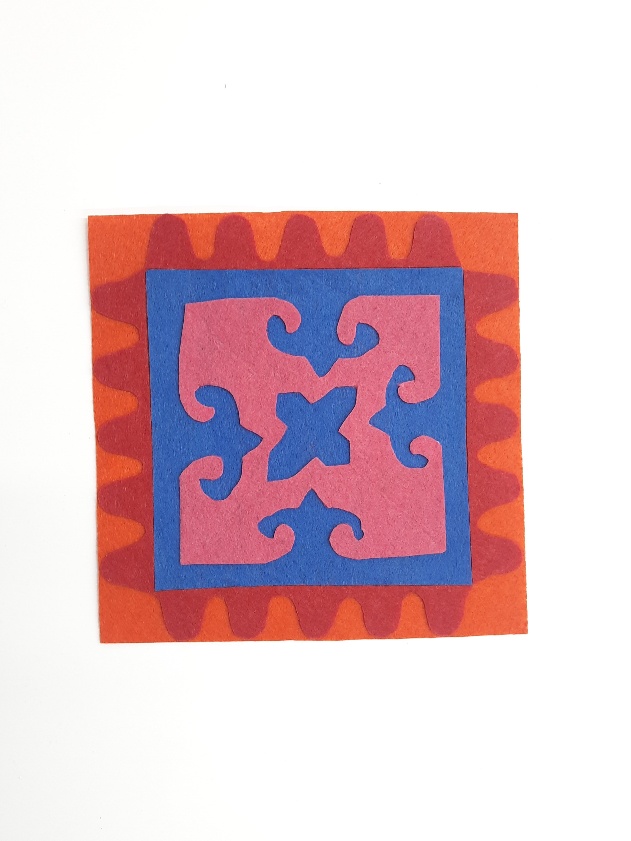
- Take the center square and cut out a design as shown in the image.
- Use fabric scissors to cut it
- Take the 2” felt strip with curvy design and place it on the sides of the center square as shown
- Stick them all in the order shown using Fevicryl Fabric Glue.
- Let it dry
STEP 6 : Making the paper bag
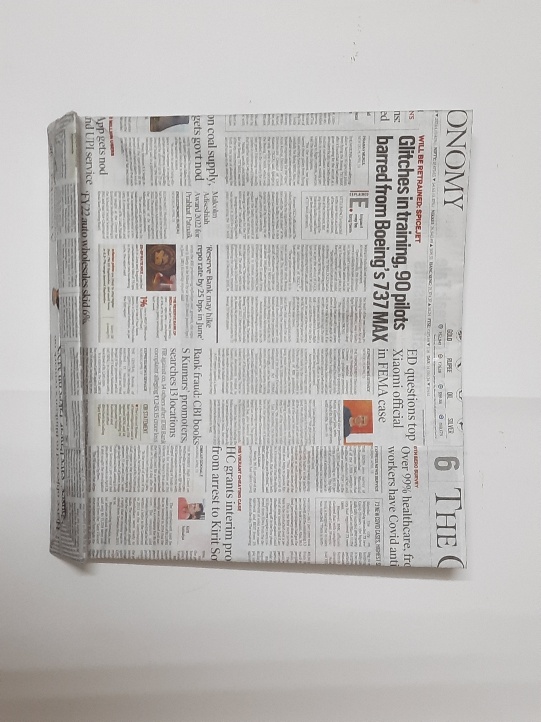
- Make a bag with 4” bottom width using the newspapers.
- Stick them together using Fevicryl Fabric Glue
- Let it dry
STEP 7 : Sticking of design
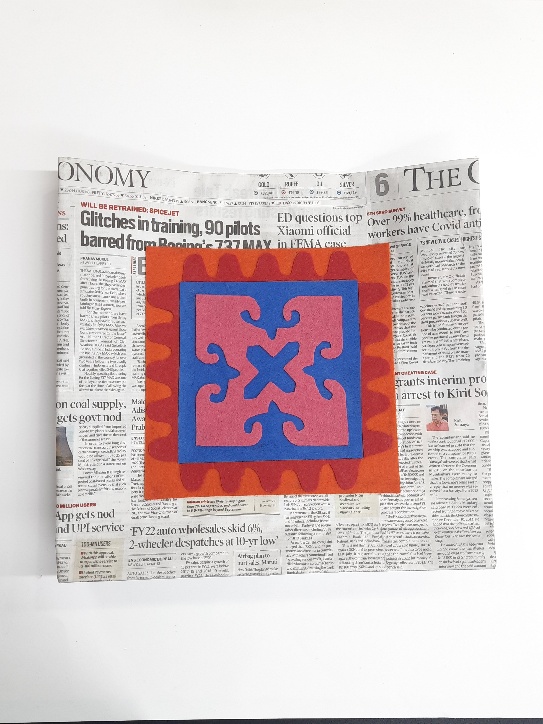
- Take the square design and stick it on the paper bag as shown in the image.
- Use Fevicryl Fabric Glue to stick it.
- Let it dry
STEP 8 : Bag handle
- Punch holes on top of the bag.
- Take a thick white cotton cord, pass it through the holes and knot themon the inside
- This becomes the handle to hold the bag
STEP 9 : Sticking of trims
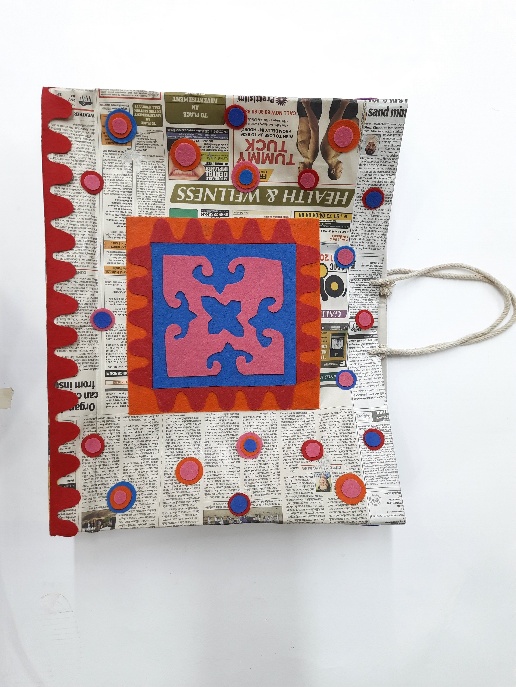
- Take the circles and stick them on the surface of the bag as shown
- Thake the curvy trim strip and stick it at the bottom as shown.
- Use Fevicryl Fabric Glue to stick them.
- Let it dry
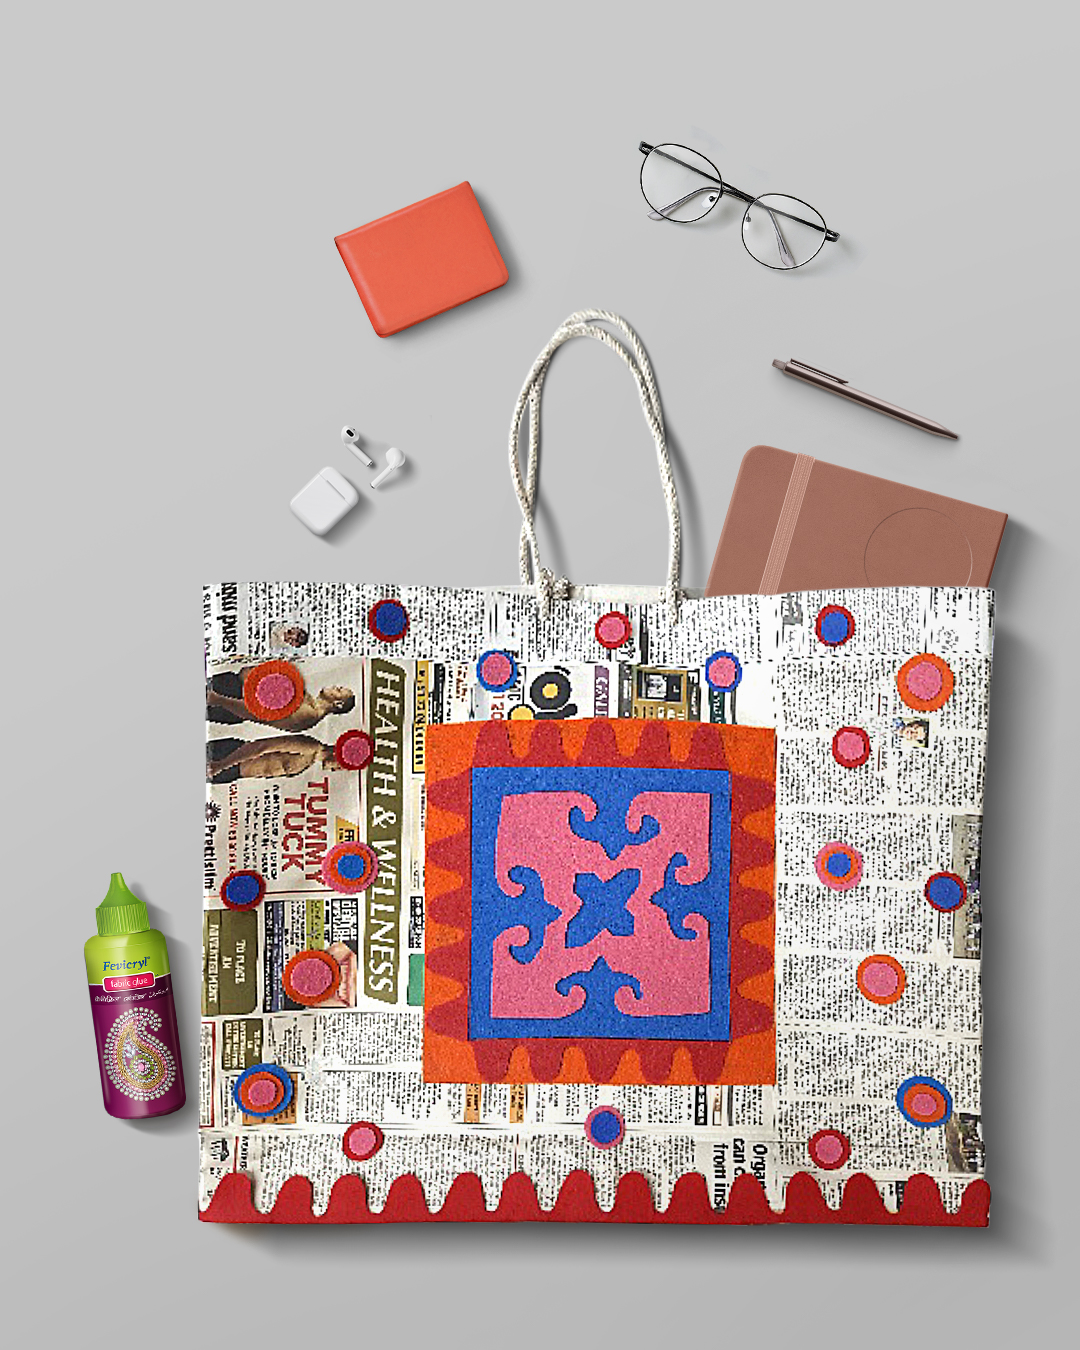
STEP 10 : Final look
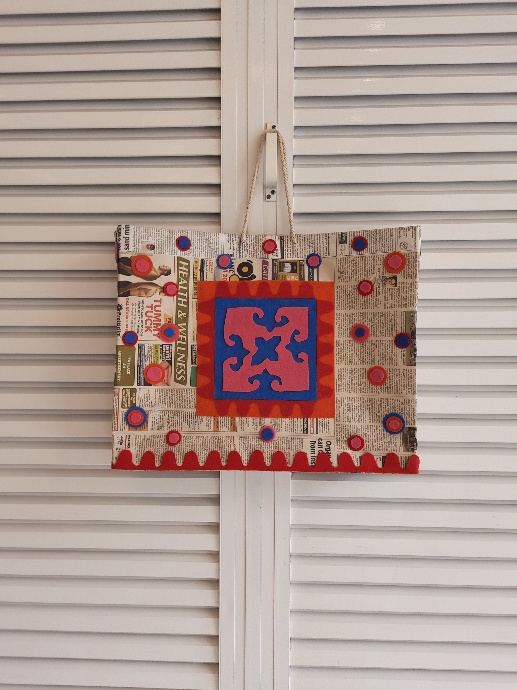
The Patchwork paper bag is ready to be given to your guests filled with goodies!


 +91 99676 55545