Fruits On My Plate

You Will Need:
Fevicryl Acrylic Colours - Crimson 04, Dark Brown 05, Dark Green 06, Golden Yellow 09, Lemon Yellow 11, Light Green Orange 17, Coral Red 66, White 27, Leaf Green 62, Neon Yellow 011, Neon Orange 017, Neon Pink 018, Fevicryl Acrylic Colours Pearl Metallic - Gold 352, Fevicryl Acrylic Metallic Powders - Gold 08, Fevicryl Mouldit, Fevicryl Fabric Glue, Fine Art Brushes, 3 Melamine Dinner Plates - Approximately 10” Diameter, Talcum Powder, Clay Carving Tools, Paper Cutter, All Surface Pencil, Colour Palette, Water Container
Product Used:


Description :
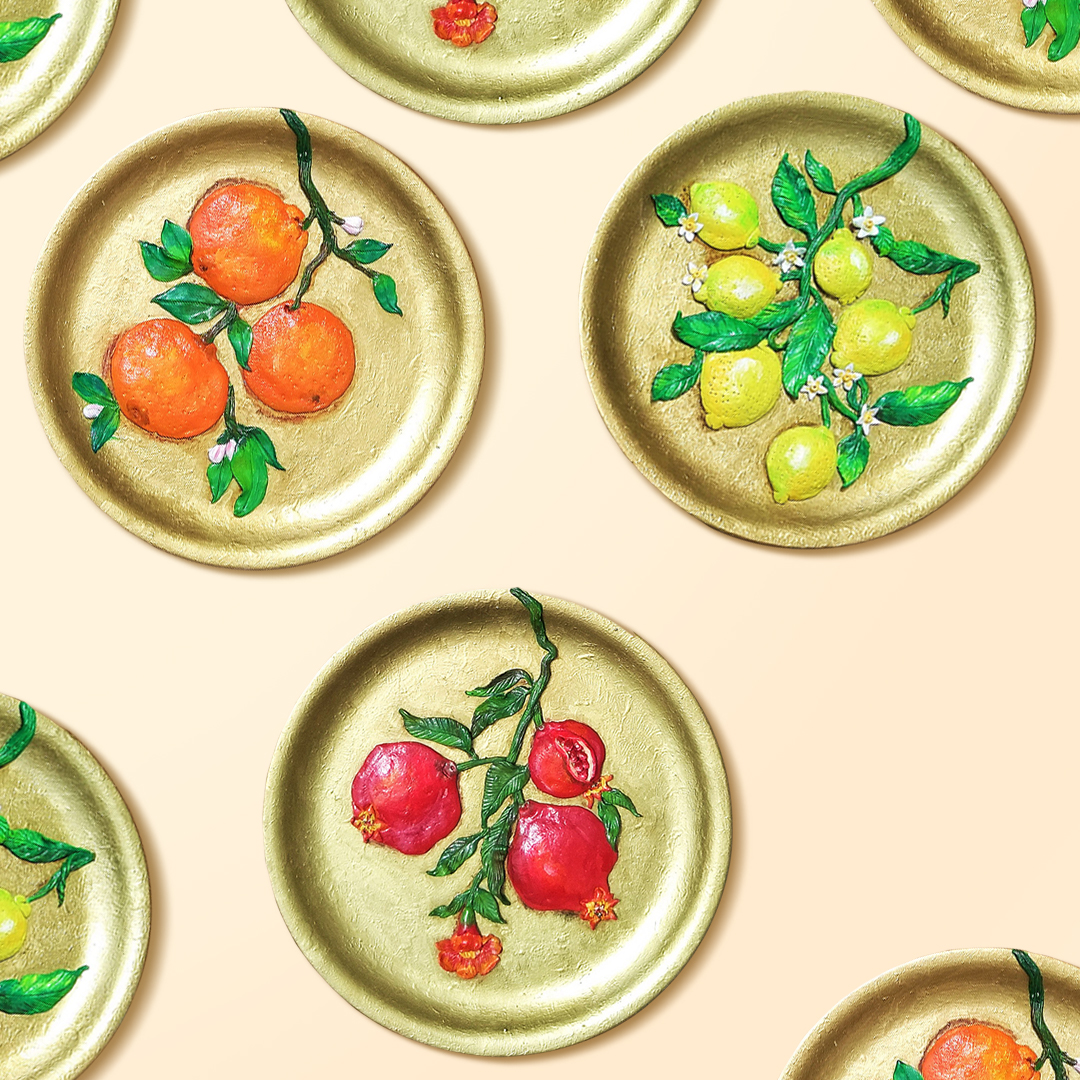
Clay moulding is a great way to create and translate your concept. Here is a very interesting DIY that we have conceptualized on the lines of fruits being hand-crafted onto plates, making them into stunning wall art pieces. You can adopt this technique with numerous other themes and ideas.
Take melamine dinner size plates (approx 10” in diameter). Take 3 such plates as we are going to mould lemons, pomegranates & oranges in each one of them.
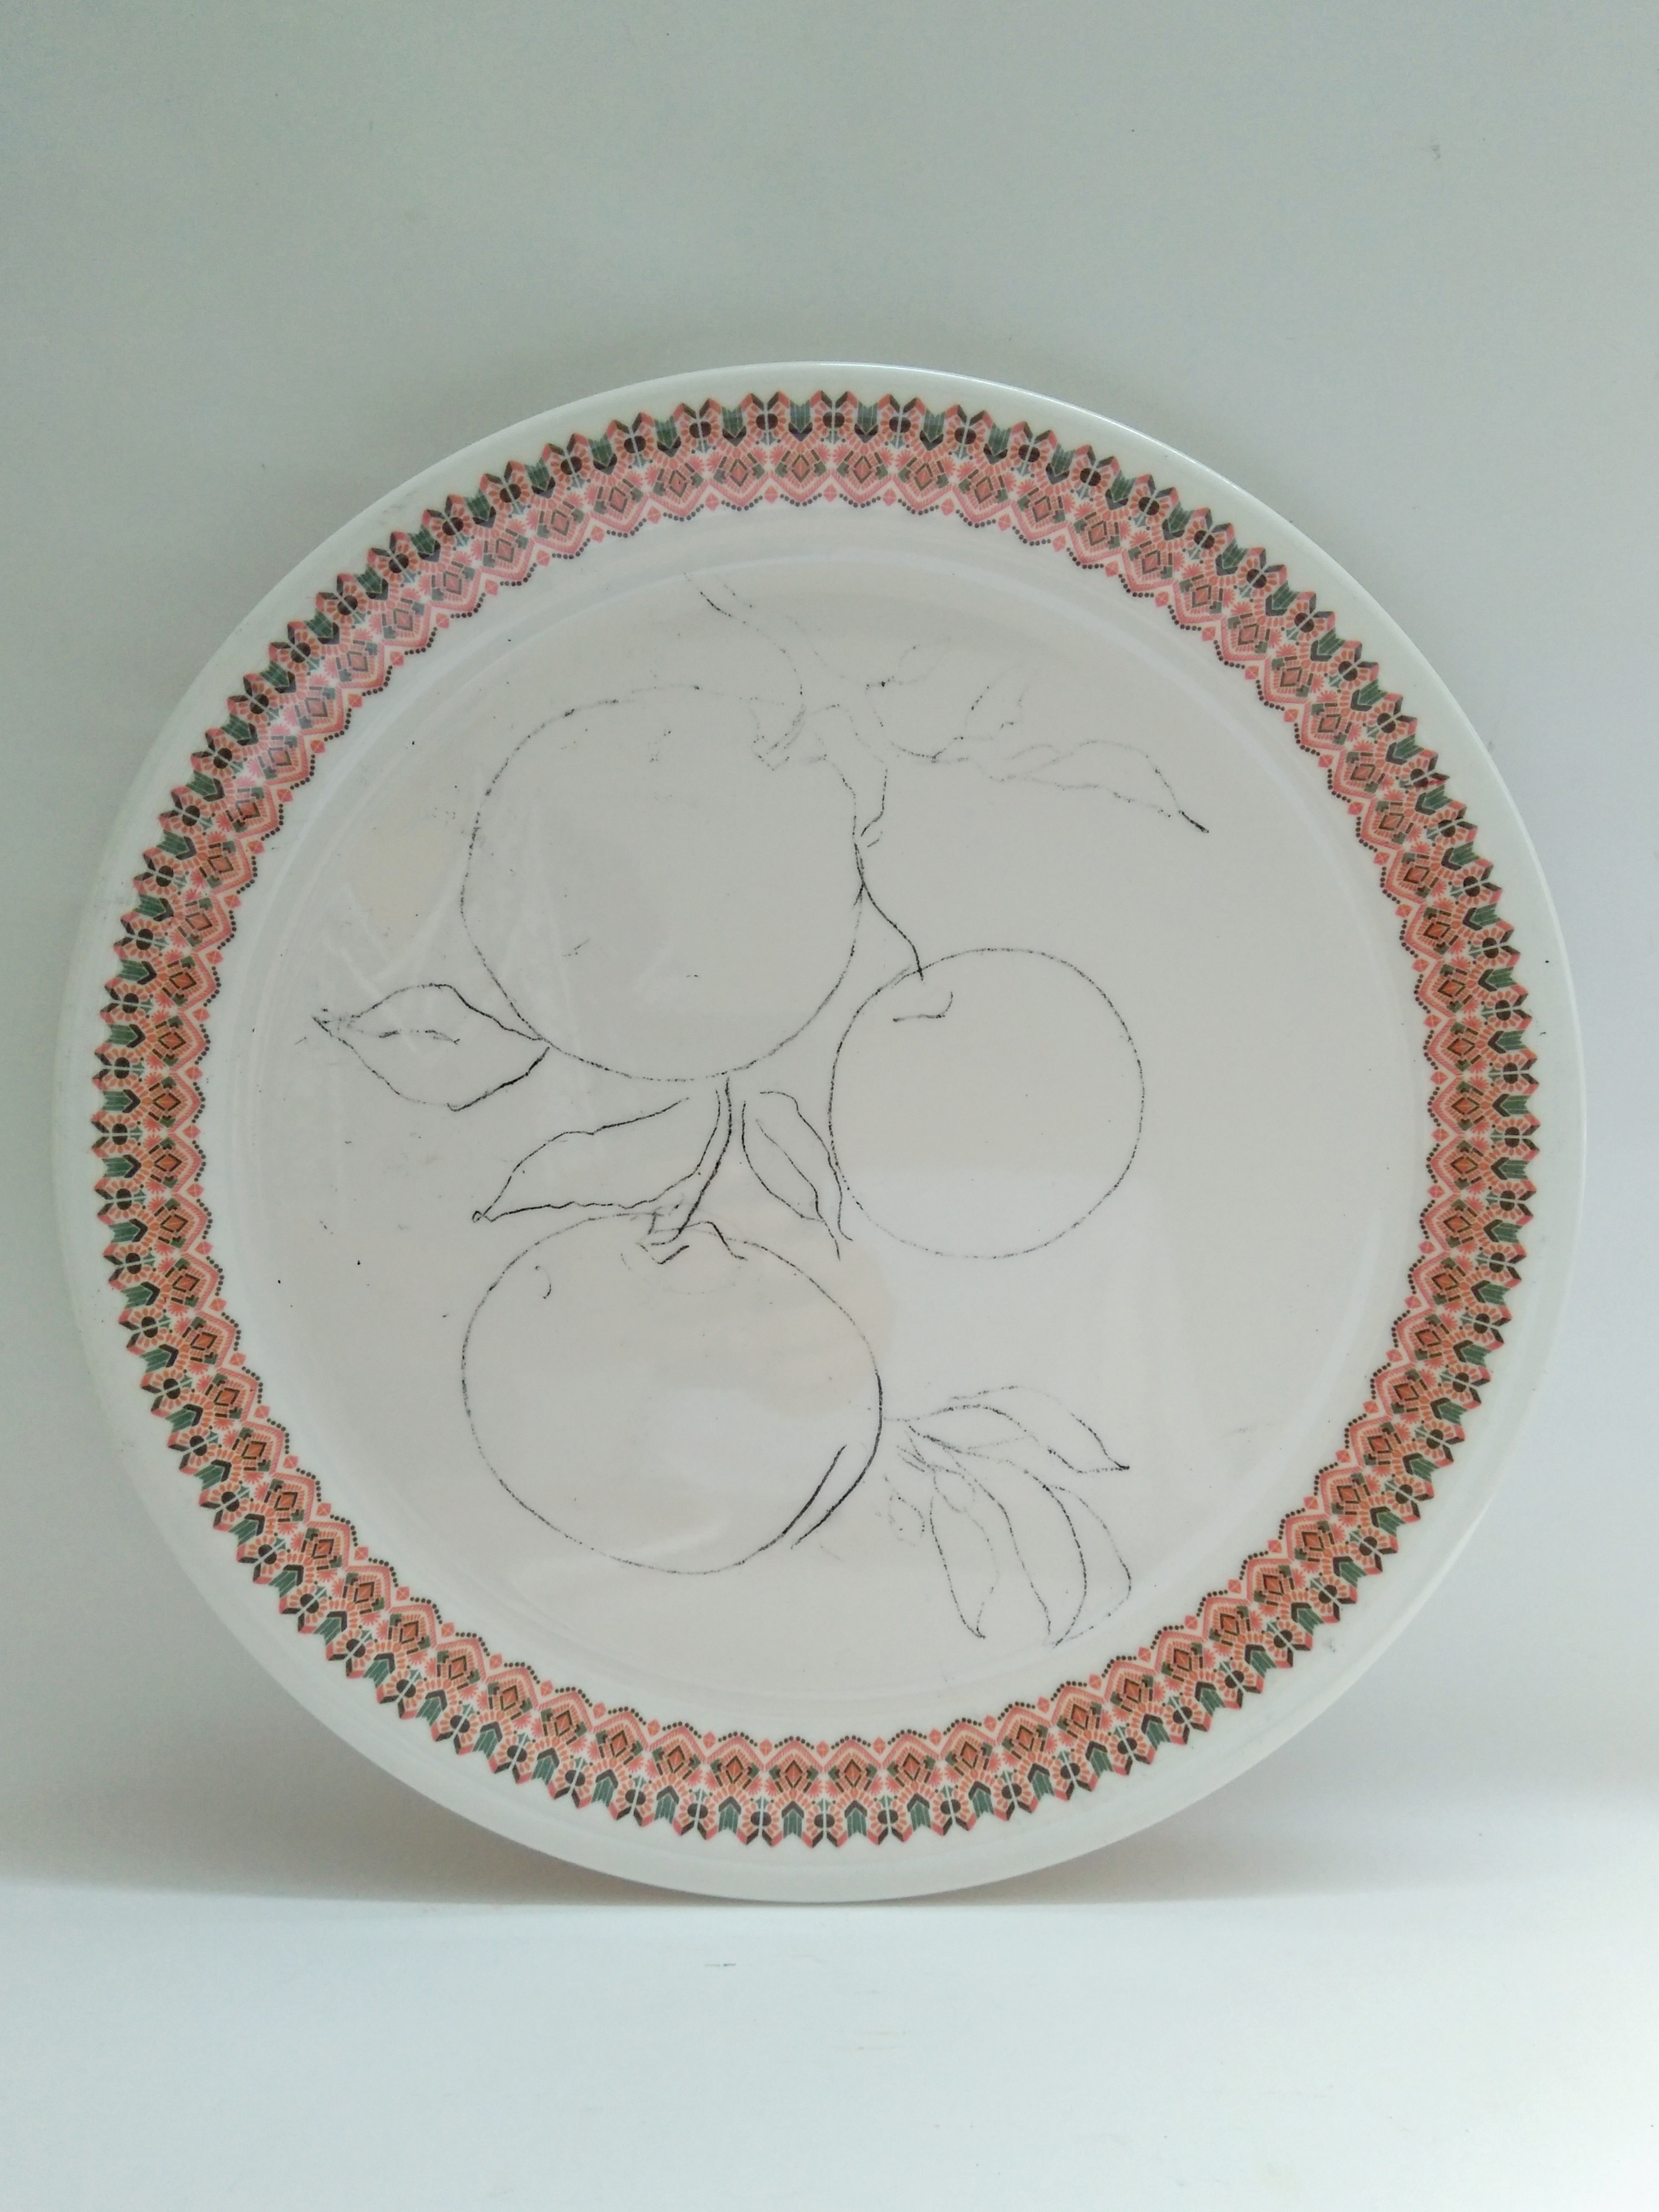
Very lightly draw a bunch of oranges with stems and leaves with the plate, using a pencil.
Take Fevicryl Mouldit – resin base & hardener and mix well to make an even soft dough.
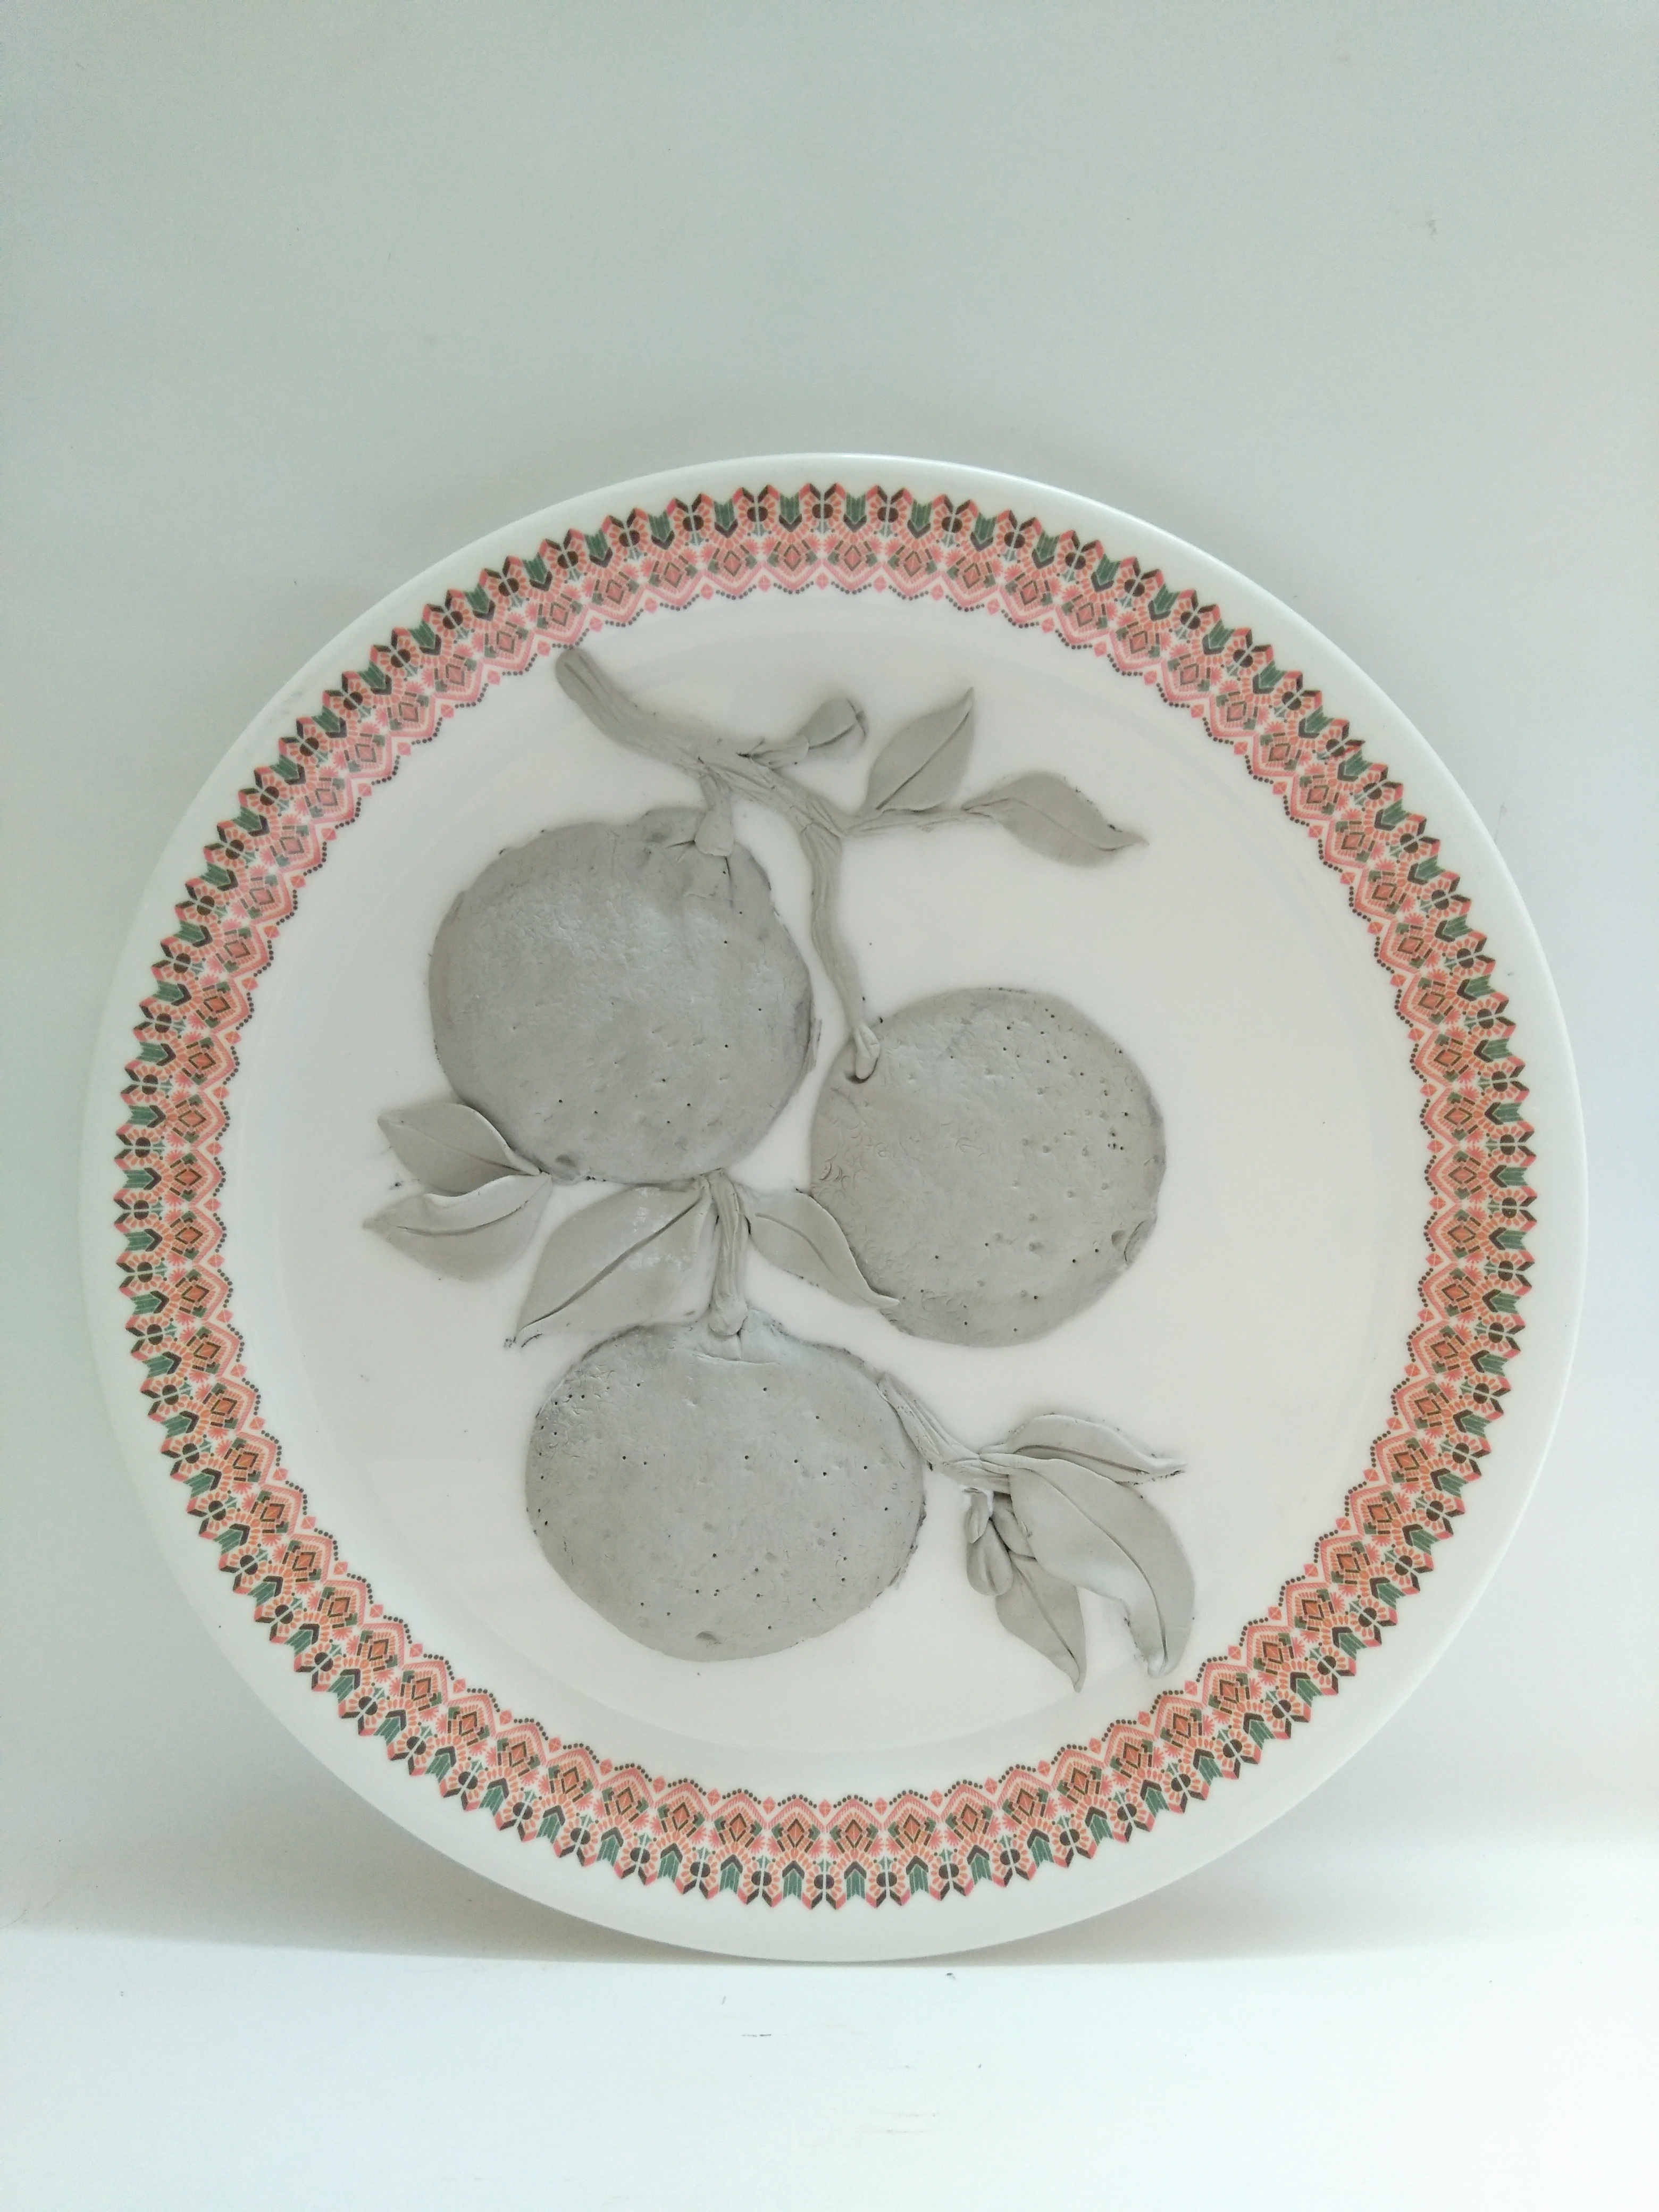
Hand-craft oranges with stems and leaves attached to it using the dough. Follow the sketch and stick onto the plate using Fevicryl Fabric Glue. Use clay carving tools for ease. Let it dry.

Paint the background of the plate with Fevicryl Acrylic Colour Pearl Metallic - Gold 352 and Fevicryl Acrylic Metallic Powders - Gold 08 with a little amount of talcum powder in it. This will lend texture and depth for the backdrop. Let it dry.

Paint the oranges using Fevicryl Acrylic Colours - Crimson 04, Dark Brown 05, Dark Green 06, Light Green 12, Orange 17, White 27, Leaf Green 62 and Neon Orange 017. Let it dry. The first wall décor plate is ready and would look like this.
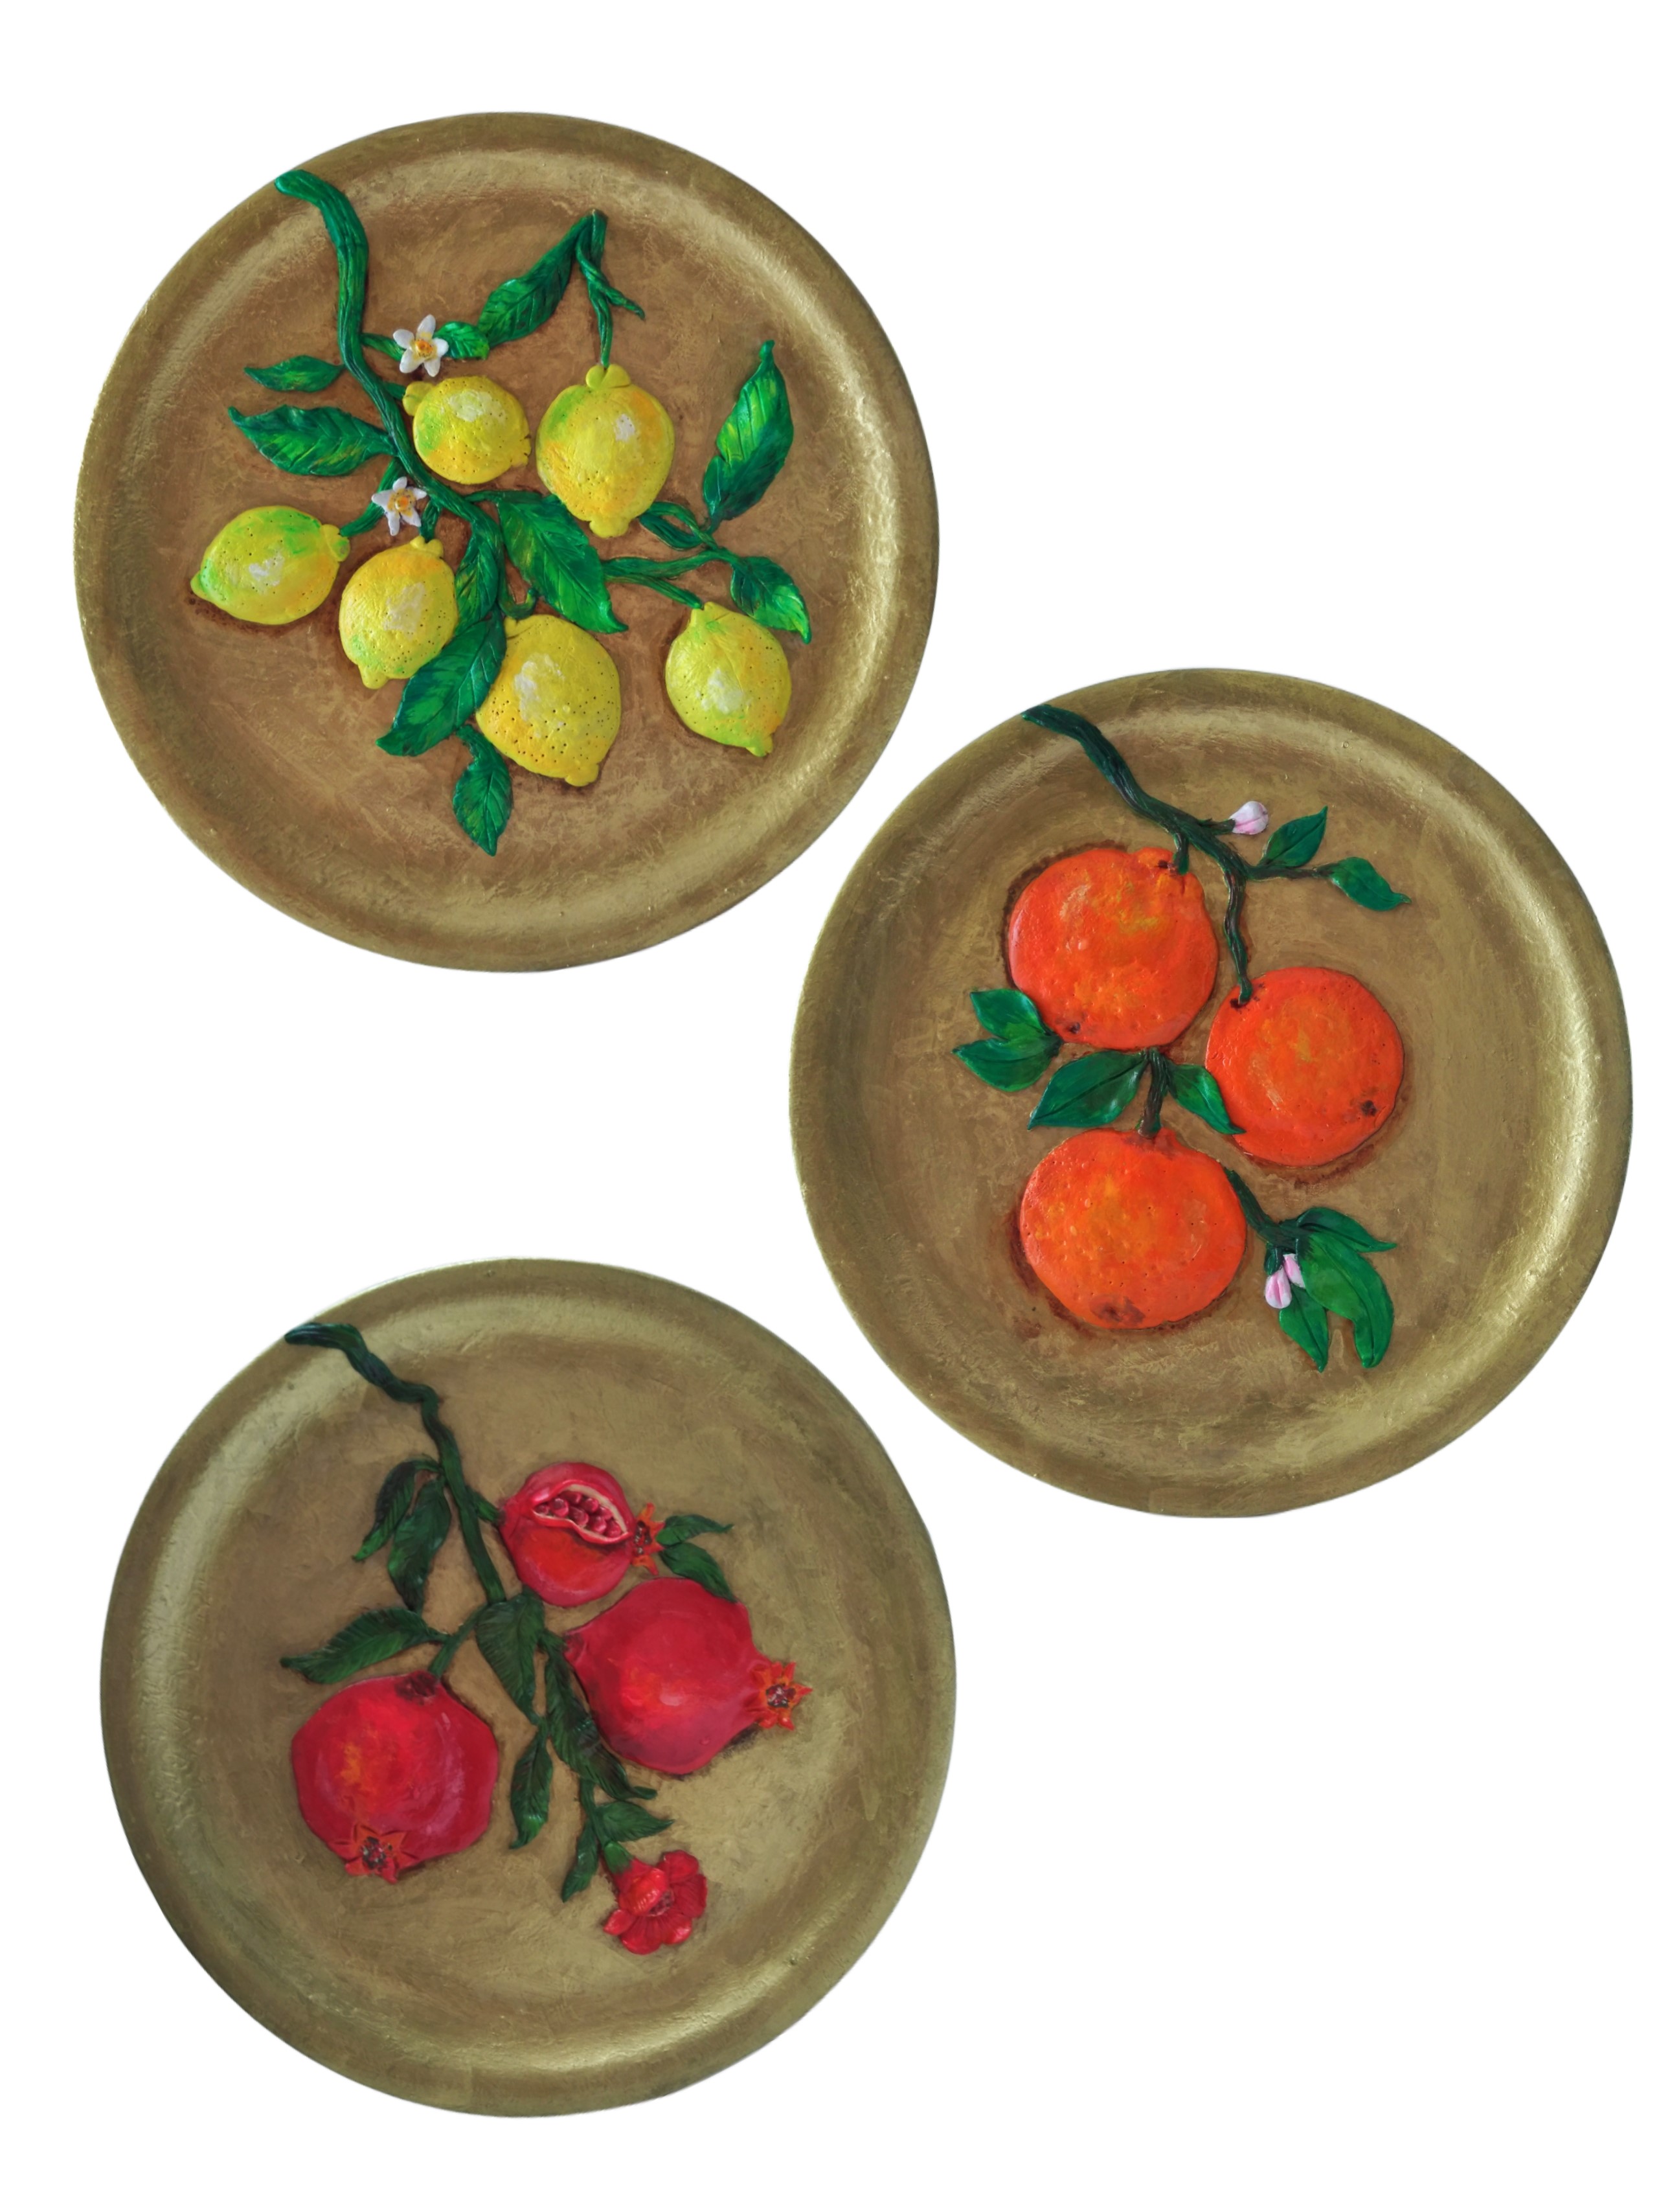
Similarly, mould the lemons and pomegranates like we did for the oranges and complete it. Once ready the three compositions put together would look like this.


 +91 99676 55545