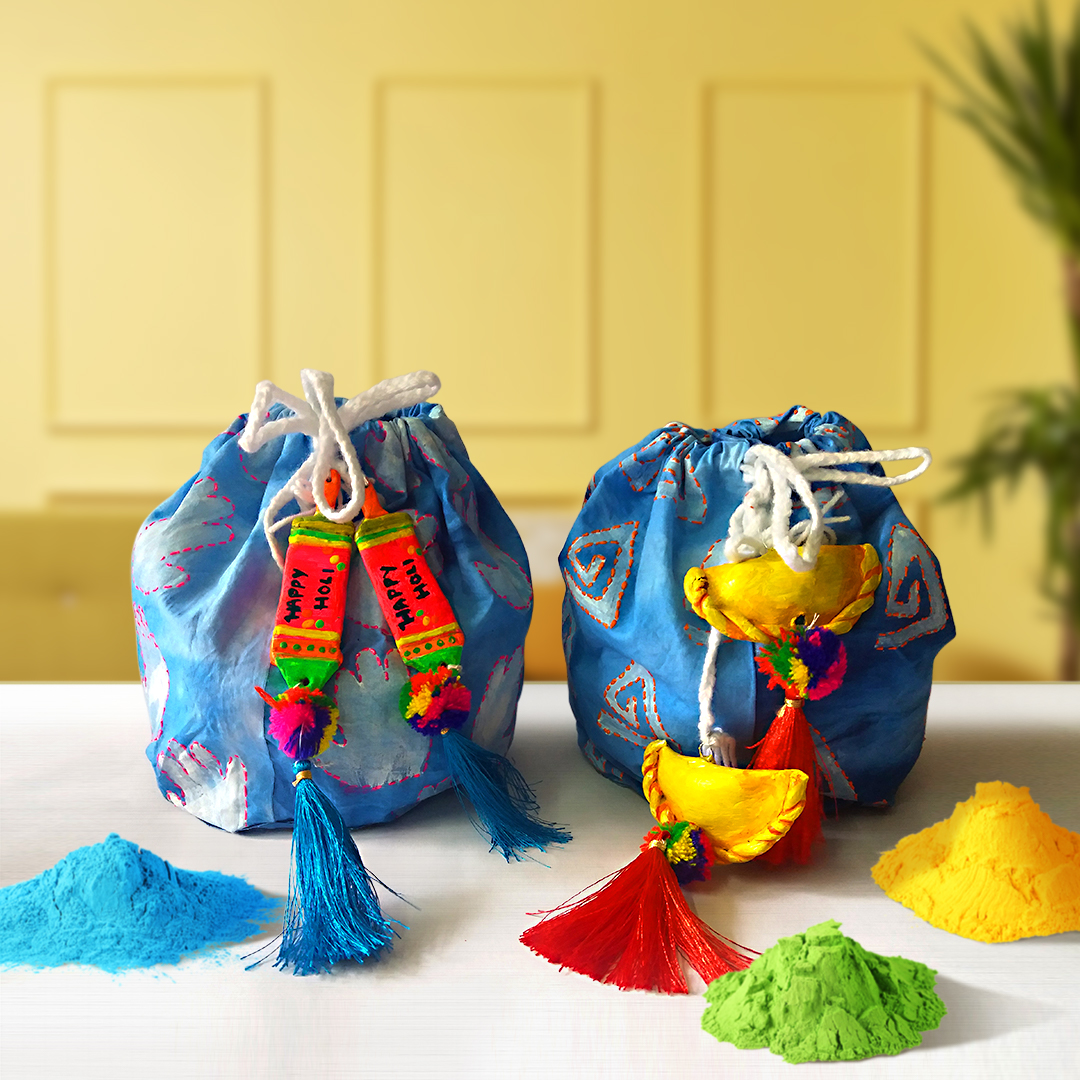
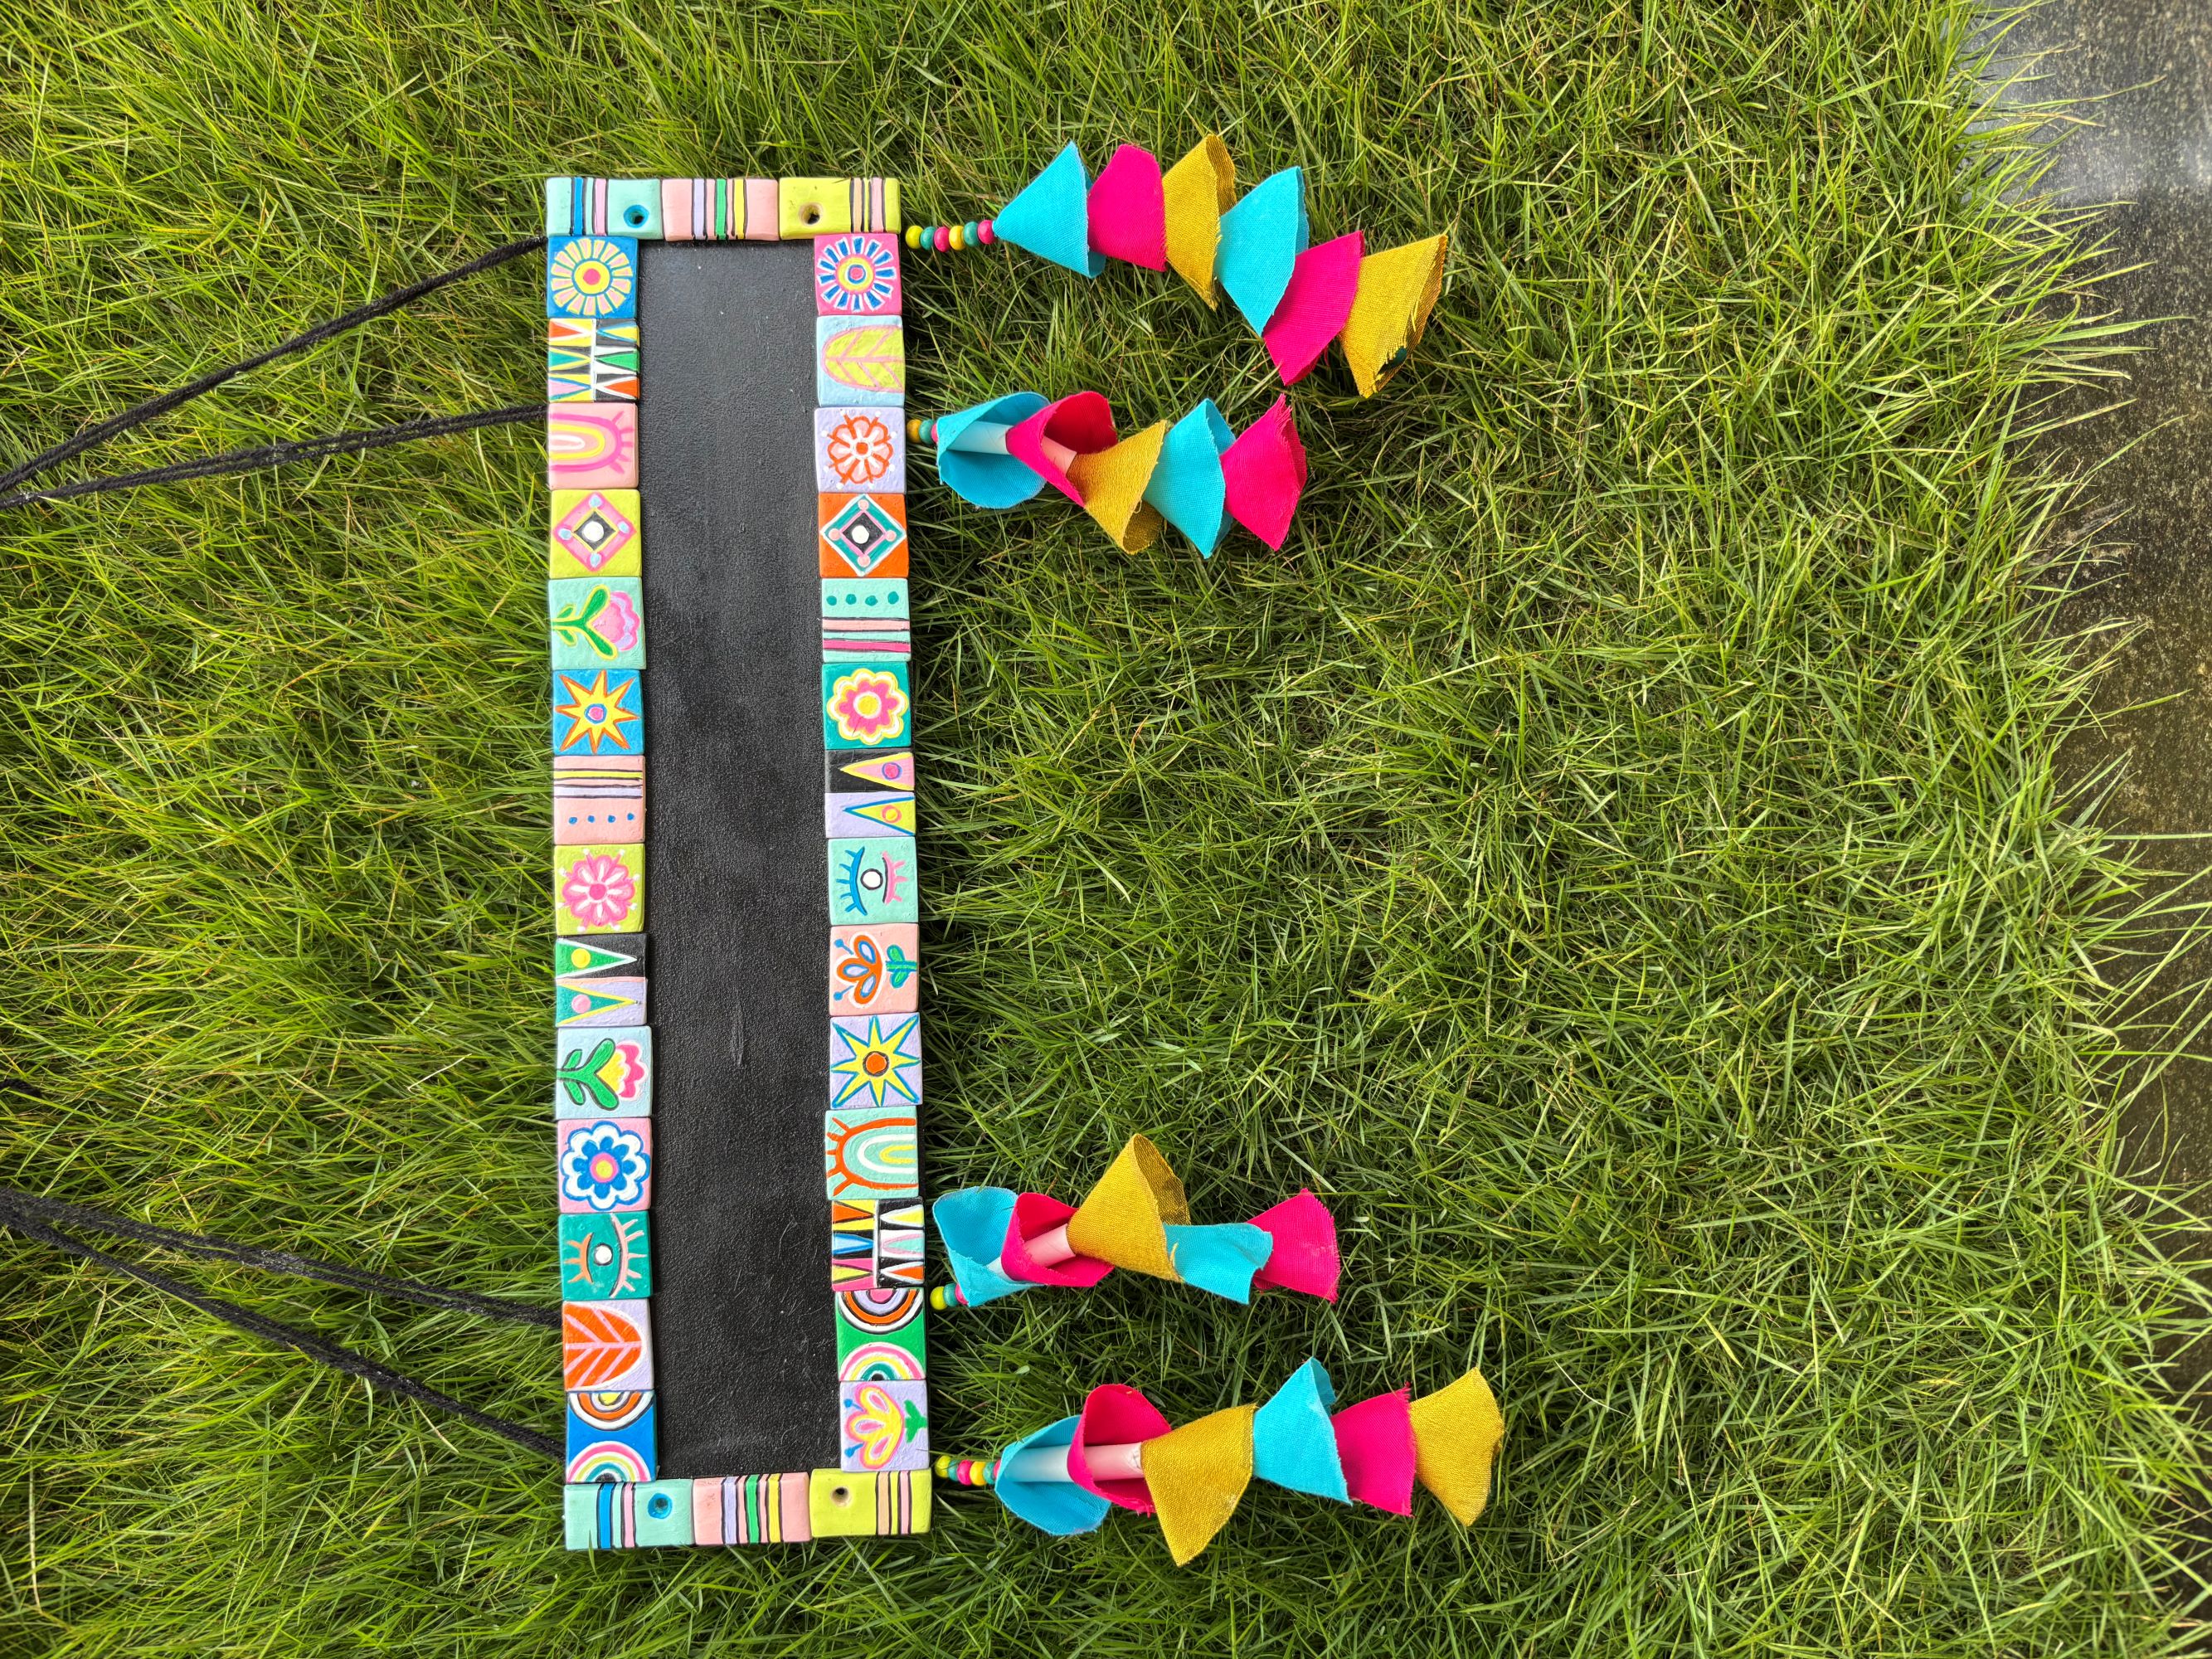
Butwa For Holi Colours

You Will Need:
Fevicryl Acrylic Colour Black 02, Chrome Yellow 03, Lemon Yellow 11, Orange 17, Prussian Blue 19 , White 27, Neon Green 012, Neon Orange 017, Neon Pink 018, 3 D Outliner Orange 705, Neon Pink 712, Fevicryl Fabric Glue, Fine Art Brushes, Corrugated Sheet, Foam Sheet, Scissors, Paper Cutter, Pencil, Half A Meter Poplin Fabric, White Wool, Clay Carving Tools, Metal Wire, Colourful Pom-Poms, Blue And Red Tassels, Corrugated Sheet, Colour Palette, Water Container
Product Used:


Description :
This holi make cute butwas to gift the goodies to your friends and family. Made in a jiffy with Fevicryl range of products read more as to how you can make this too.
STEP 1 : Source the base
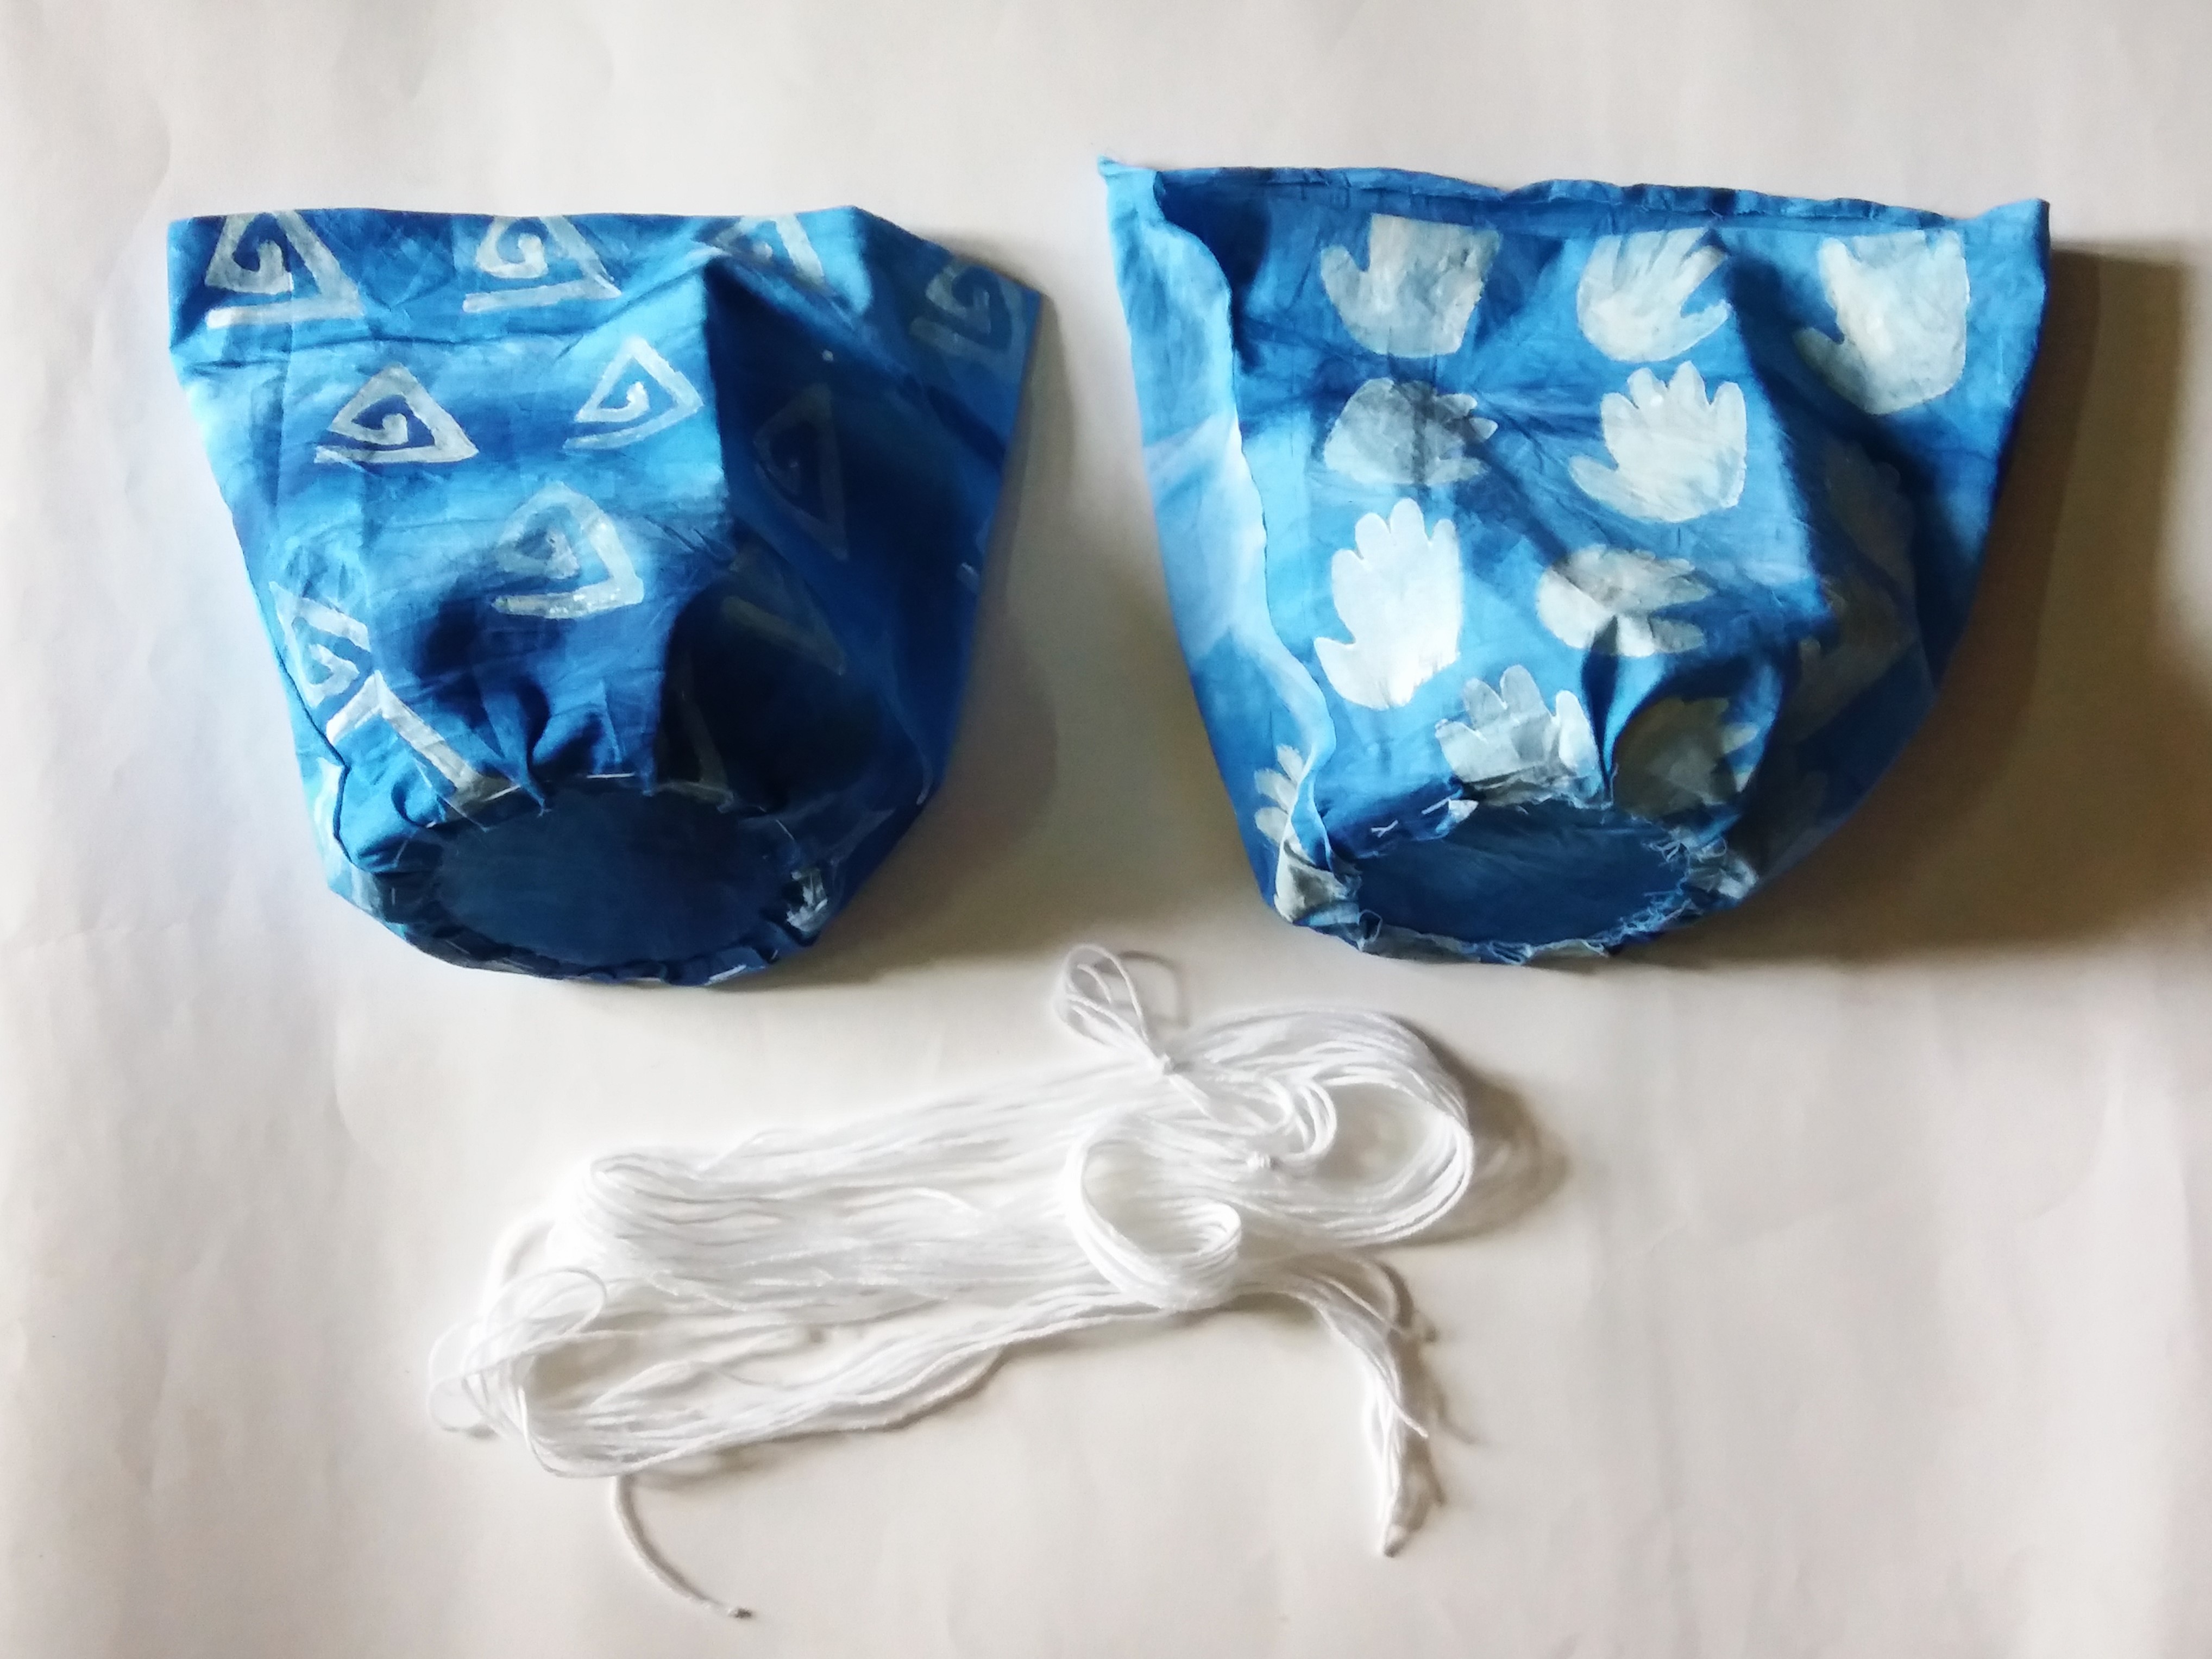
- We are going to make the butwa for keeping the holi colours with indigo colours and block printing.
- Take half a meter white poplin fabric.
STEP 2 : Dye the fabric

- Dye the fabric with the shade of Indigo made by mixing Acrylic Colour Prussian Blue 19 and Black 02. Let it dry.
- After drying iron the fabric neatly.
- Refer to the image.
STEP 3 : Make blocks
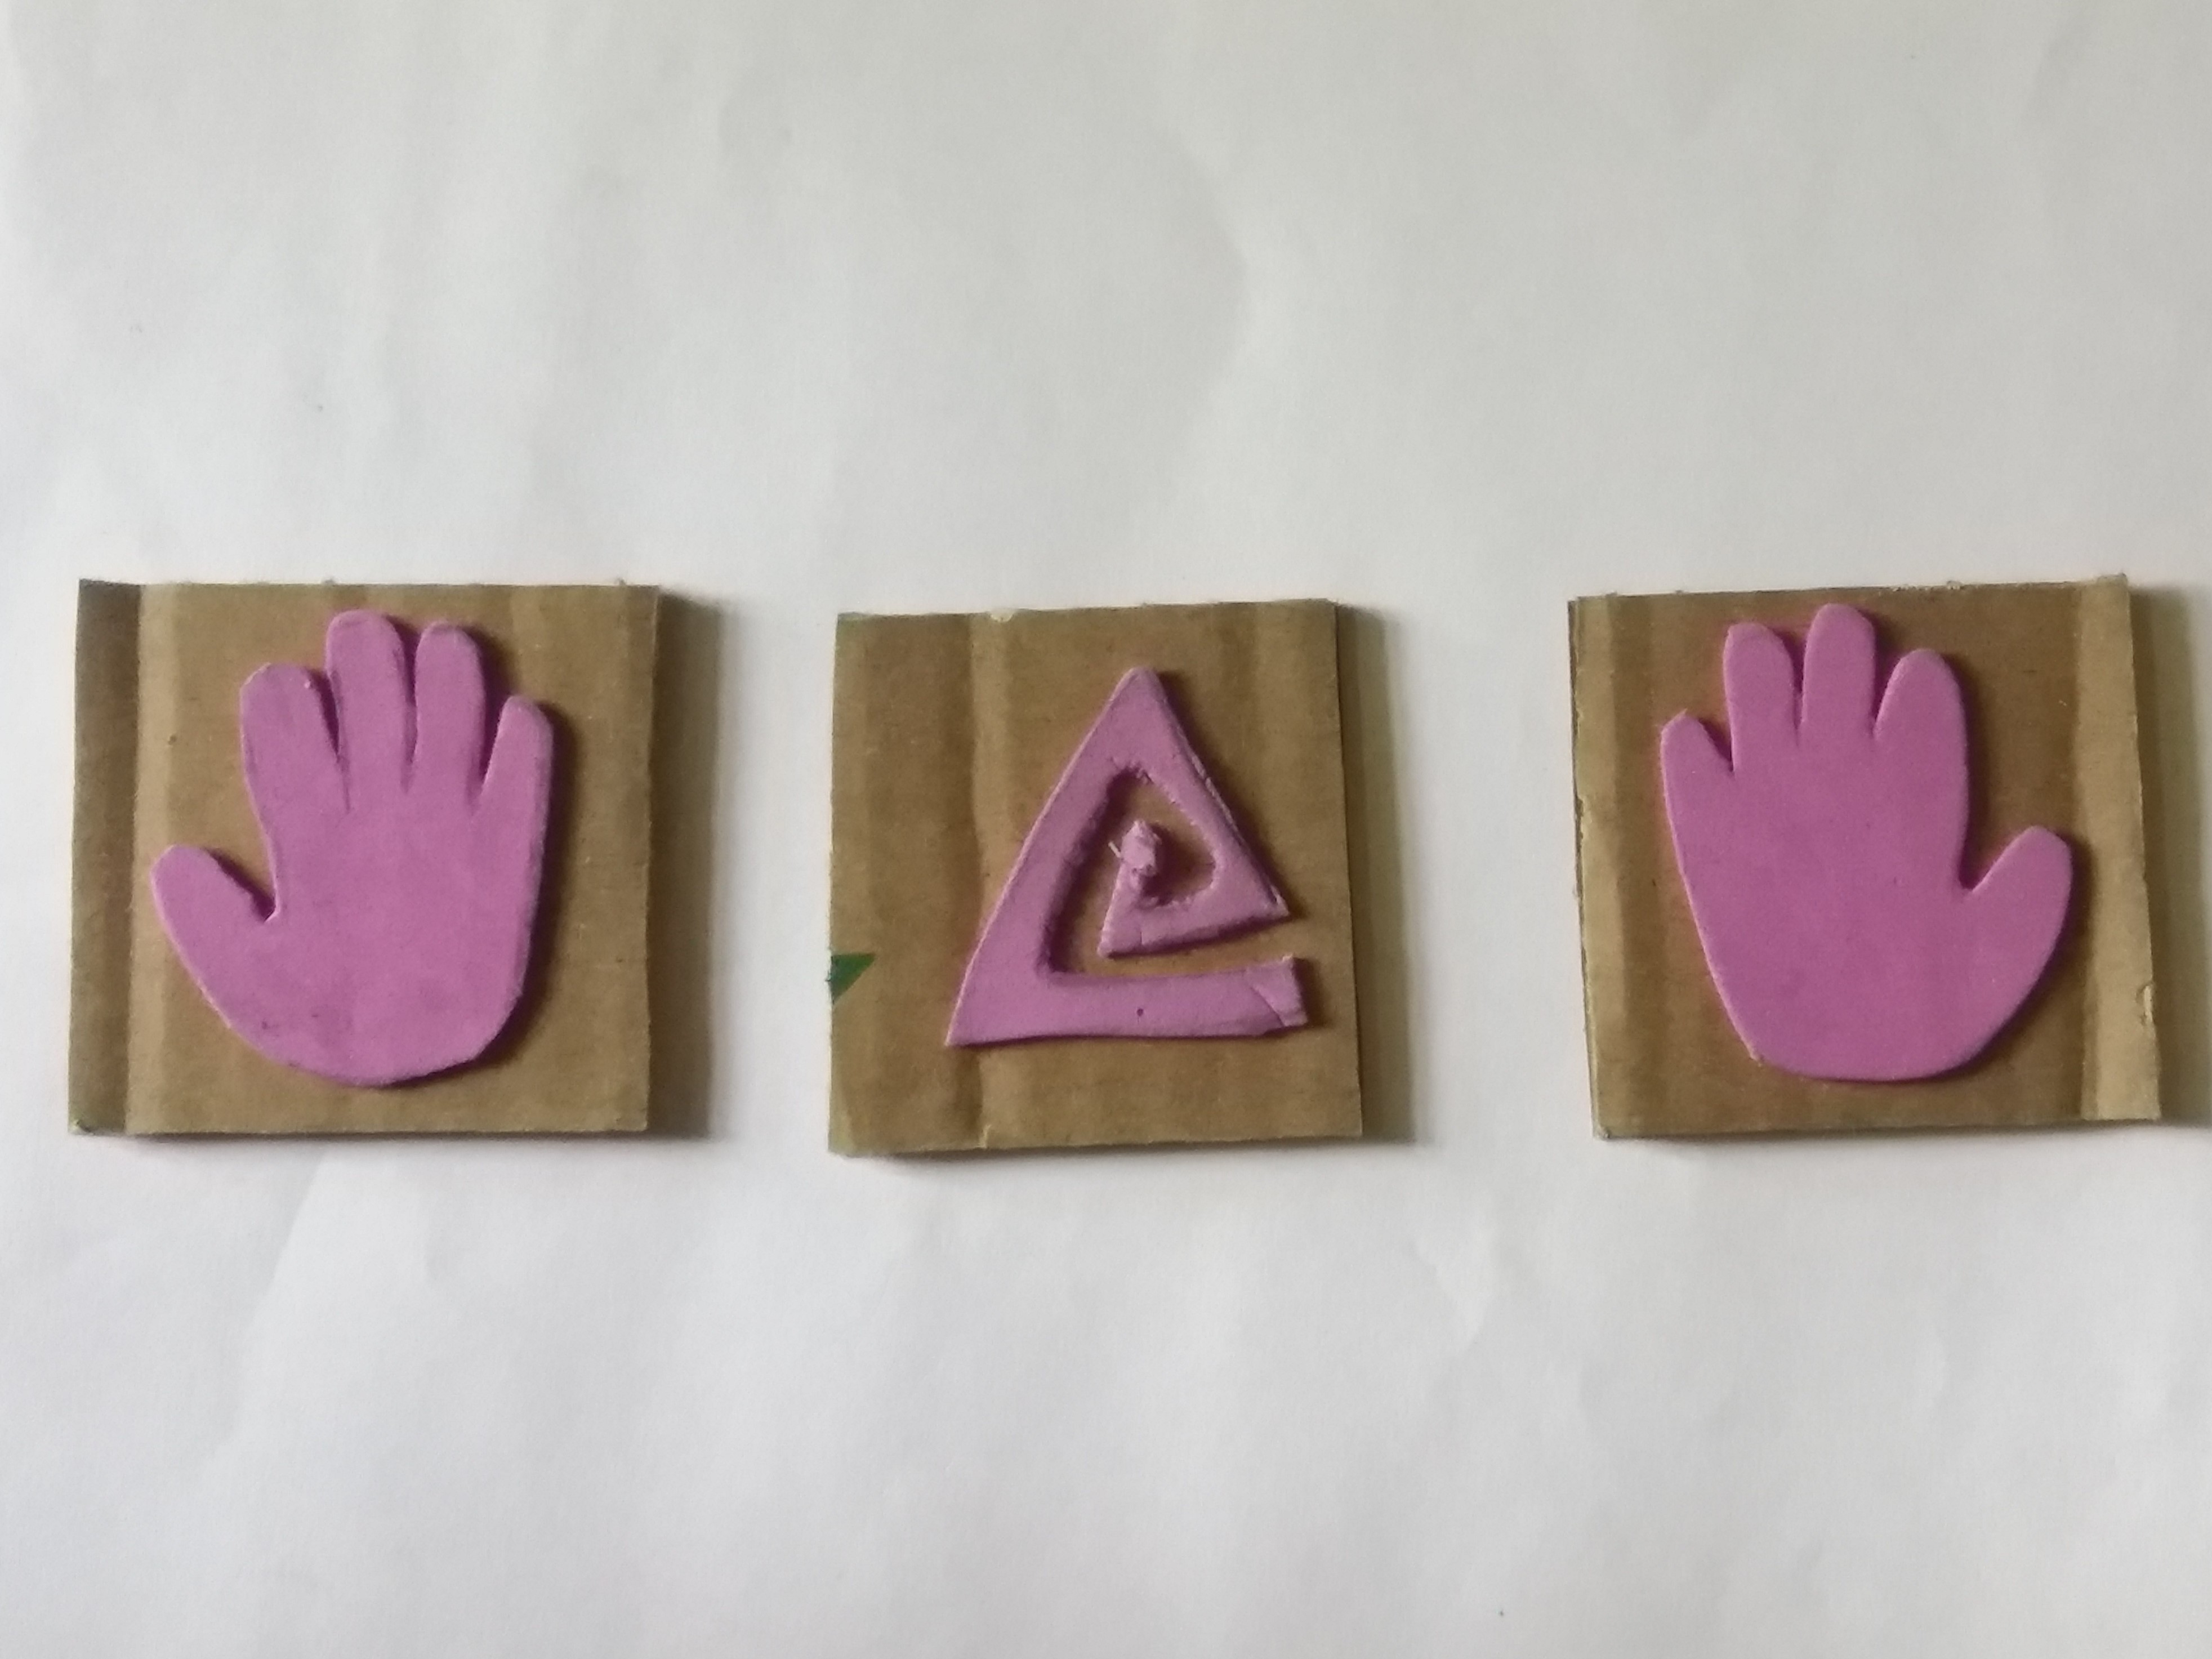
- We are going to make blocks with the motifs of the palms and the radiating triangular shape using the foam sheet and corrugated sheet as the base to stick on the shapes with the help of the Fabric Glue.
- Let it dry.
STEP 4 : Print the fabric.
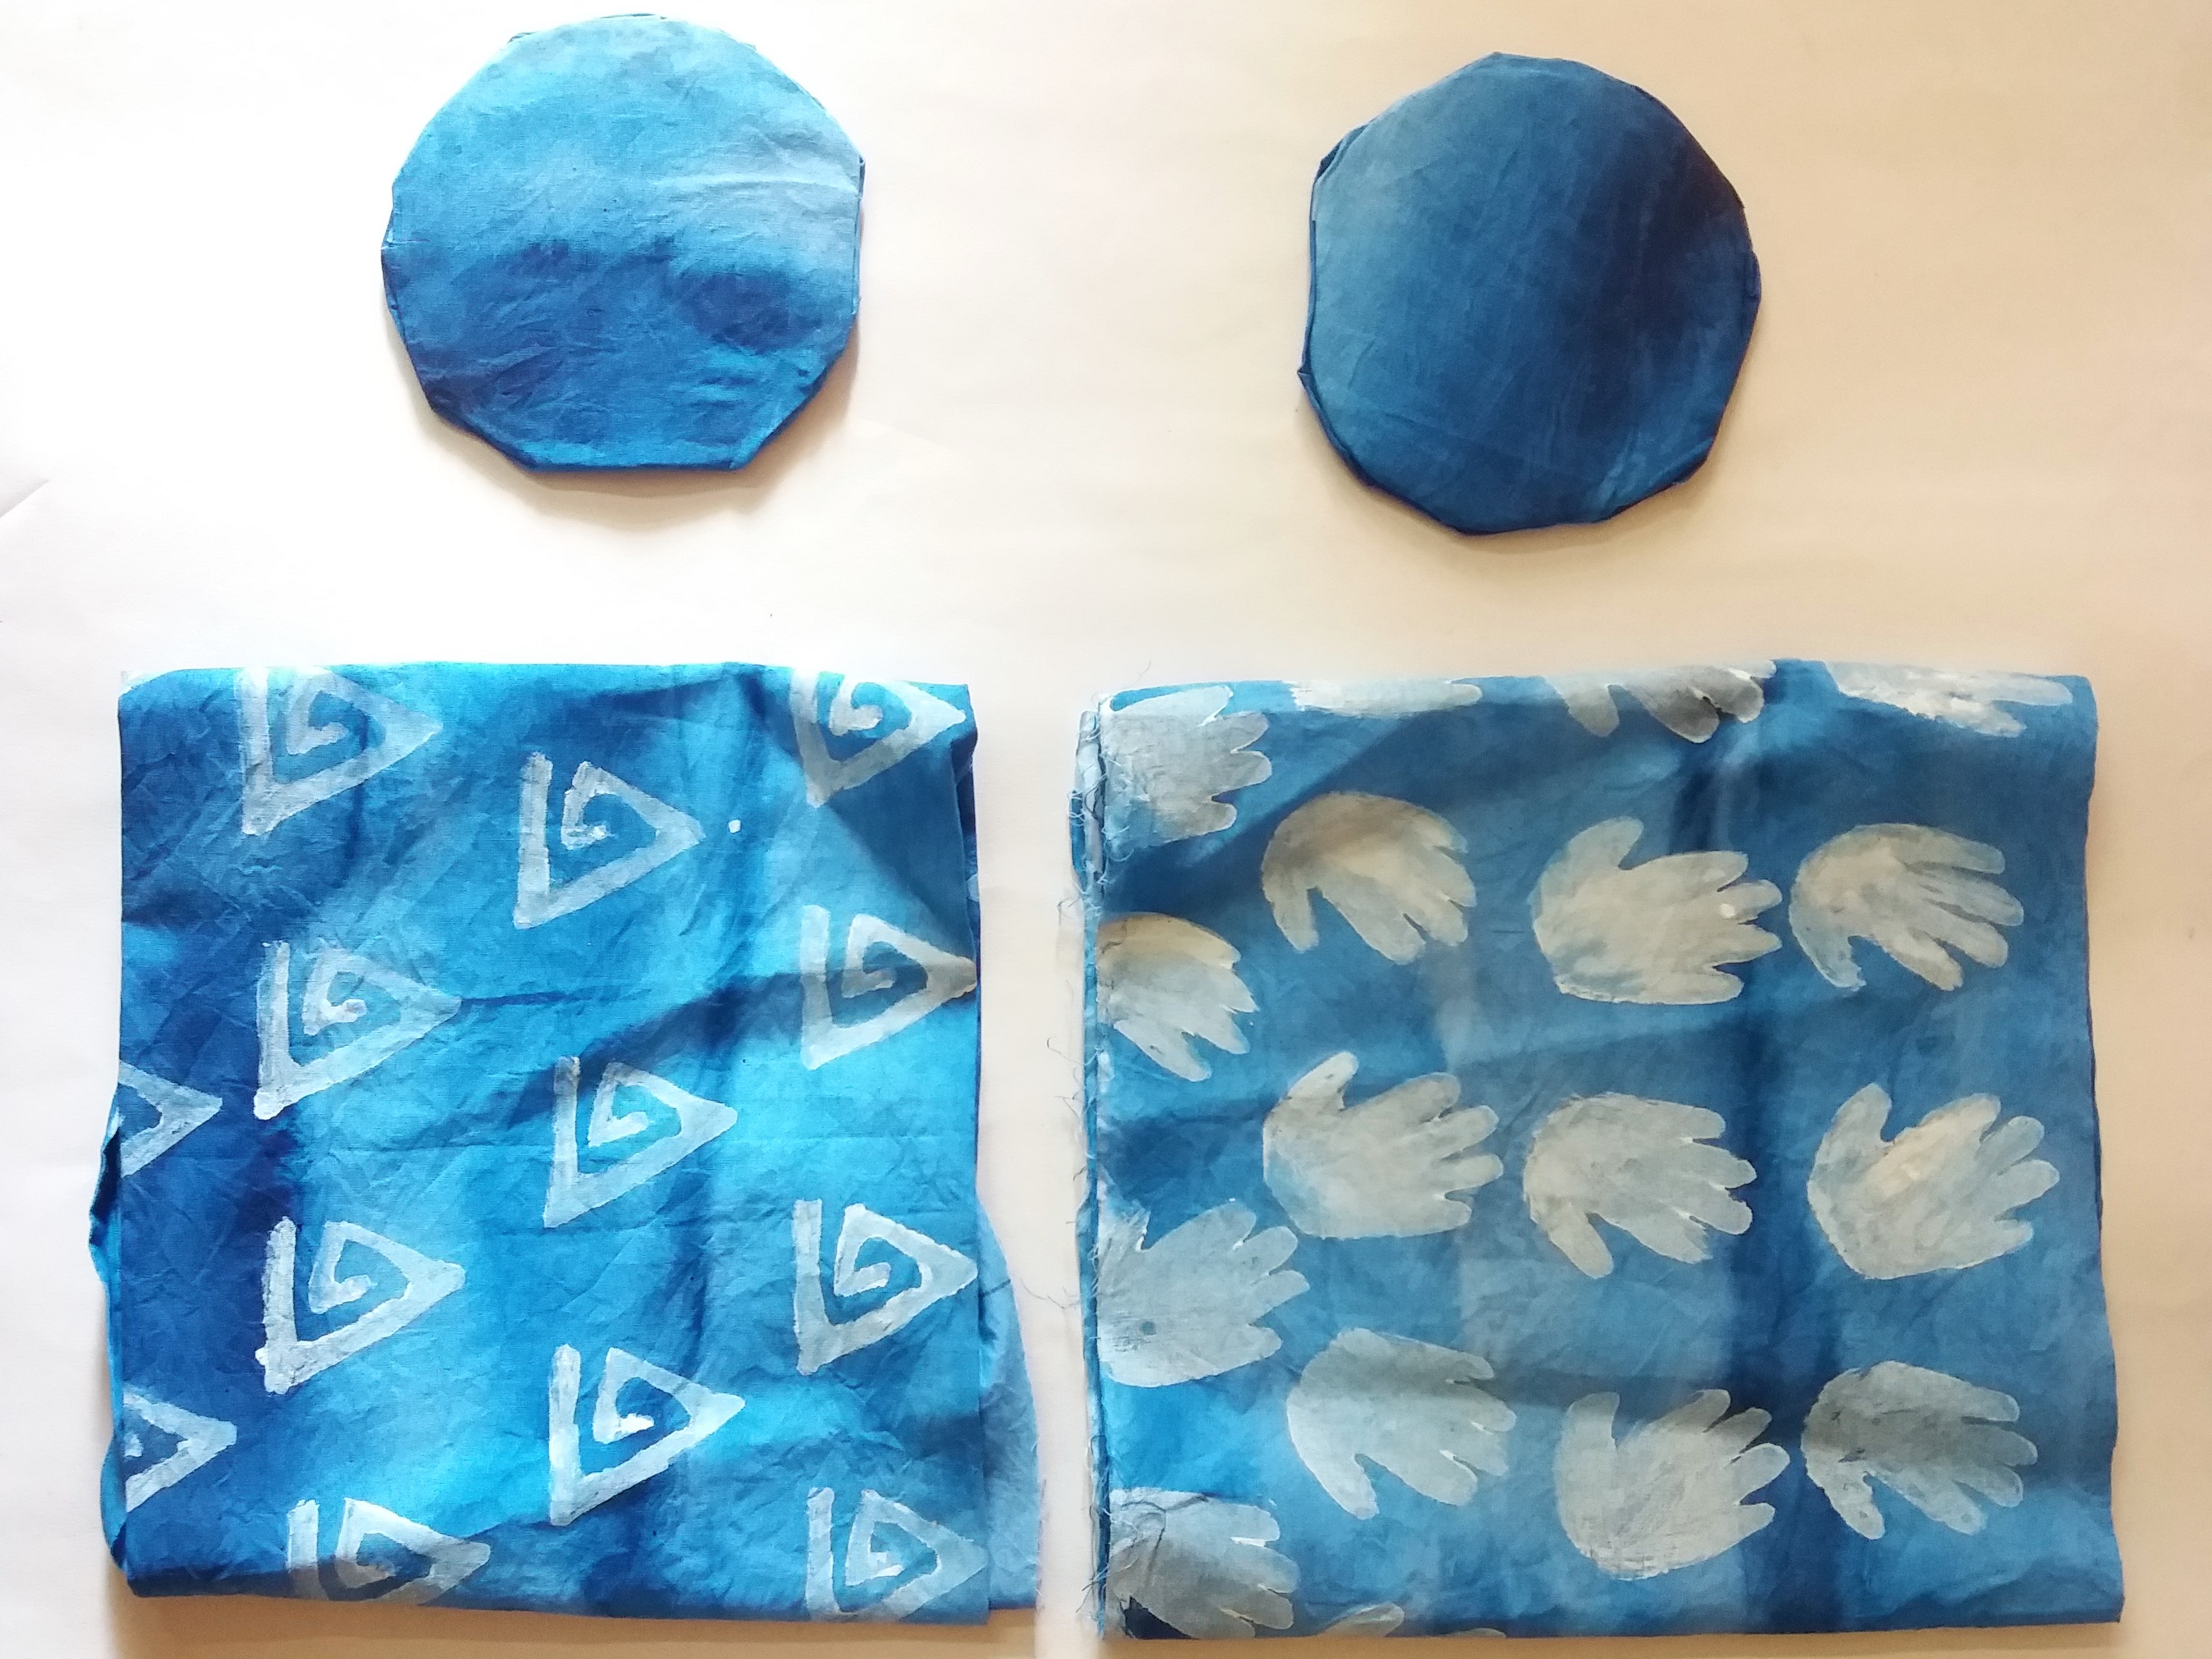
- We will need 4” diameter corrugated sheet circle to make the butwa.
- Cover the circle with the dyed fabric piece from both the sides with Fabric Glue.
- Let it dry.
- Paint the fabric with block print motifs using Acrylic Colour White 27.
- Let it dry.
- Mark and cut the strip measuring 7” x 11” in size.
STEP 5 : Make the base of the butwa
- Stick the broad strip of block print fabric around the base circle by making a small pleated base and using Fabric Glue for sticking on regular intervals.
- Let it dry.
- Make sure that keep the broad piping on the top side further to pass the thread.
STEP 6 : Finish the butwa
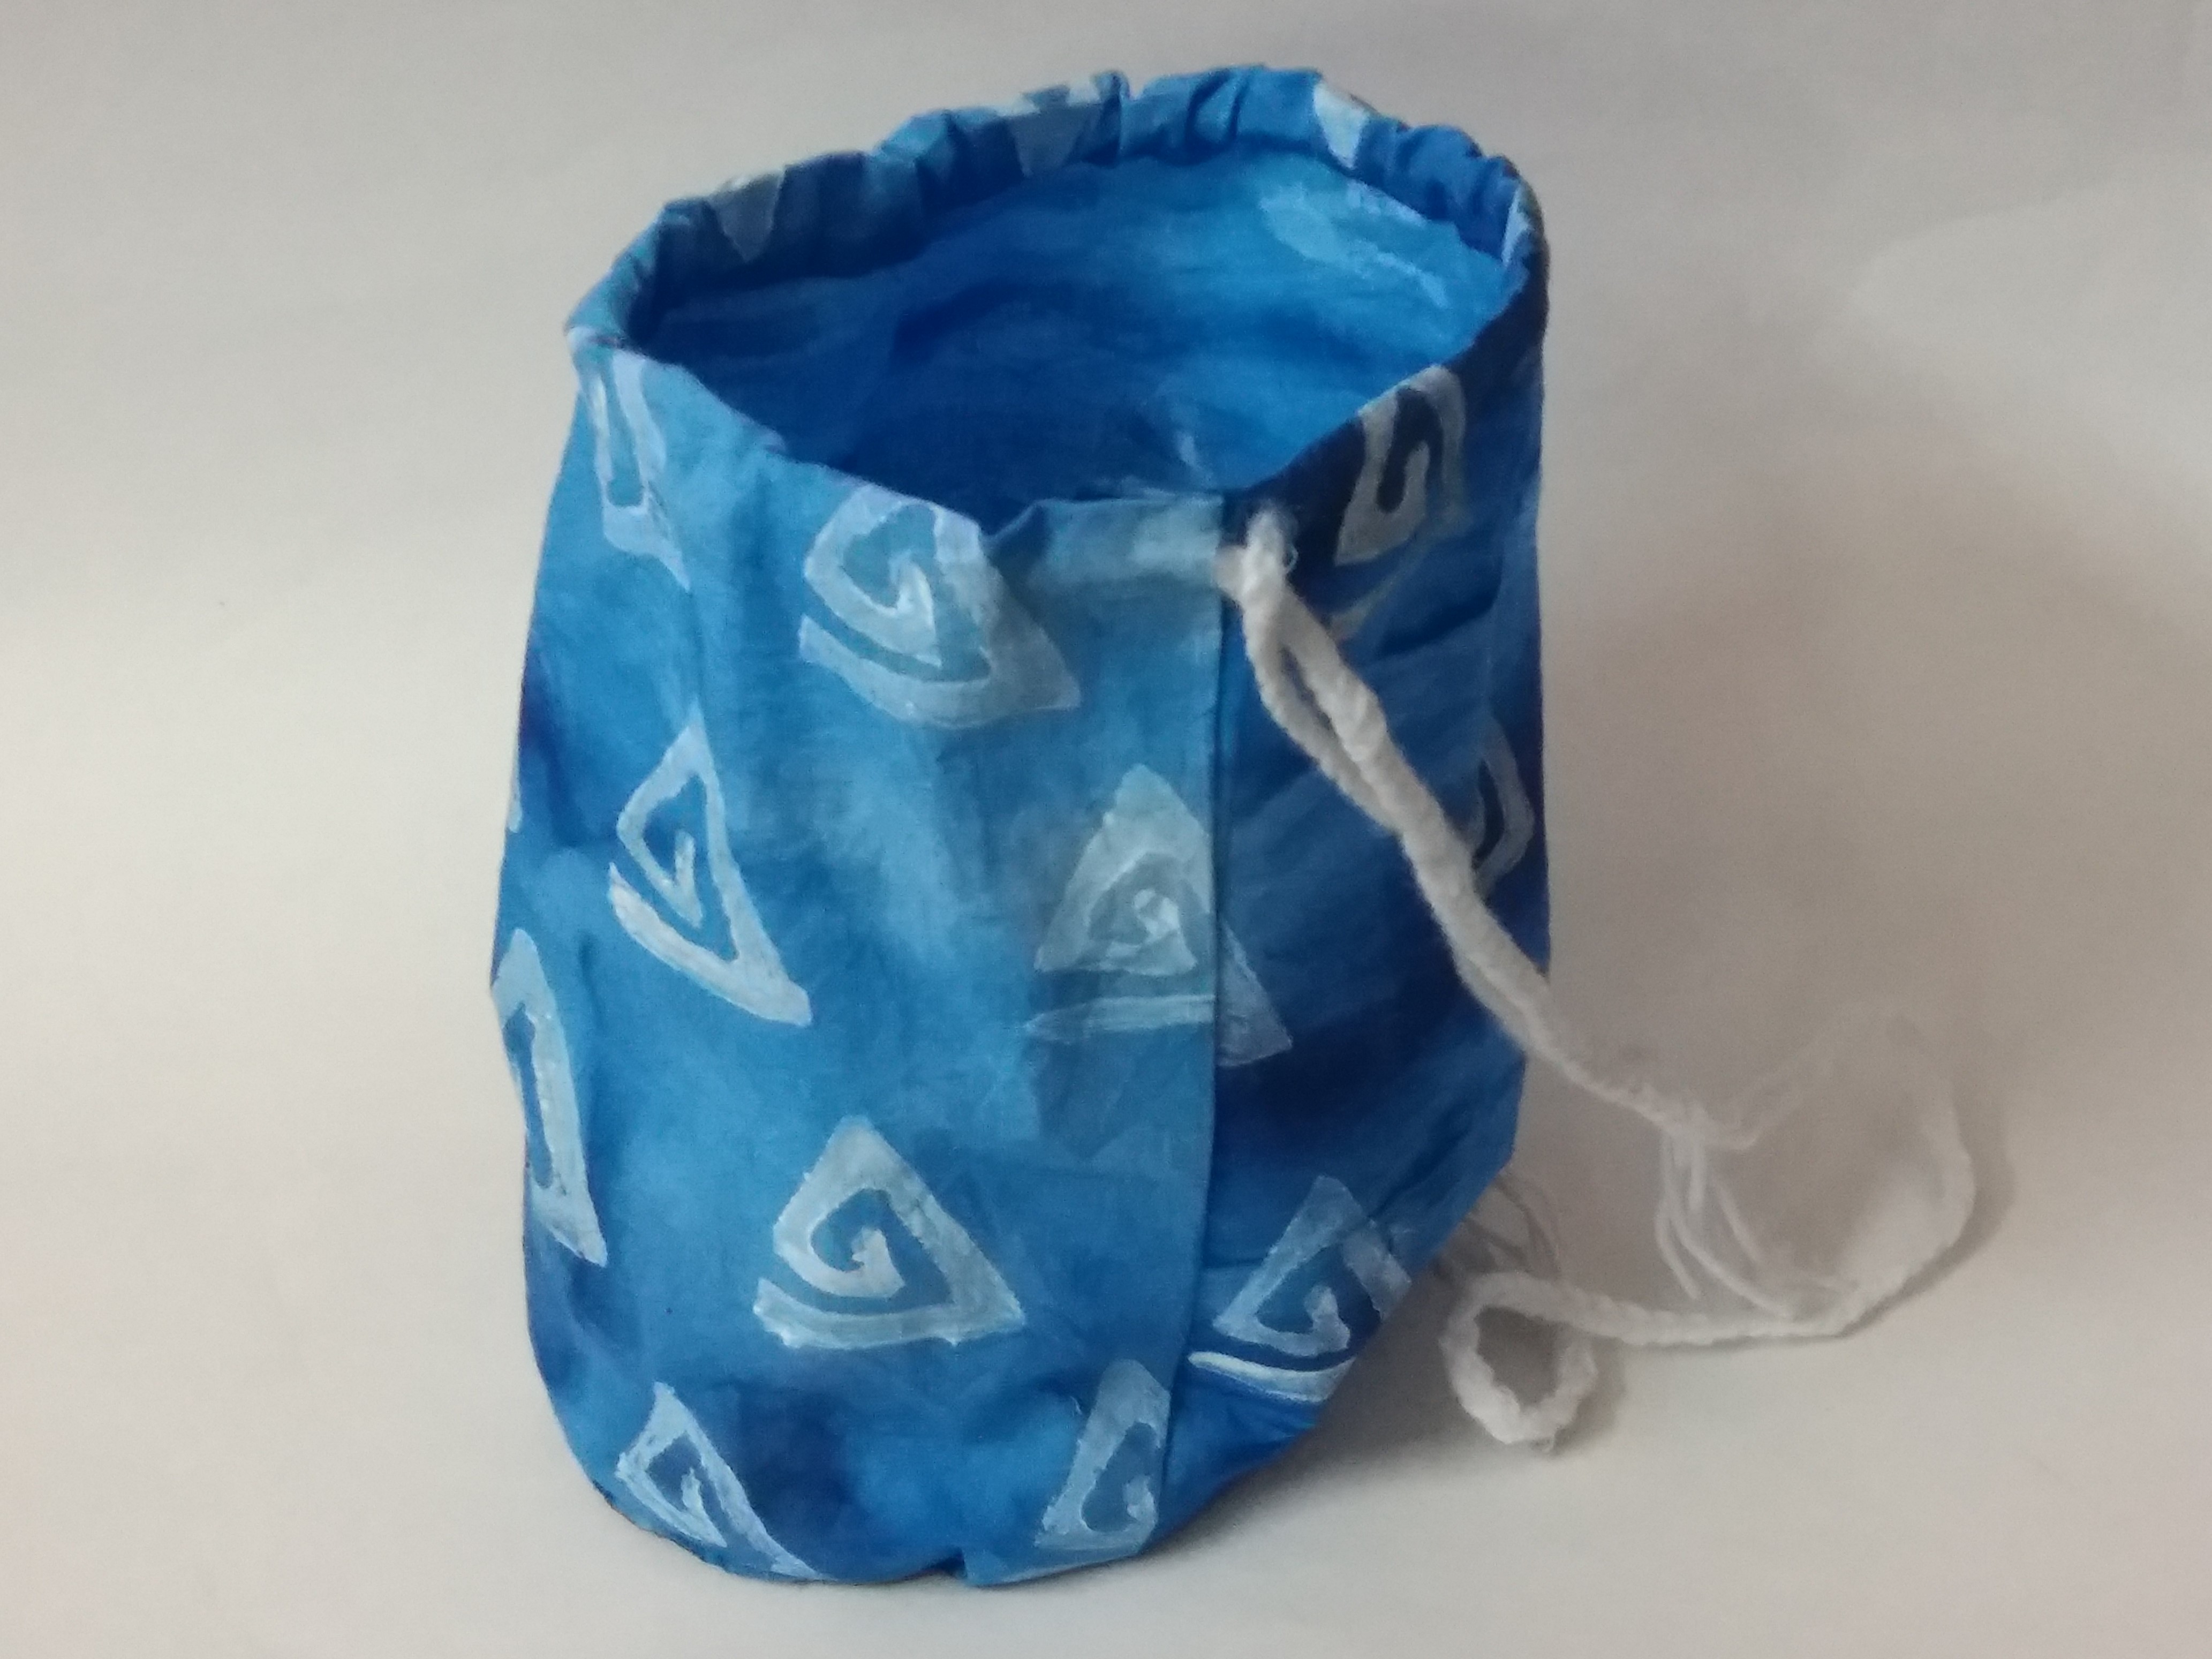
- Pass the white woolen thread through the piping on the top side of the butwa.
- Your butwa will look like this.
STEP 7 : Make clay holi elements
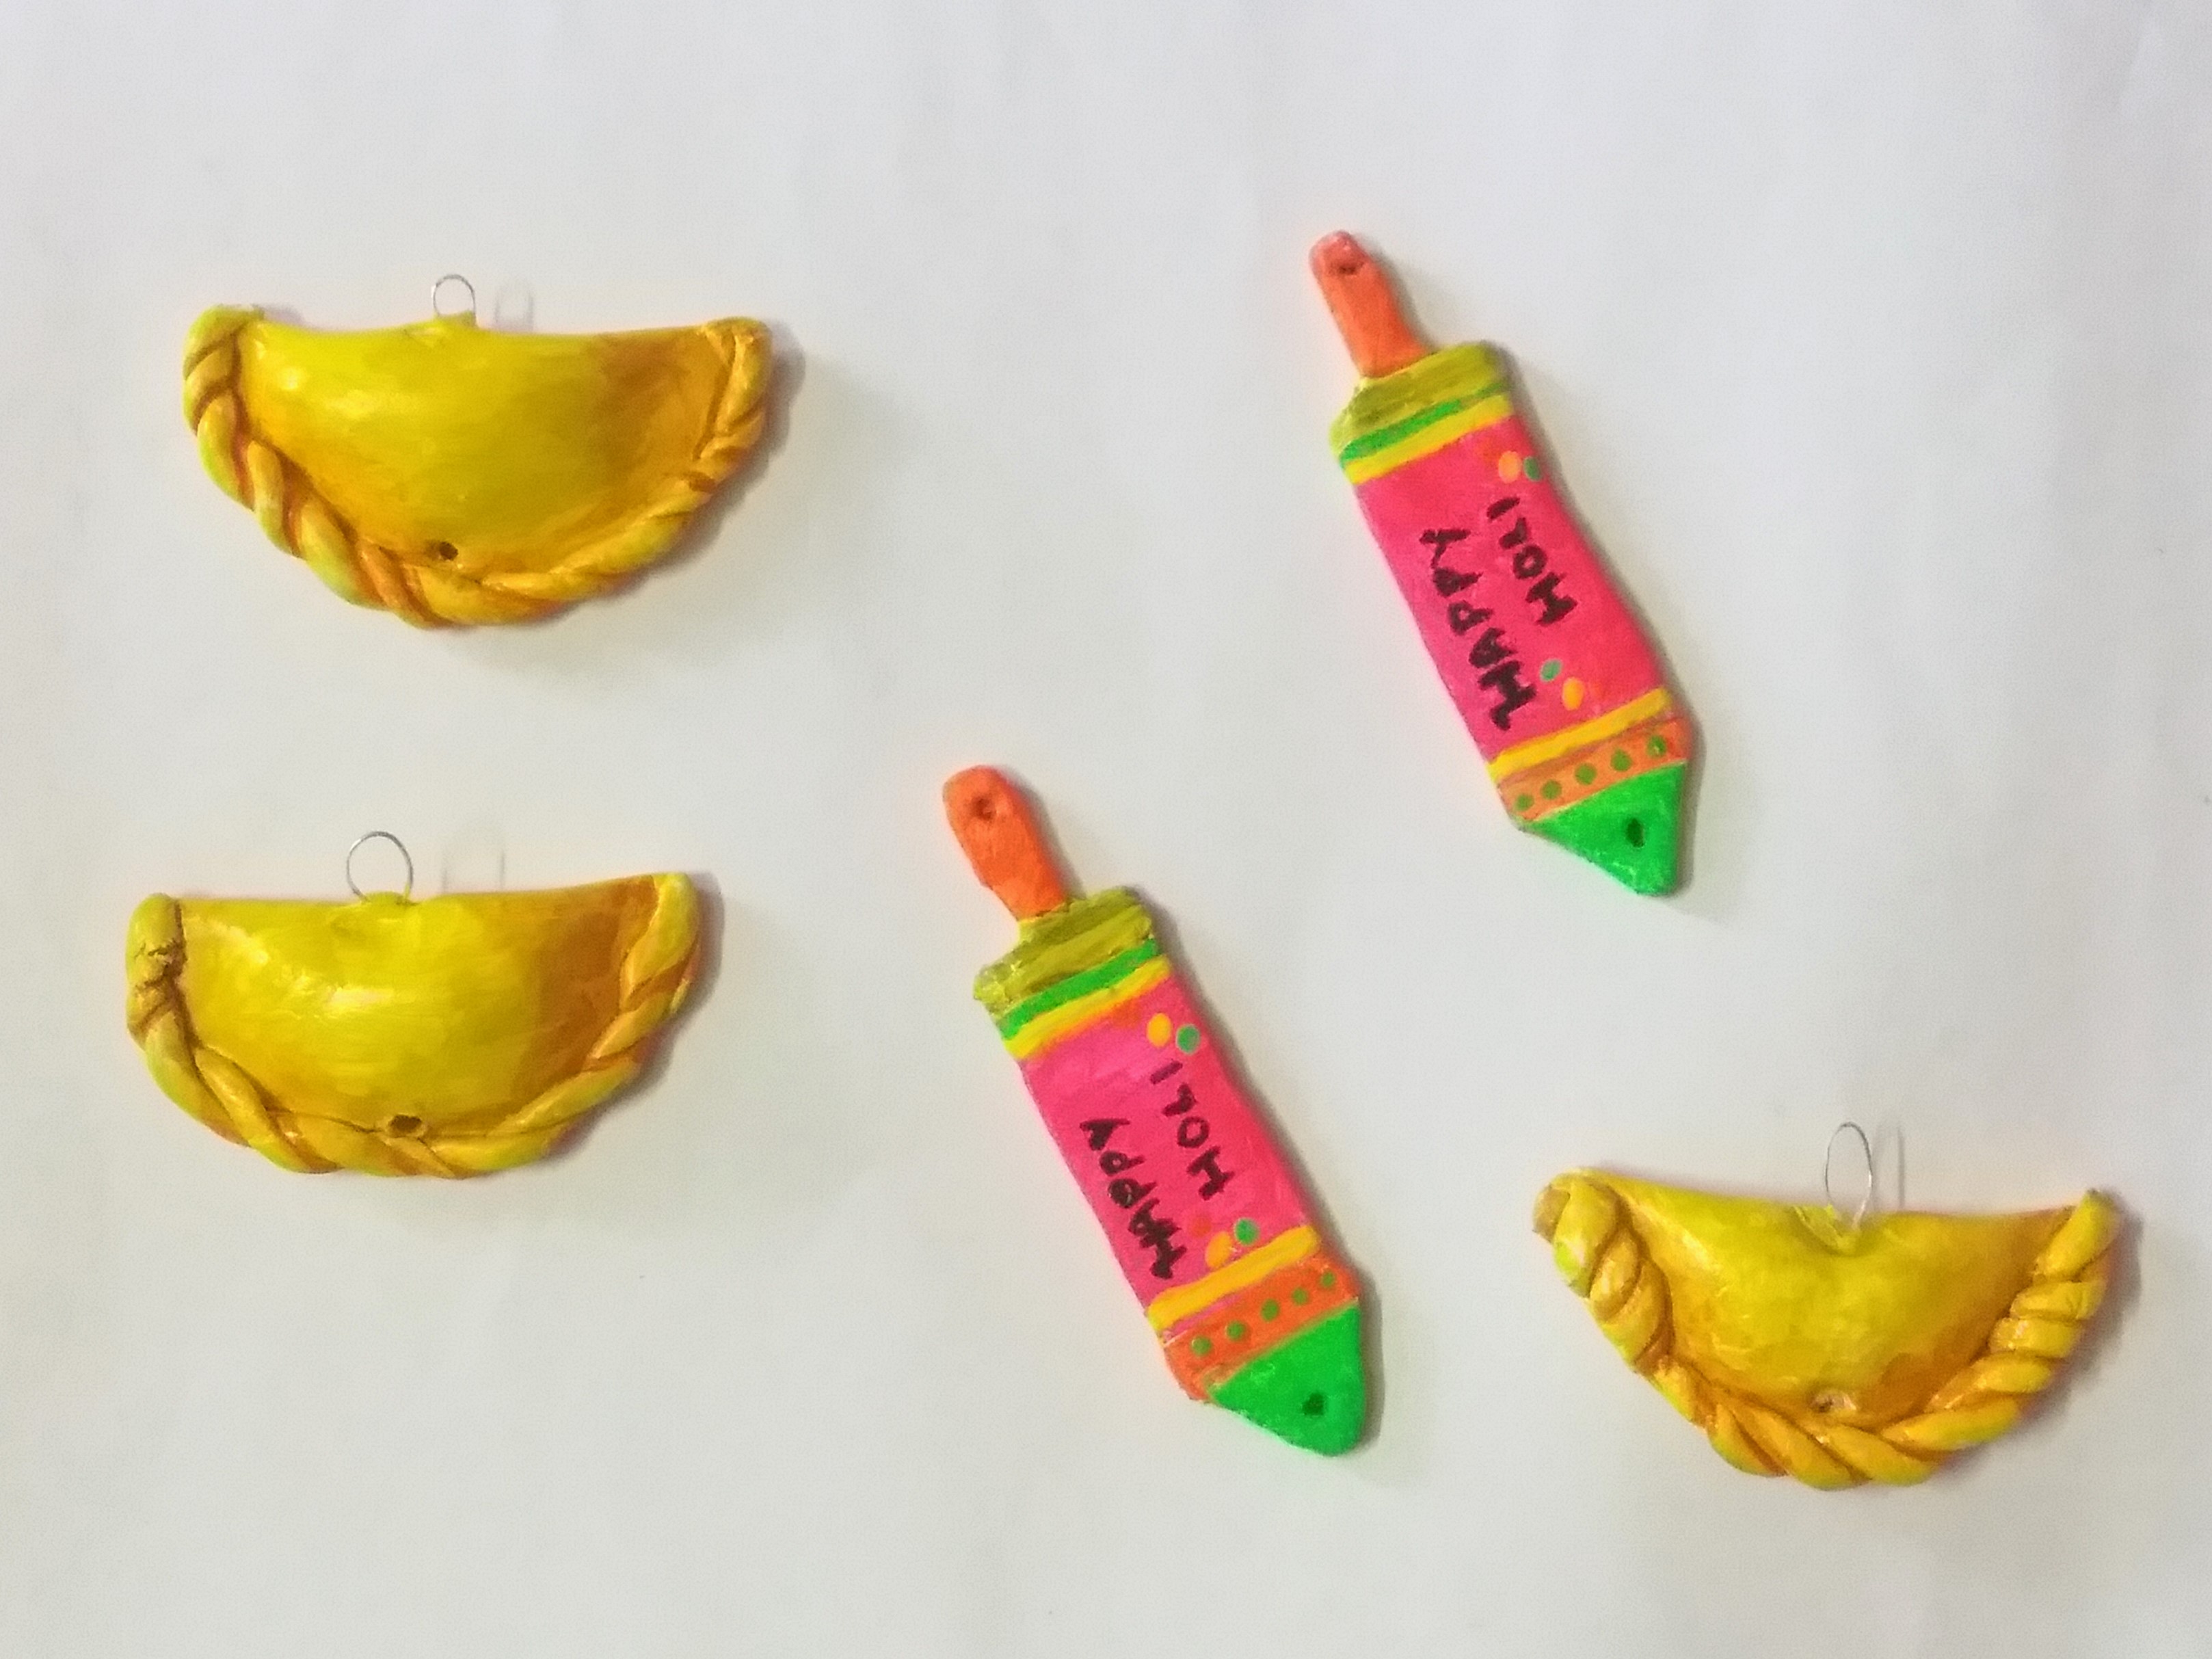
- We are going to make holi elements like the gujjiya and pichkari with Mouldit.
- Take the mixture of Mouldit resin base and hardener, mix it thoroughly to make the dough.
- Take the dough, shape it to make the gujjiya and the pichkari out of it.
- Pierce the metal wire towards the upper side of the gujjiya and pierce the holes towards the bottom to attach the tassels.
- Similarly pierce the holes on the pichkari motif.
- Paint the motifs with Acrylic Colours Black 02, Chrome Yellow 03, Lemon Yellow 11, Orange 17, White 27, Neon Green 012, Neon Orange 017 and Neon Pink 018.
- Let it dry.
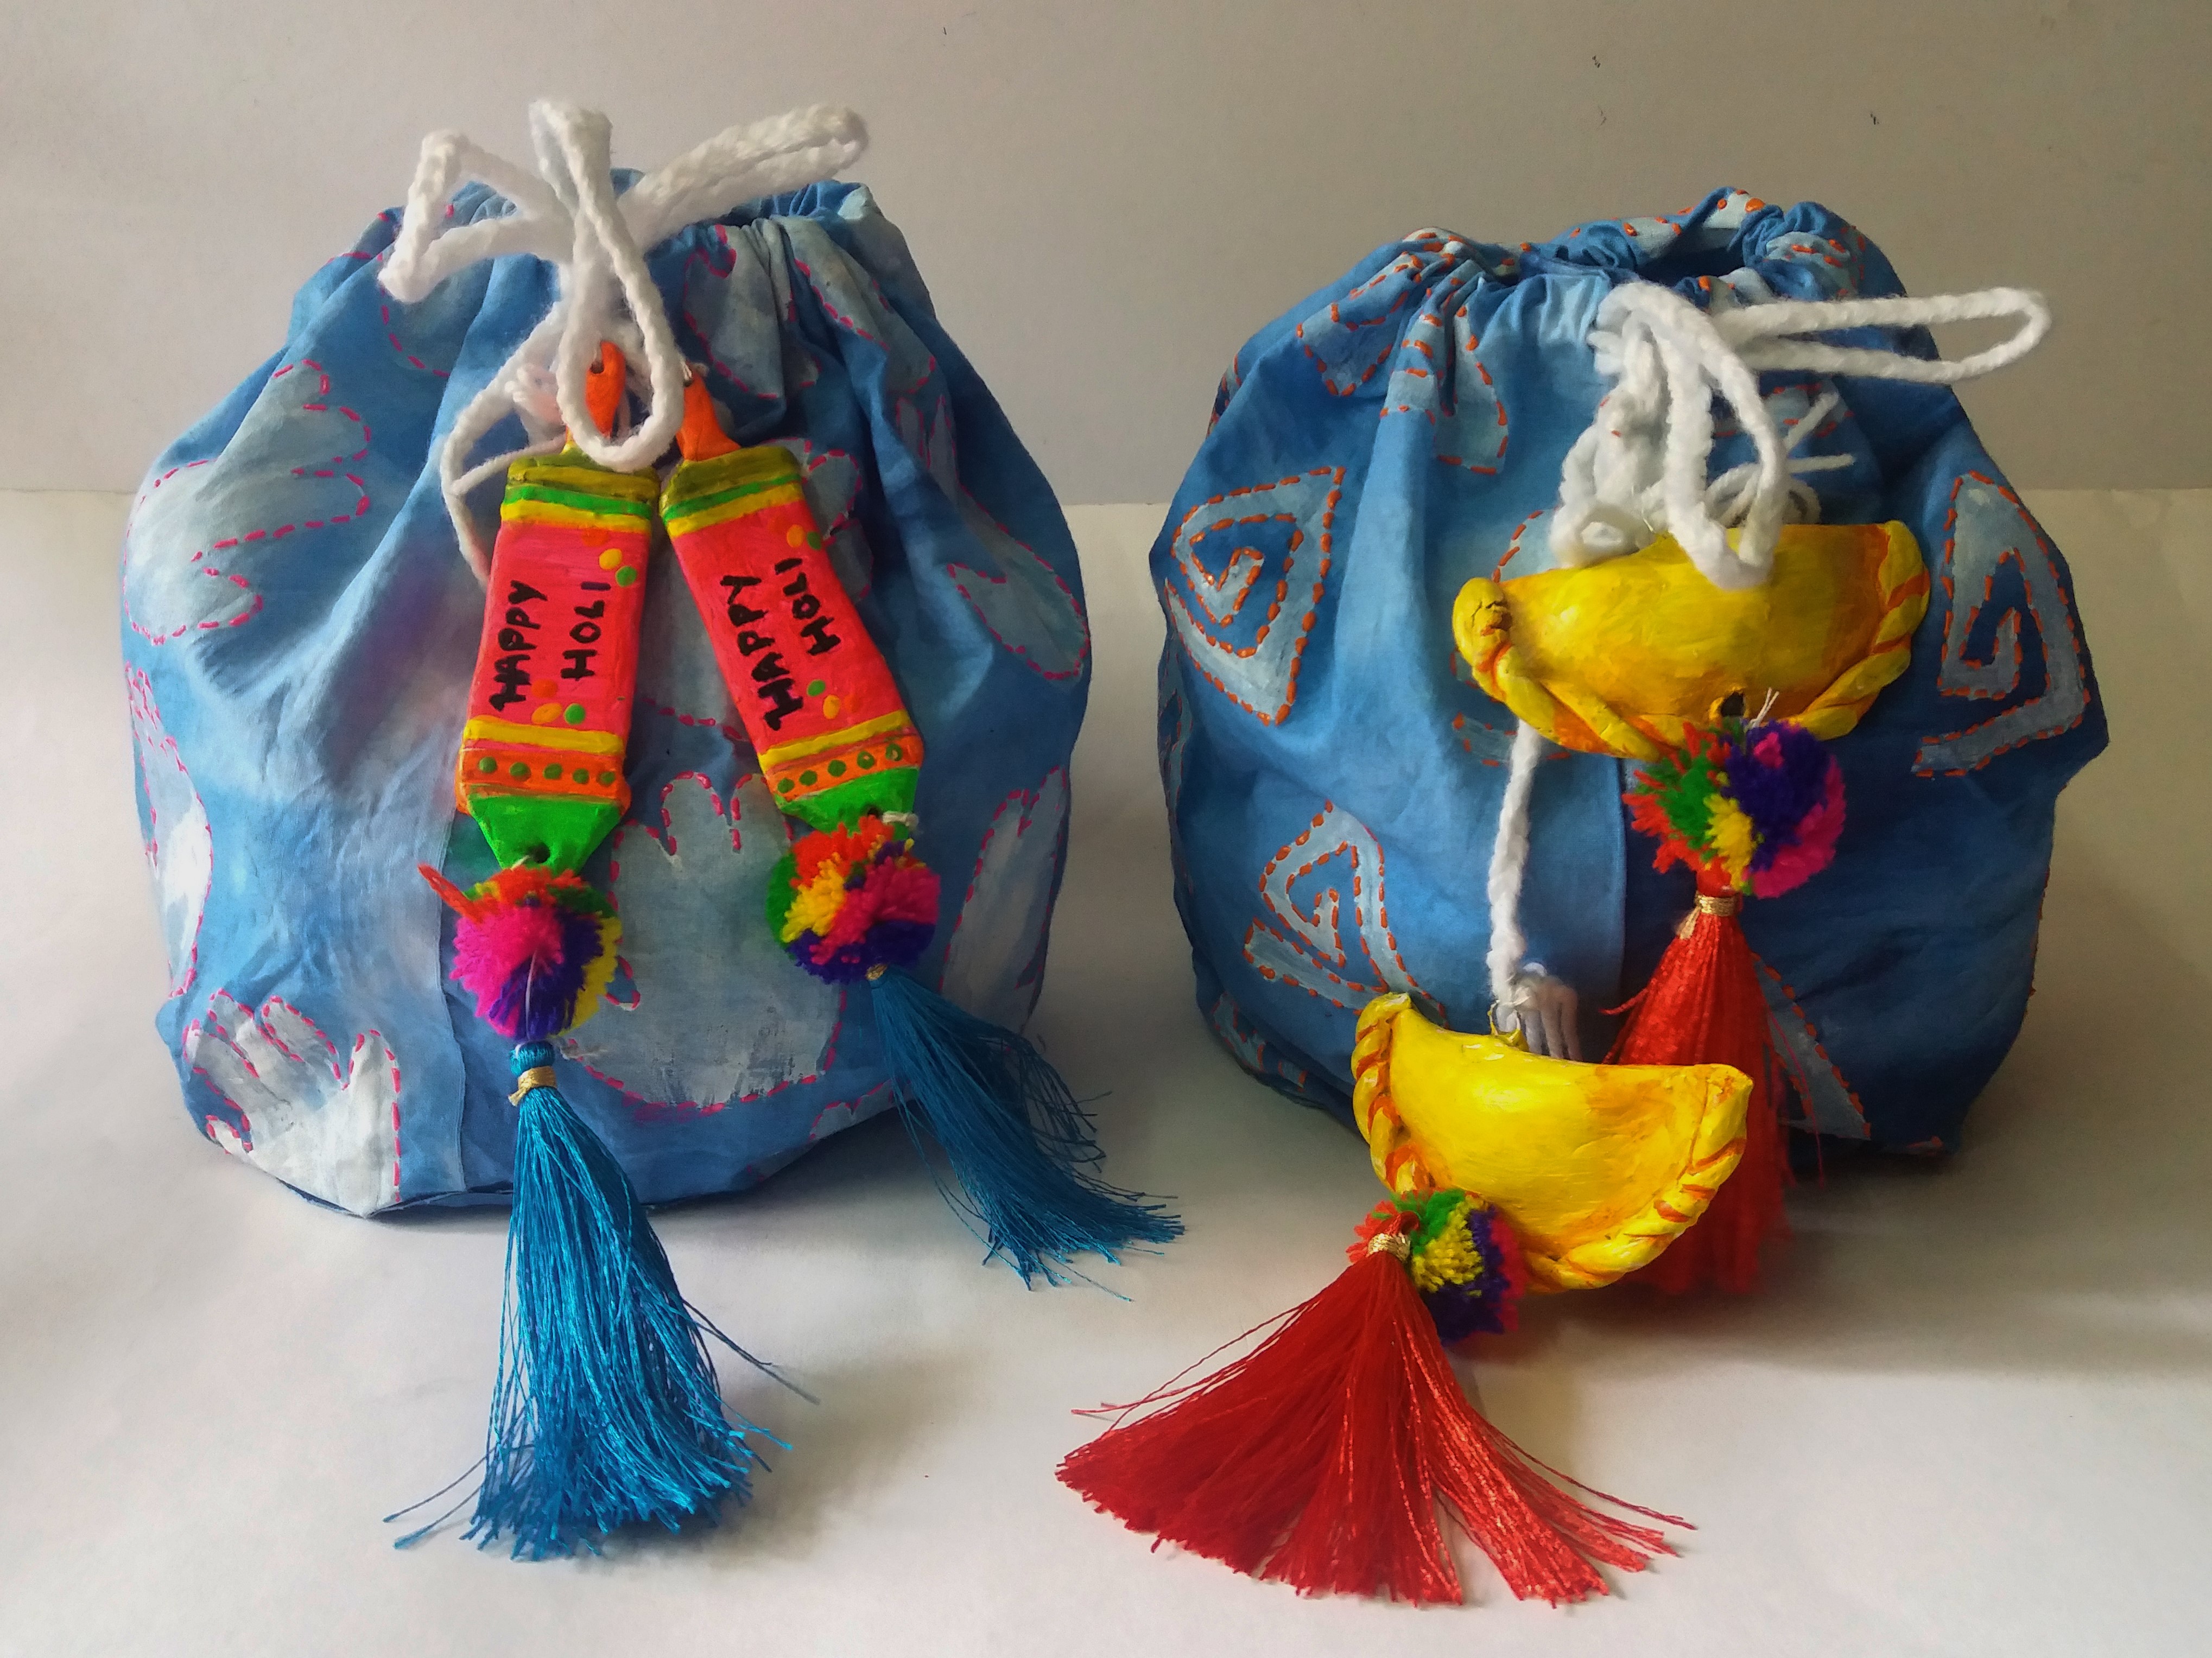
STEP 8 : Final look
- Paint the outline of the motifs with dotted lines using 3 D Outliner Orange 705 and Neon Pink 712.
- Let it dry.
- Attach the gujjiya and pichkari motifs towards the end of the white woolen thread along with the colourful pom-poms and the red, blue tassels.
- Refer to the image.


 +91 99676 55545