Spiral Coffee Table


You Will Need:
Fevicryl Fabric Glue, Fevicryl Acrylic Colour White, Compact Wooden Coffee Table, Casement Fabric, Woollen (Any 3 Colours), Cotton Printed Fabric, Drawing Paper, Yellow Carbon Paper, Pencil-Thread Attached, Stencil with Circles, Scale, Pencil, Compass, Eraser, Marker, Paper Pin, Paper Tape, Mirrors of Different Sizes, Empty Ball Pen, Fabric Scissors, Flat Brush, Fabric Chalk, Waste Fabric
Product Used:

Description :
A small and compact coffee table with mirrors as spiral table top: a nice addition to your living room made completely using Fevicryl Fabric Glue.
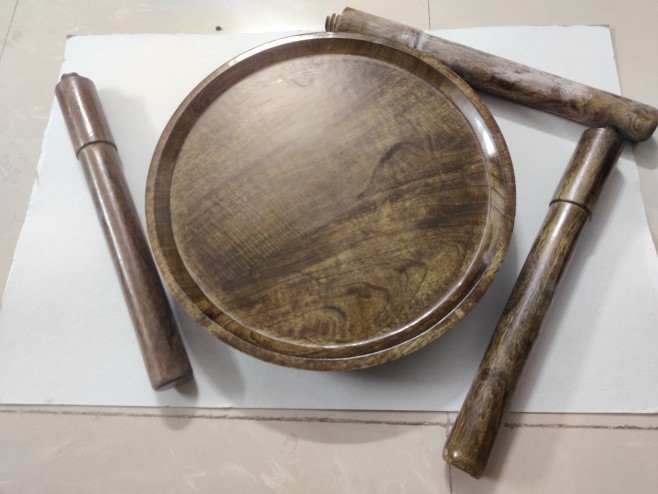
- Take a coffee table with a round top.

- Measure the top of the coffee table and draw the same on a chart paper using the thread –pencil method as seen in the image.
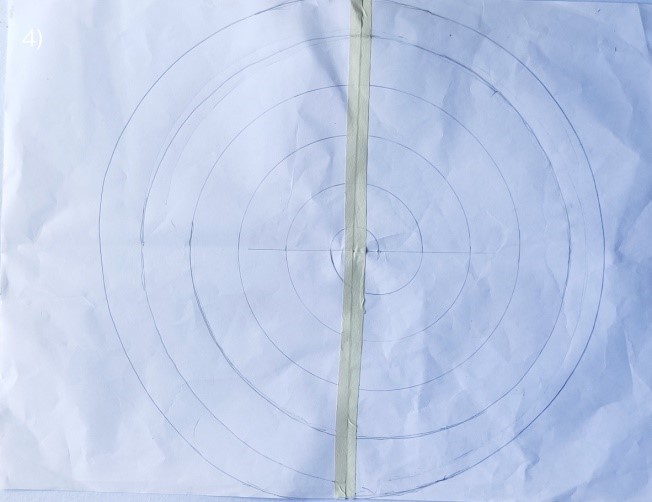
- Once the outer circle is drawn, draw a spiral starting from the center and ending at the outer circle.
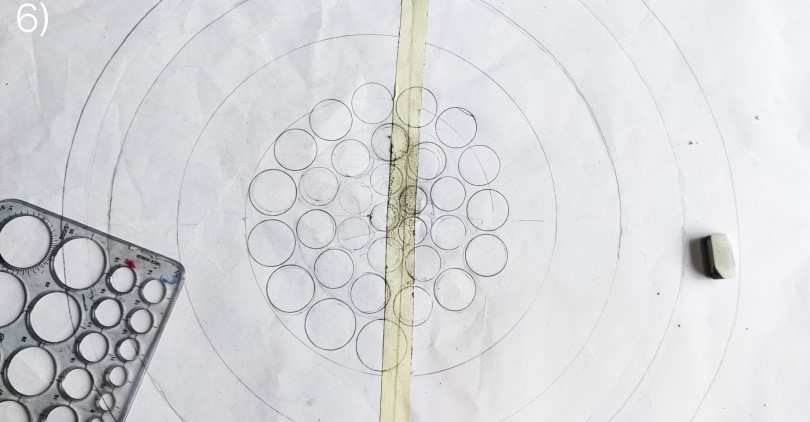
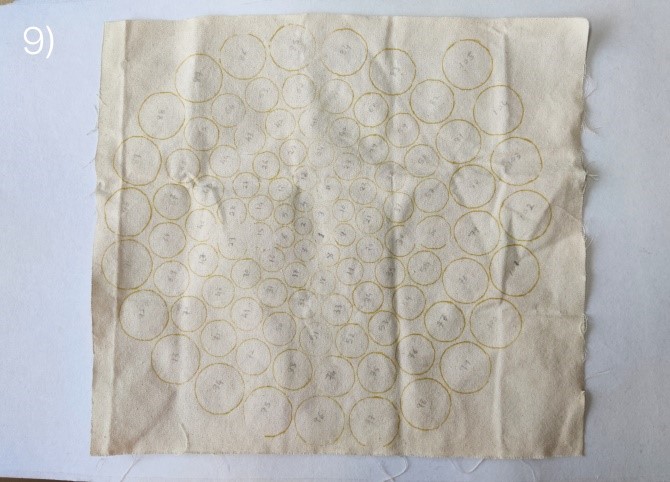
Draw circles (small to big) as seen in the image using the circle stencil and pencil.
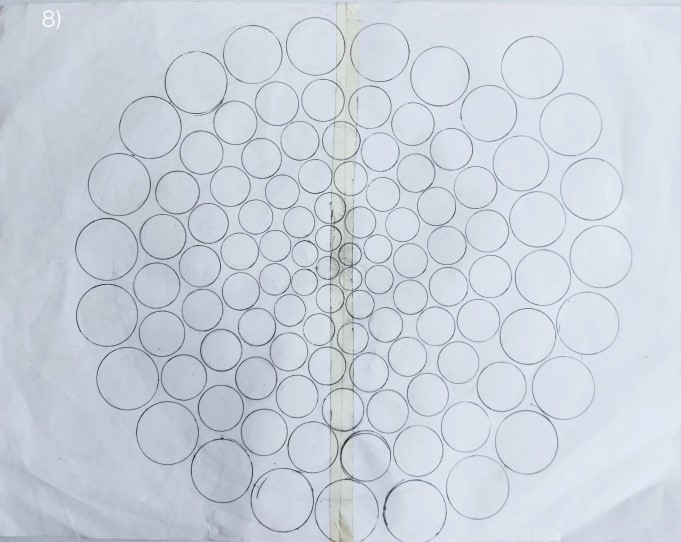
The whole artwork must look like this once the circles have been drawn.
- Transfer these circles on to a fabric piece with the help of yellow carbon paper and pencil.
- Make sure to number the circles on both sides to keep a track of the spiral formation
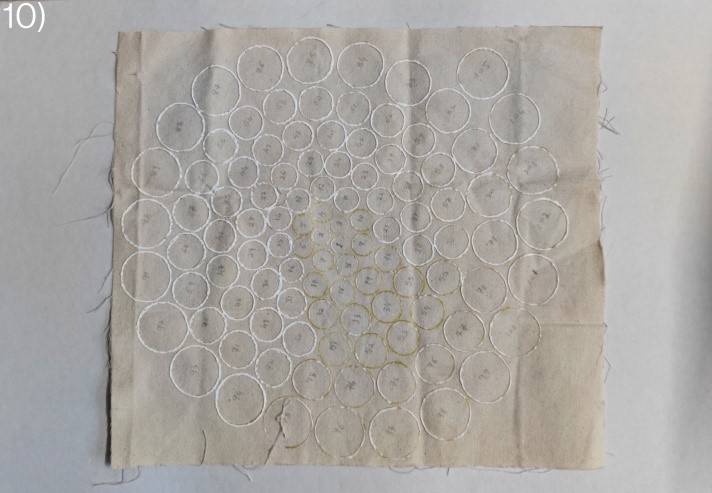
- Trace out the circles using fevicryl fabric glue as shown in the image.
- This process secures the edges of the circles that will be cut out and will avoid fraying.
- Let it all dry
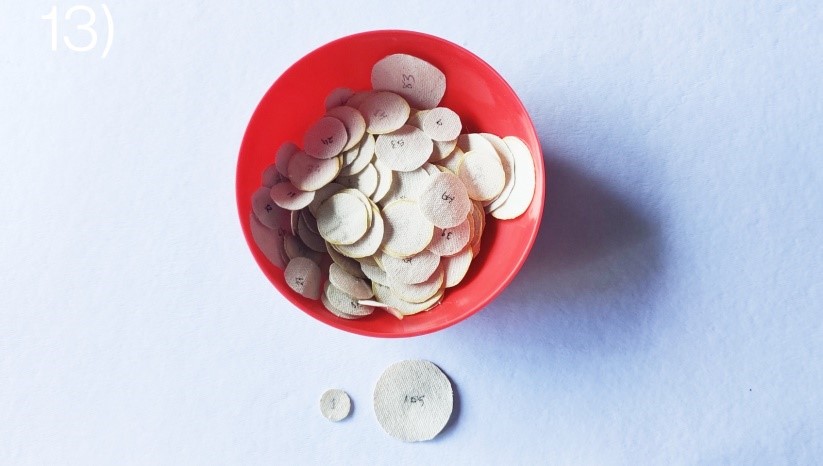
- Cut the circles and collect them in a bowl as shown.
- Make sure to cut them using fabric scissors and do not forget to number them on the back as well.

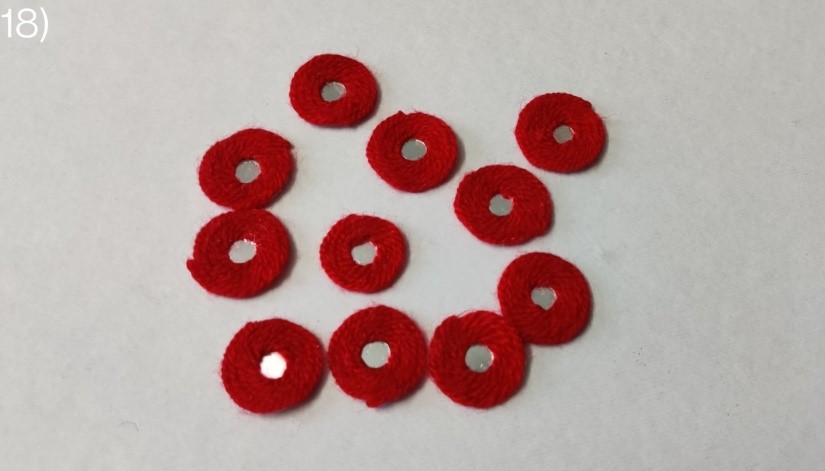
- Stick mirrors on all the circles except the big ones as seen in the image.
- Make sure to use mirrors according to the size of the circle.
- Stick it using Fevicryl Fabric Glue.
- Let it all dry
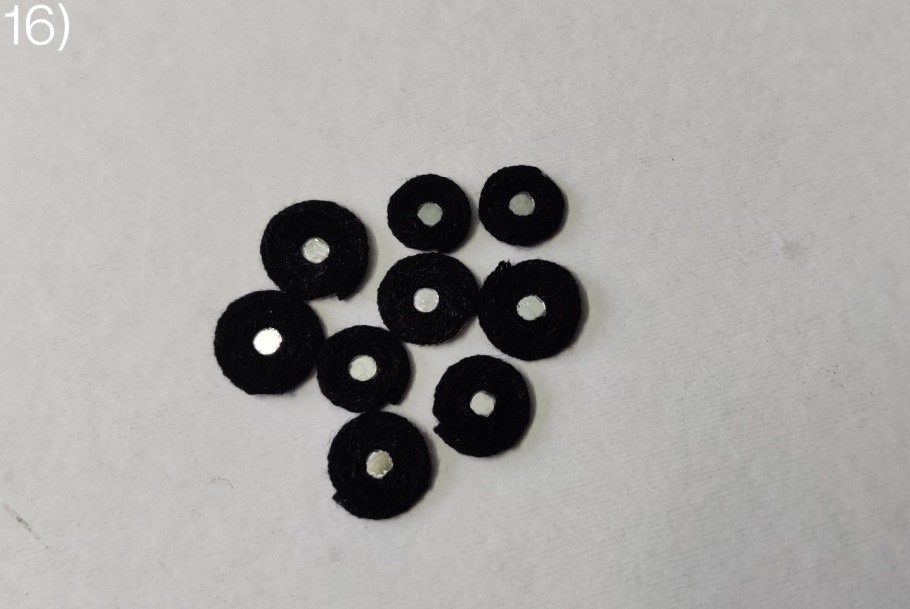
- Stick black wool around the smallest circles as seen in the image.
- Stick it using Fevicryl Fabric Glue.
- Let it all dry
- Stick red wool around the next set of circles as seen in the image
- Stick using Fevicryl Fabric Glue.
- Let it all dry
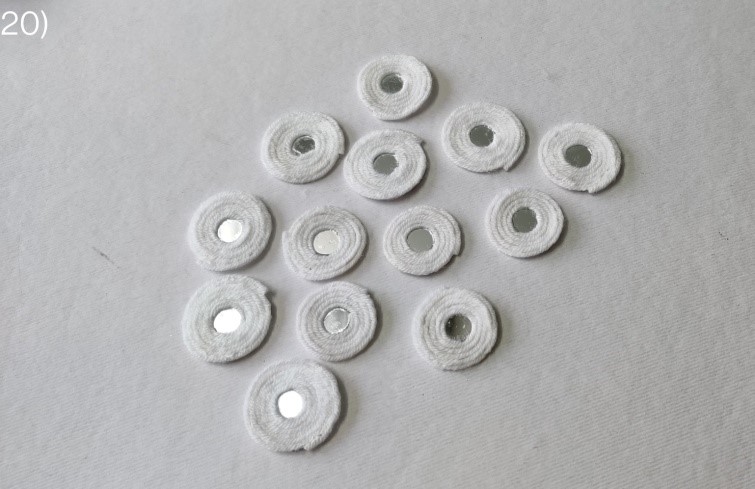
- Stick white wool around the next set of circles as seen in the image
- Stick using Fevicryl Fabric Glue.
- Let it all dry
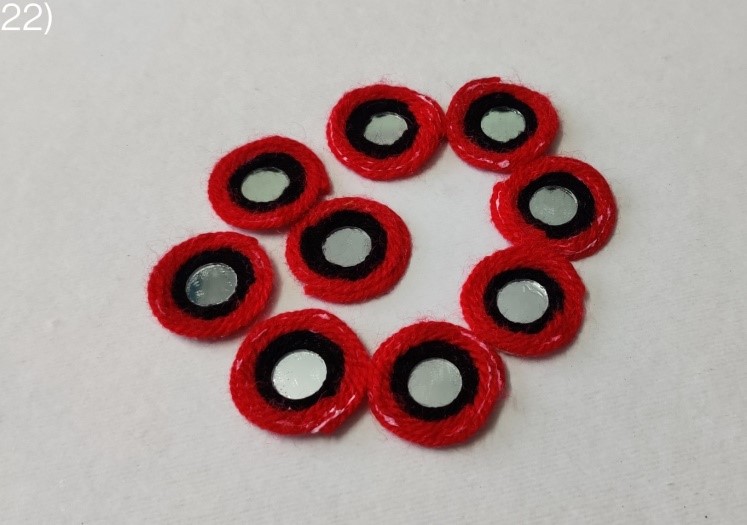
- Stick black and red wool around the next set of circles as seen in the image
- Stick using Fevicryl Fabric Glue.
- Let it all dry
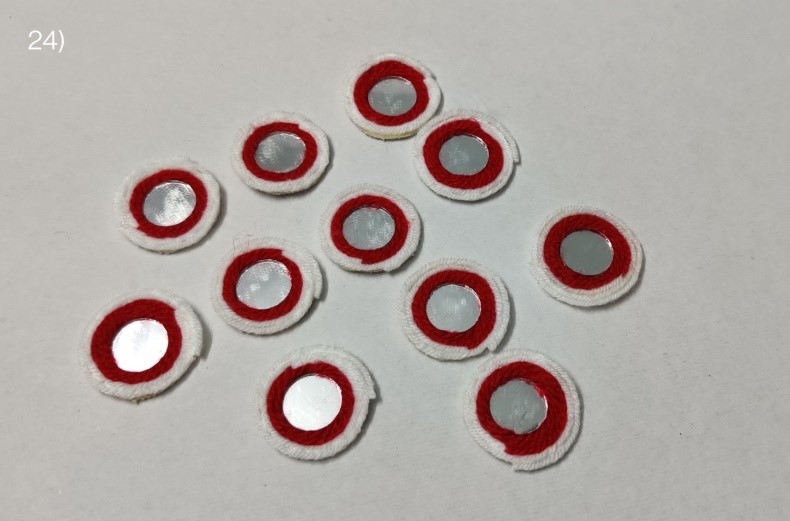
- Stick red and white wool around the next set of circles as seen in the image
- Stick using Fevicryl Fabric Glue.
- Let it all dry

- Stick white, black & red wool around the next set of circles as seen in the image
- Stick using Fevicryl Fabric Glue.
- Let it all dry
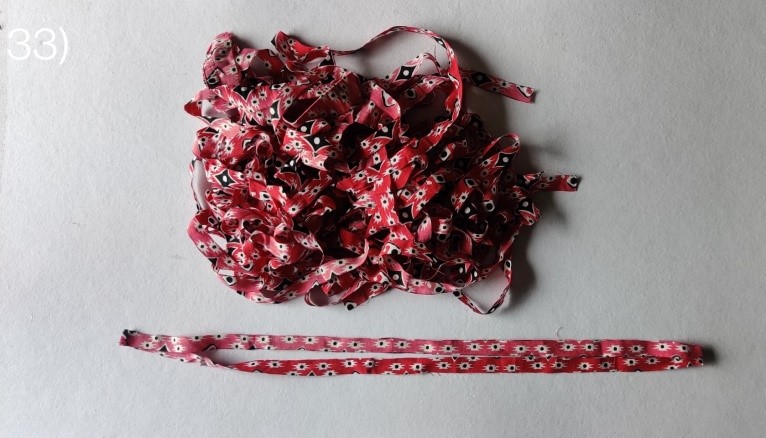
- Take the cotton printed fabric and cut thin strips from them using a fabric scissors.
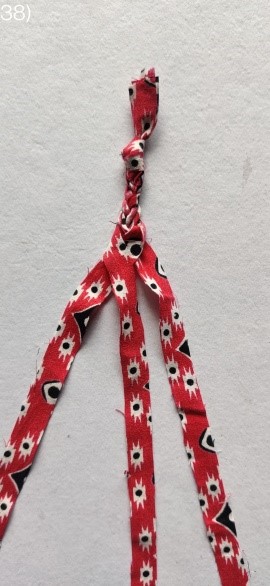
- Take 3 strips at a time, knot them at the top and braid them as shown in the image
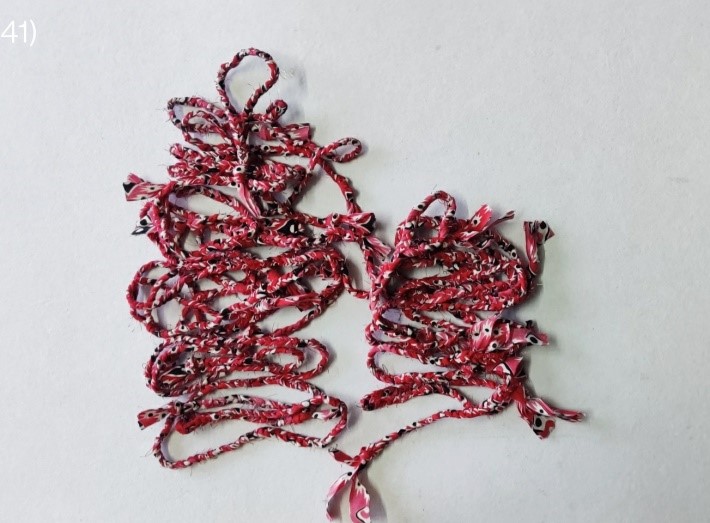
- Once braided, you will have a good amount of fabric yarn that you would have created as seen in the image given.
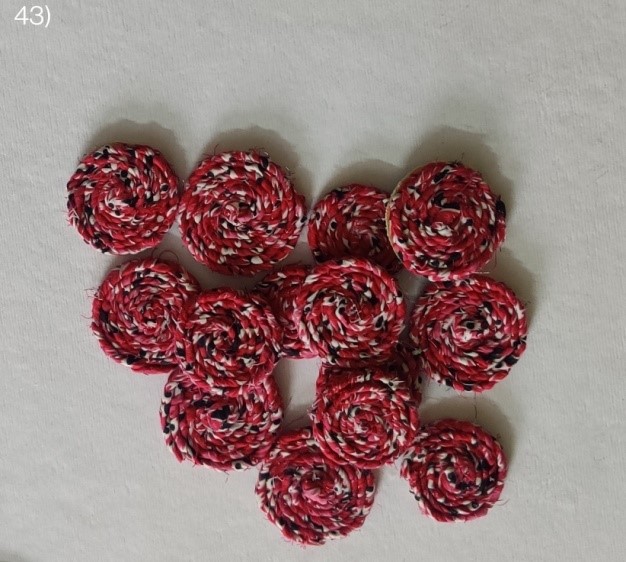
- Stick the fabric yarn around the next set of circles as seen in the image
- Stick using Fevicryl Fabric Glue.
- Let it all dry
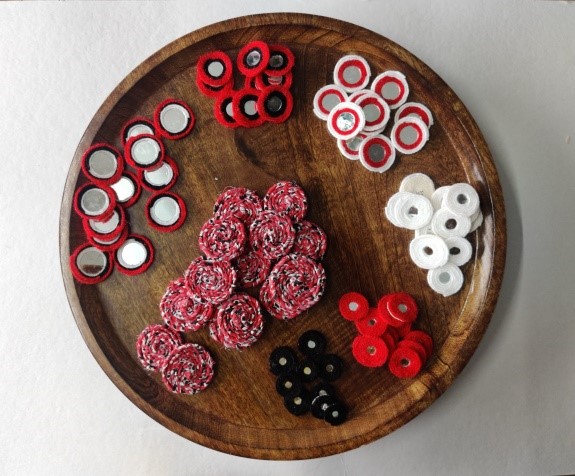
This is how all the circles will look once they have been completed.
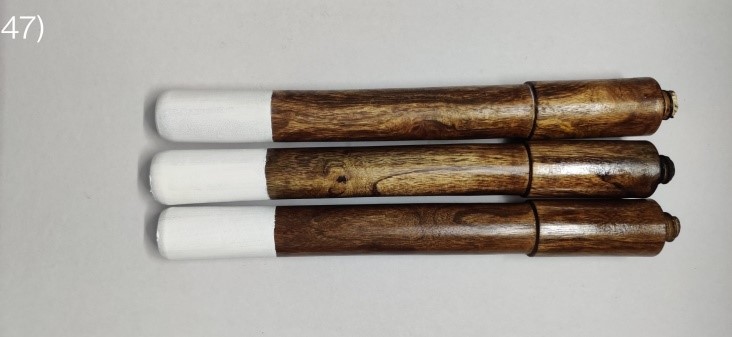
- Take the legs of the coffee table and paint the bottom part using Fevicryl Acrylic Colour white.
- Let it all dry
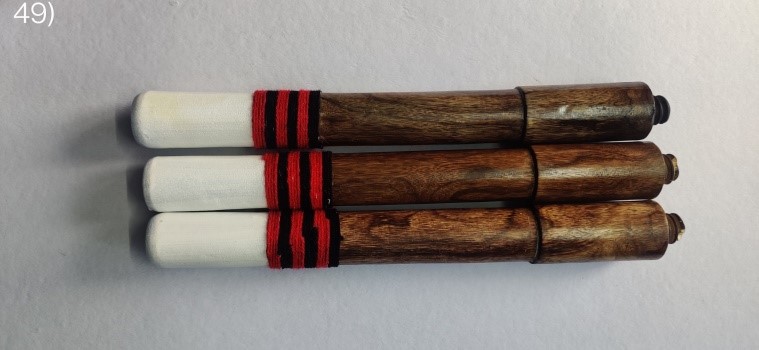
- Stick red and black wool on the legs as shown in the image.
- Stick it using Fevicryl Fabric Glue.
- Let it all dry
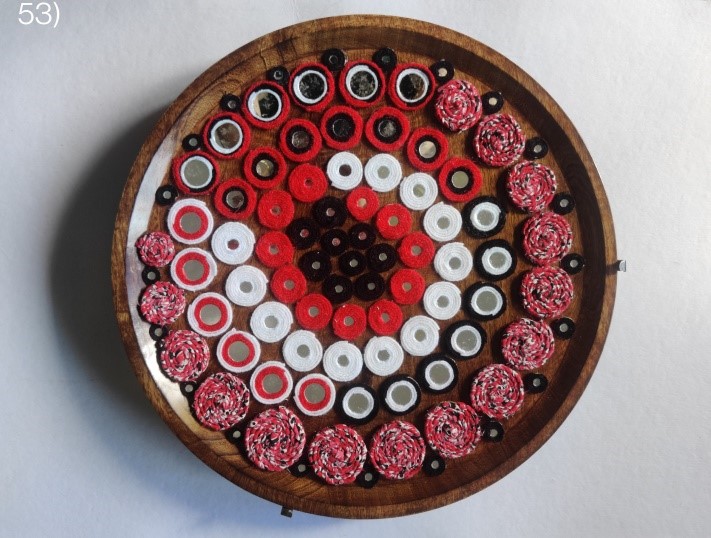
- Taking cue from the numbers at the back of the circle, place them in a spiral shape as shown in the image.
- Stick them all using Fevicryl Fabric Glue.
- Let it all dry
- To fill the extra space around the spiral, make tiny circles with mirrors on them and stick black wool around them.
- Stick it using Fevicryl Fabric Glue.
- Let it all dry

- Place a glass on top of the table and secure it with clips as seen in the image
- This will protect the spiral art underneath it
- Secure the legs of the table, clean the glass and your coffee table is ready to be used.


 +91 99676 55545