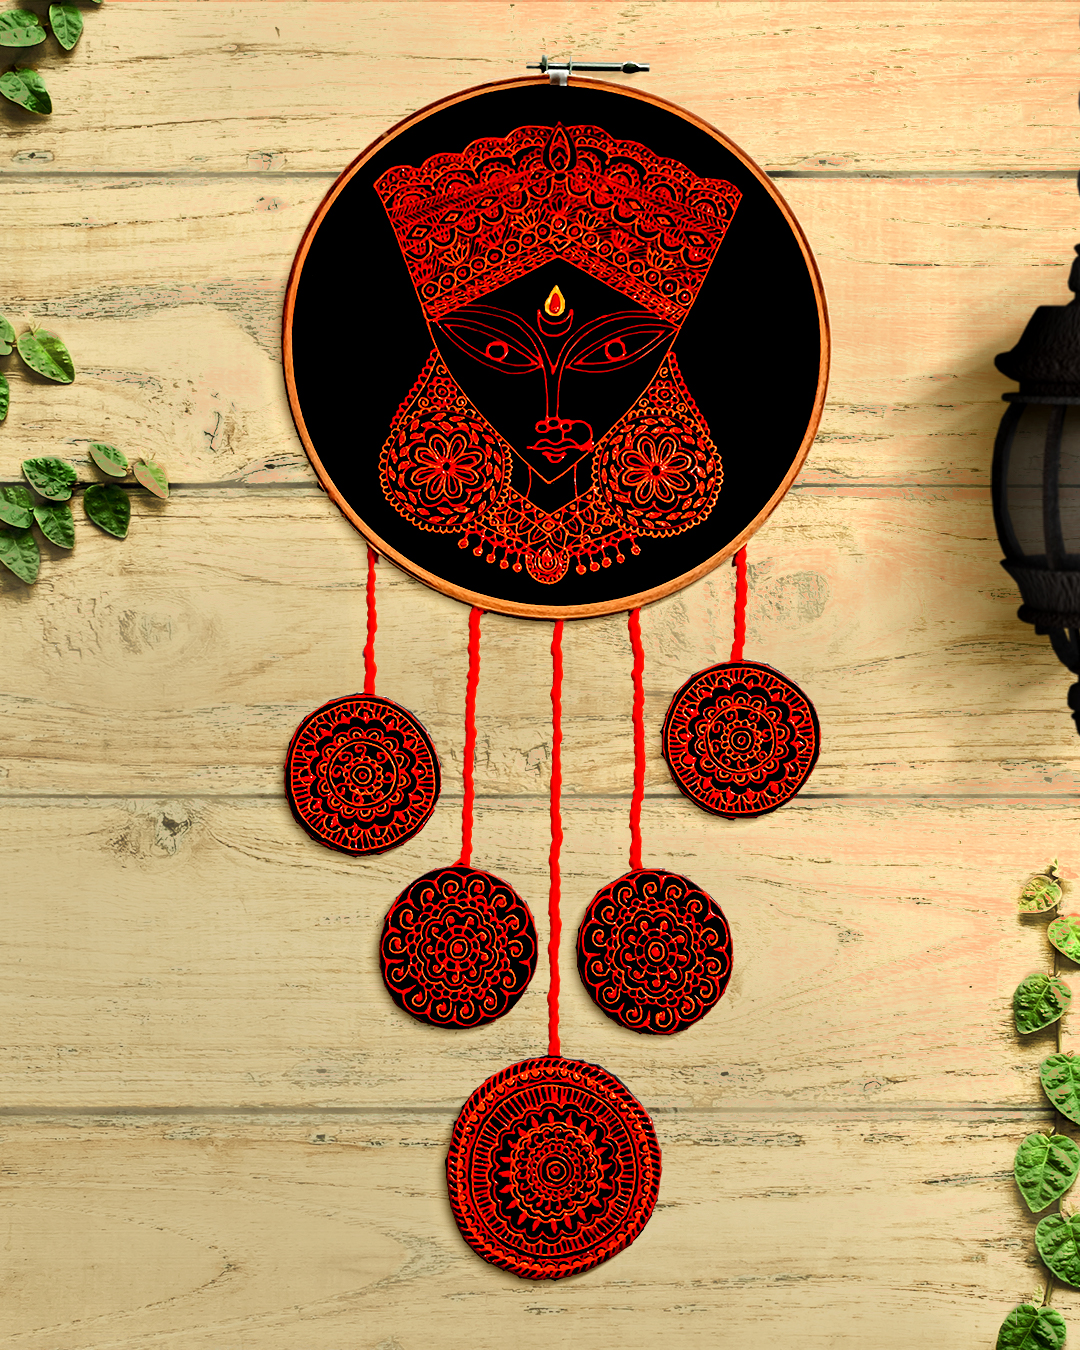
Durga Face With 3d

You Will Need:
Fevicryl 3D Outliner Red 701, Orange 705, Fevicryl Fabric Glue, Fine Art Canvas Sheet, Black Fabric ½ A Meter, 8” Diameter Embroidery Ring, Scissors, A3 White Paper, White Carbon Paper, Pencil, Red Wool, Needle & Thread
Product Used:

Description :
Here is a simple DIY for the festival of Navaratri to adorn the walls of your home and add to the beauty of your home décor. Made with Fevicryl 3D Outliners this can be made in a jiffy too.
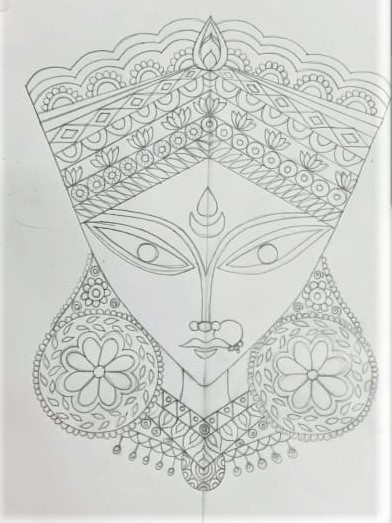
Take A3 white paper, draw the face of goddess Durga on it for 8” diameter embroidery ring.
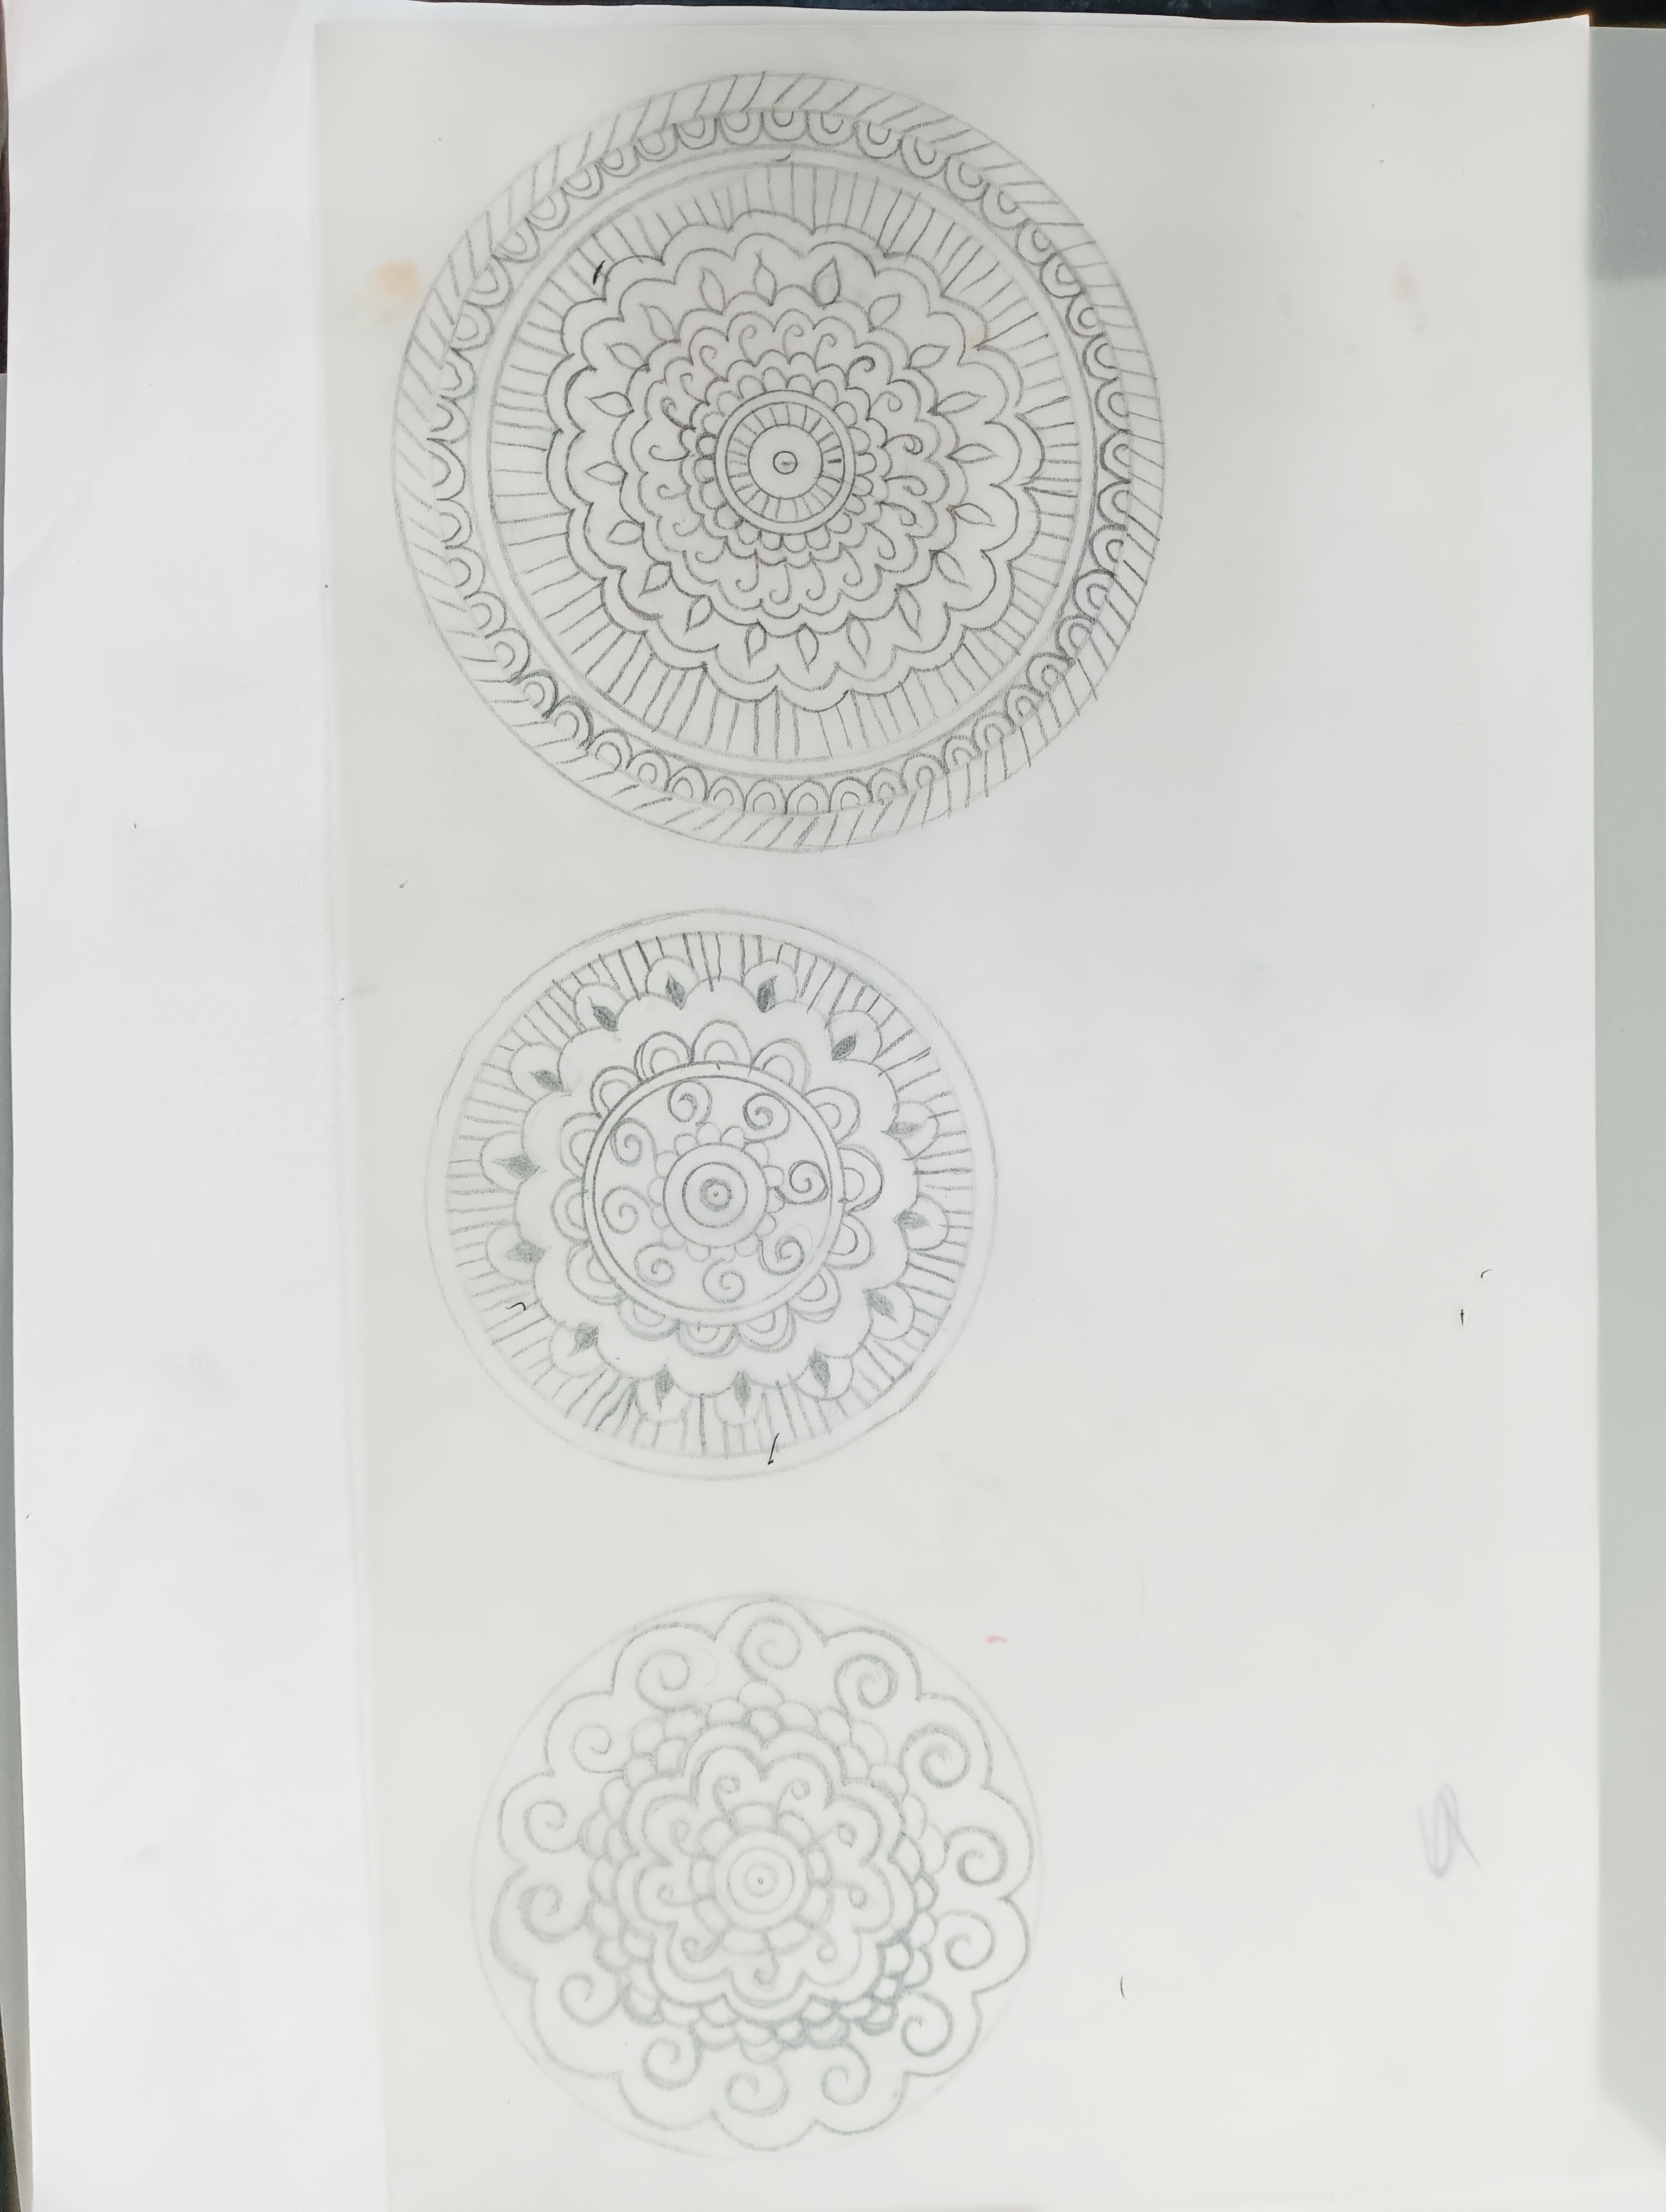
Similarly draw mandala design in 4” and 3” diameter circle. Refer to the image.
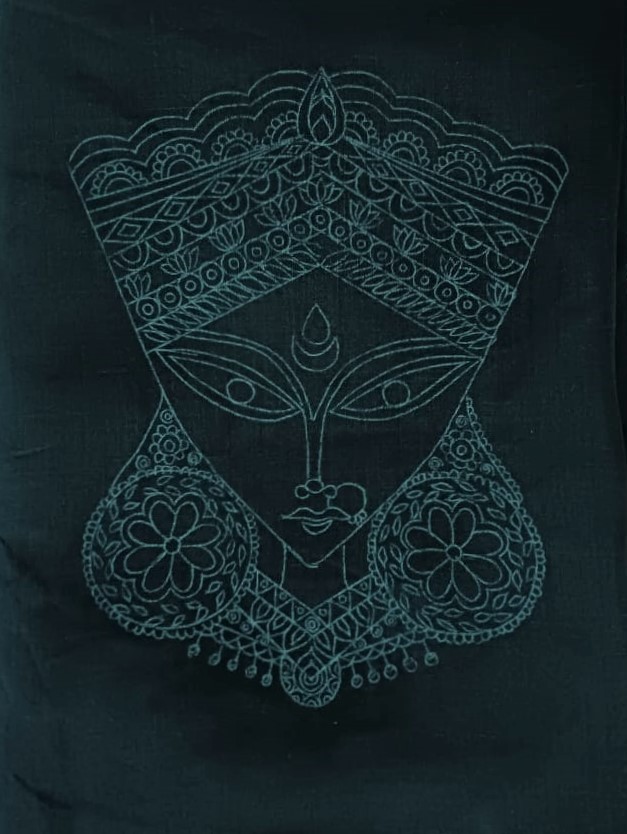
Take black fabric and trace the face of Durga on it with white carbon paper.
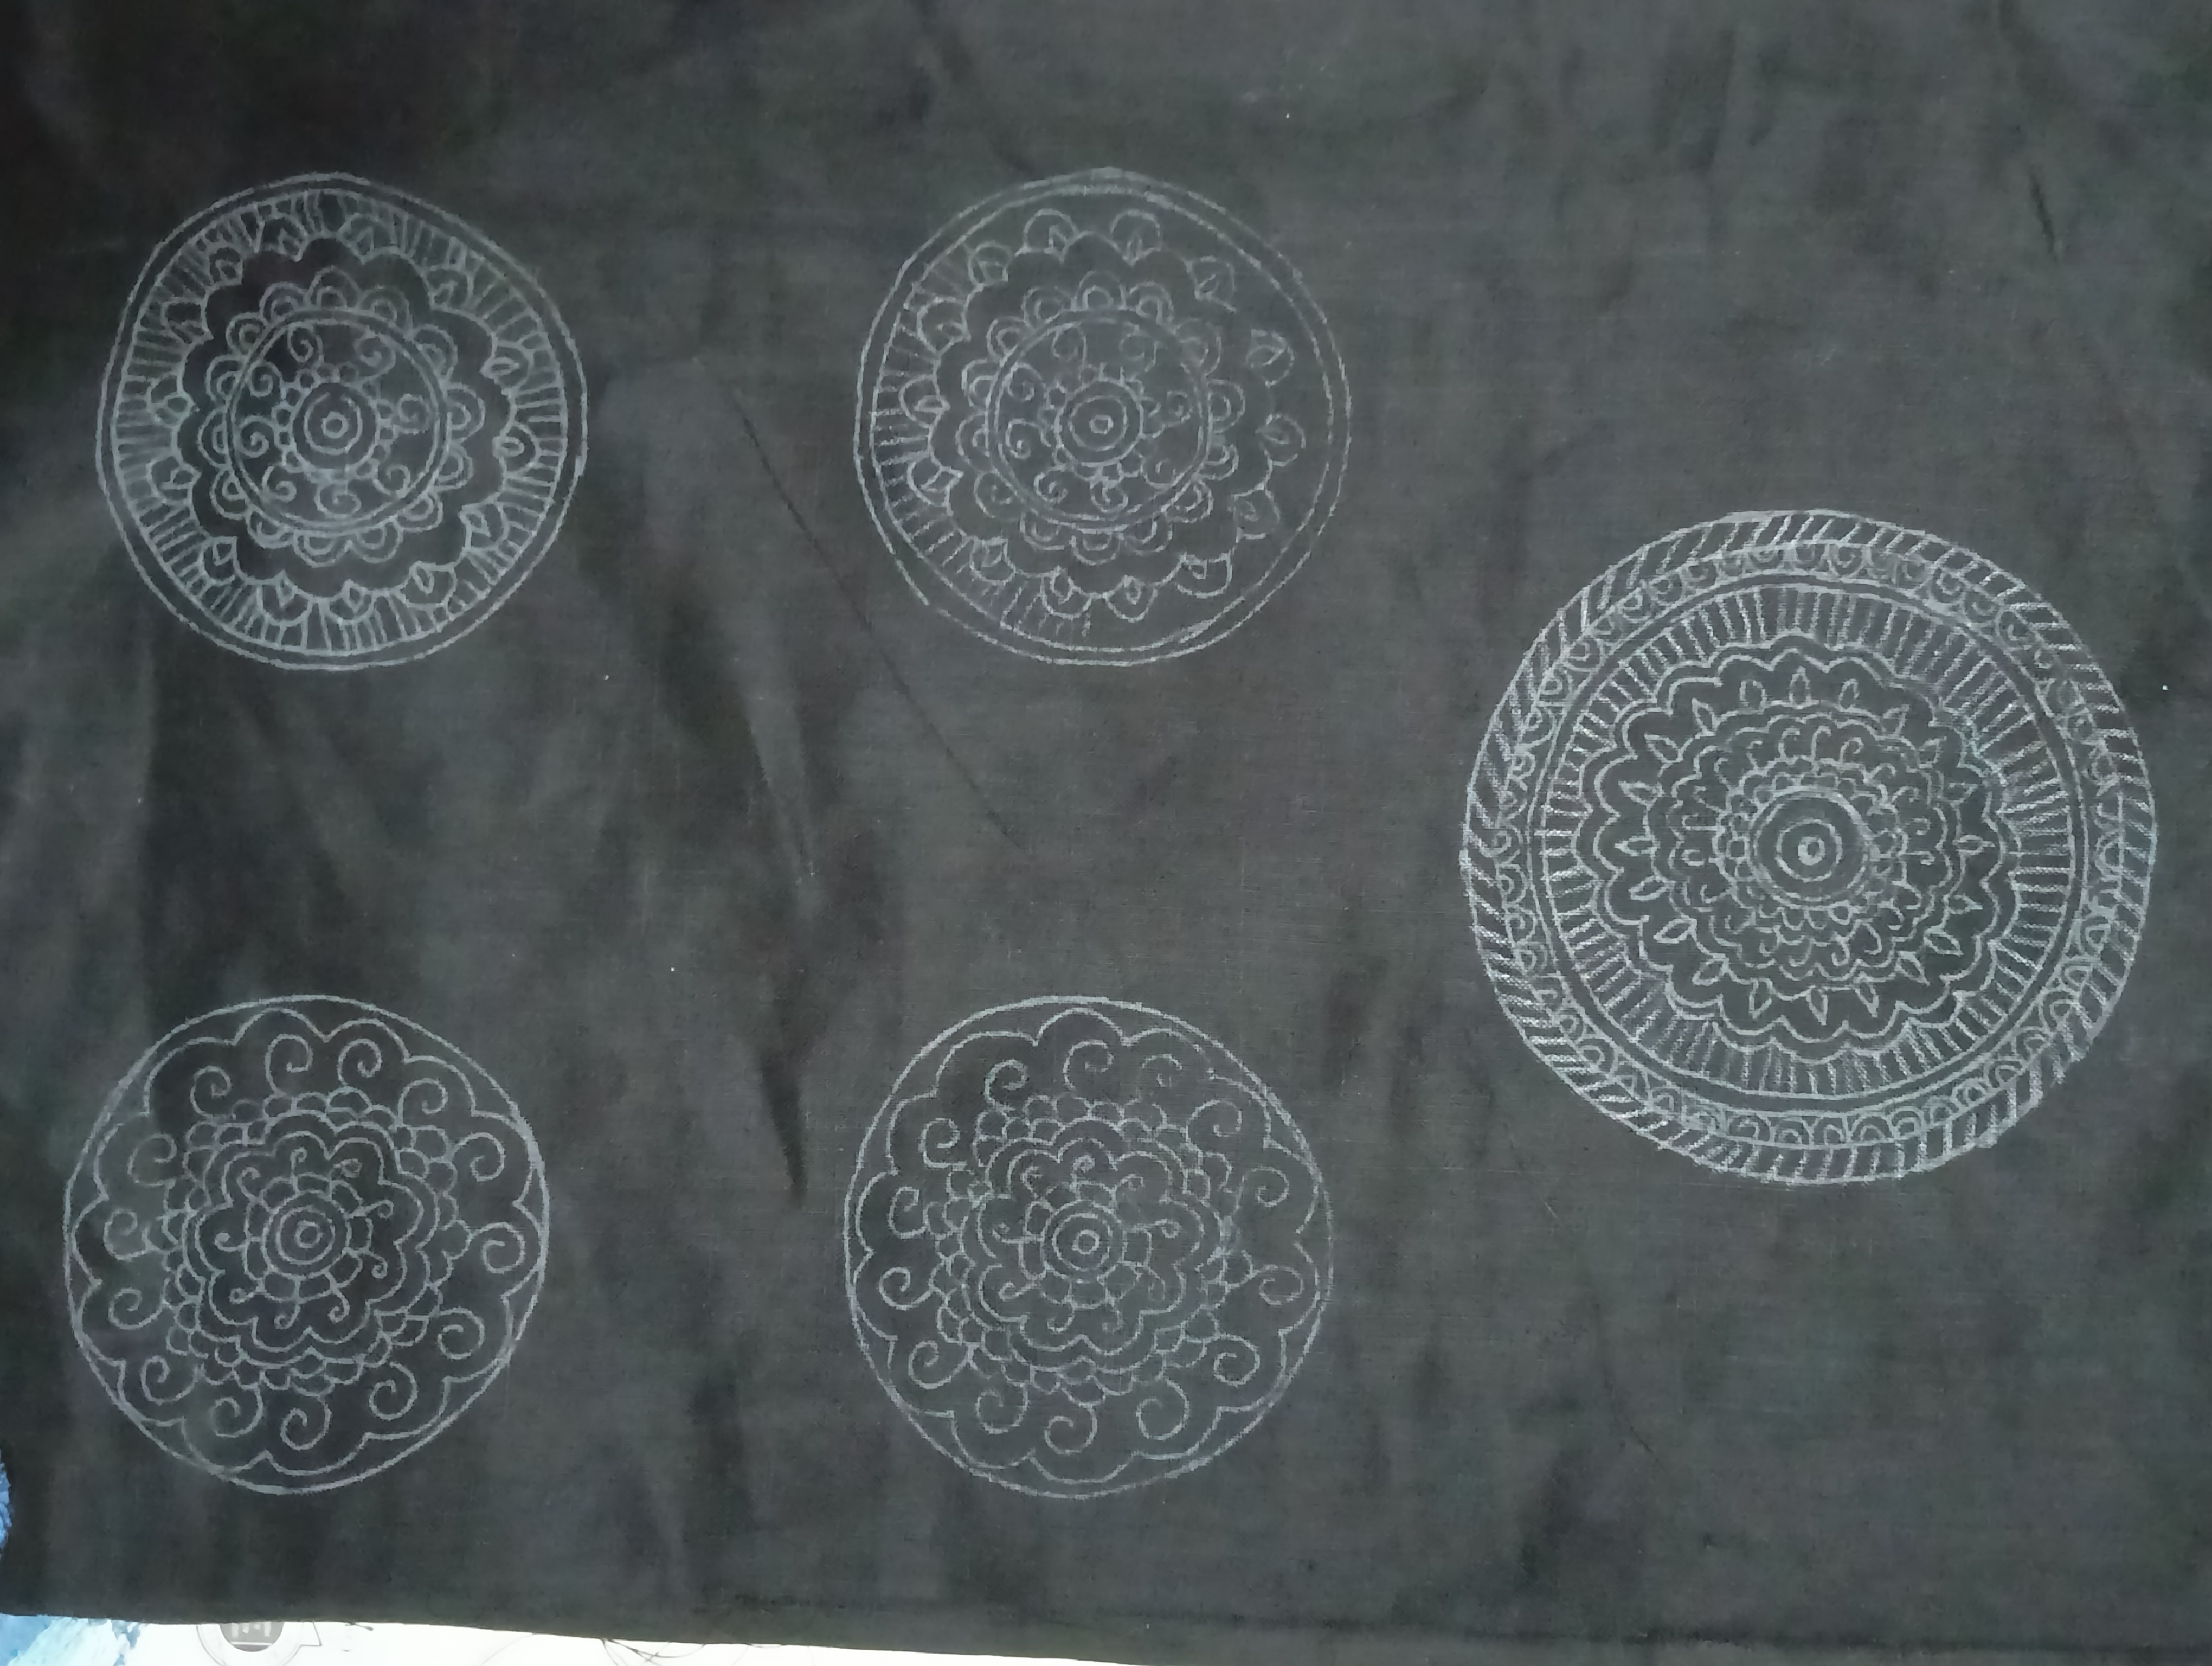
Trace the mandala design circles too on the black fabric with white carbon paper. Trace 4 circles of 3” size and 1 circle of 4” size.

Paint the face of Durga with 2 shades of Fevicryl 3 D Outliner Red 701 and Orange 705. Let it dry.

Paint the mandala design with Fevicryl 3 D Outliner Red 701 and Orange 705. Let it dry.

Attach 8” diameter ring to the painted fabric of Durga face, remove the excess fabric and secure the ends from behind with Fabric Glue. Let it dry.
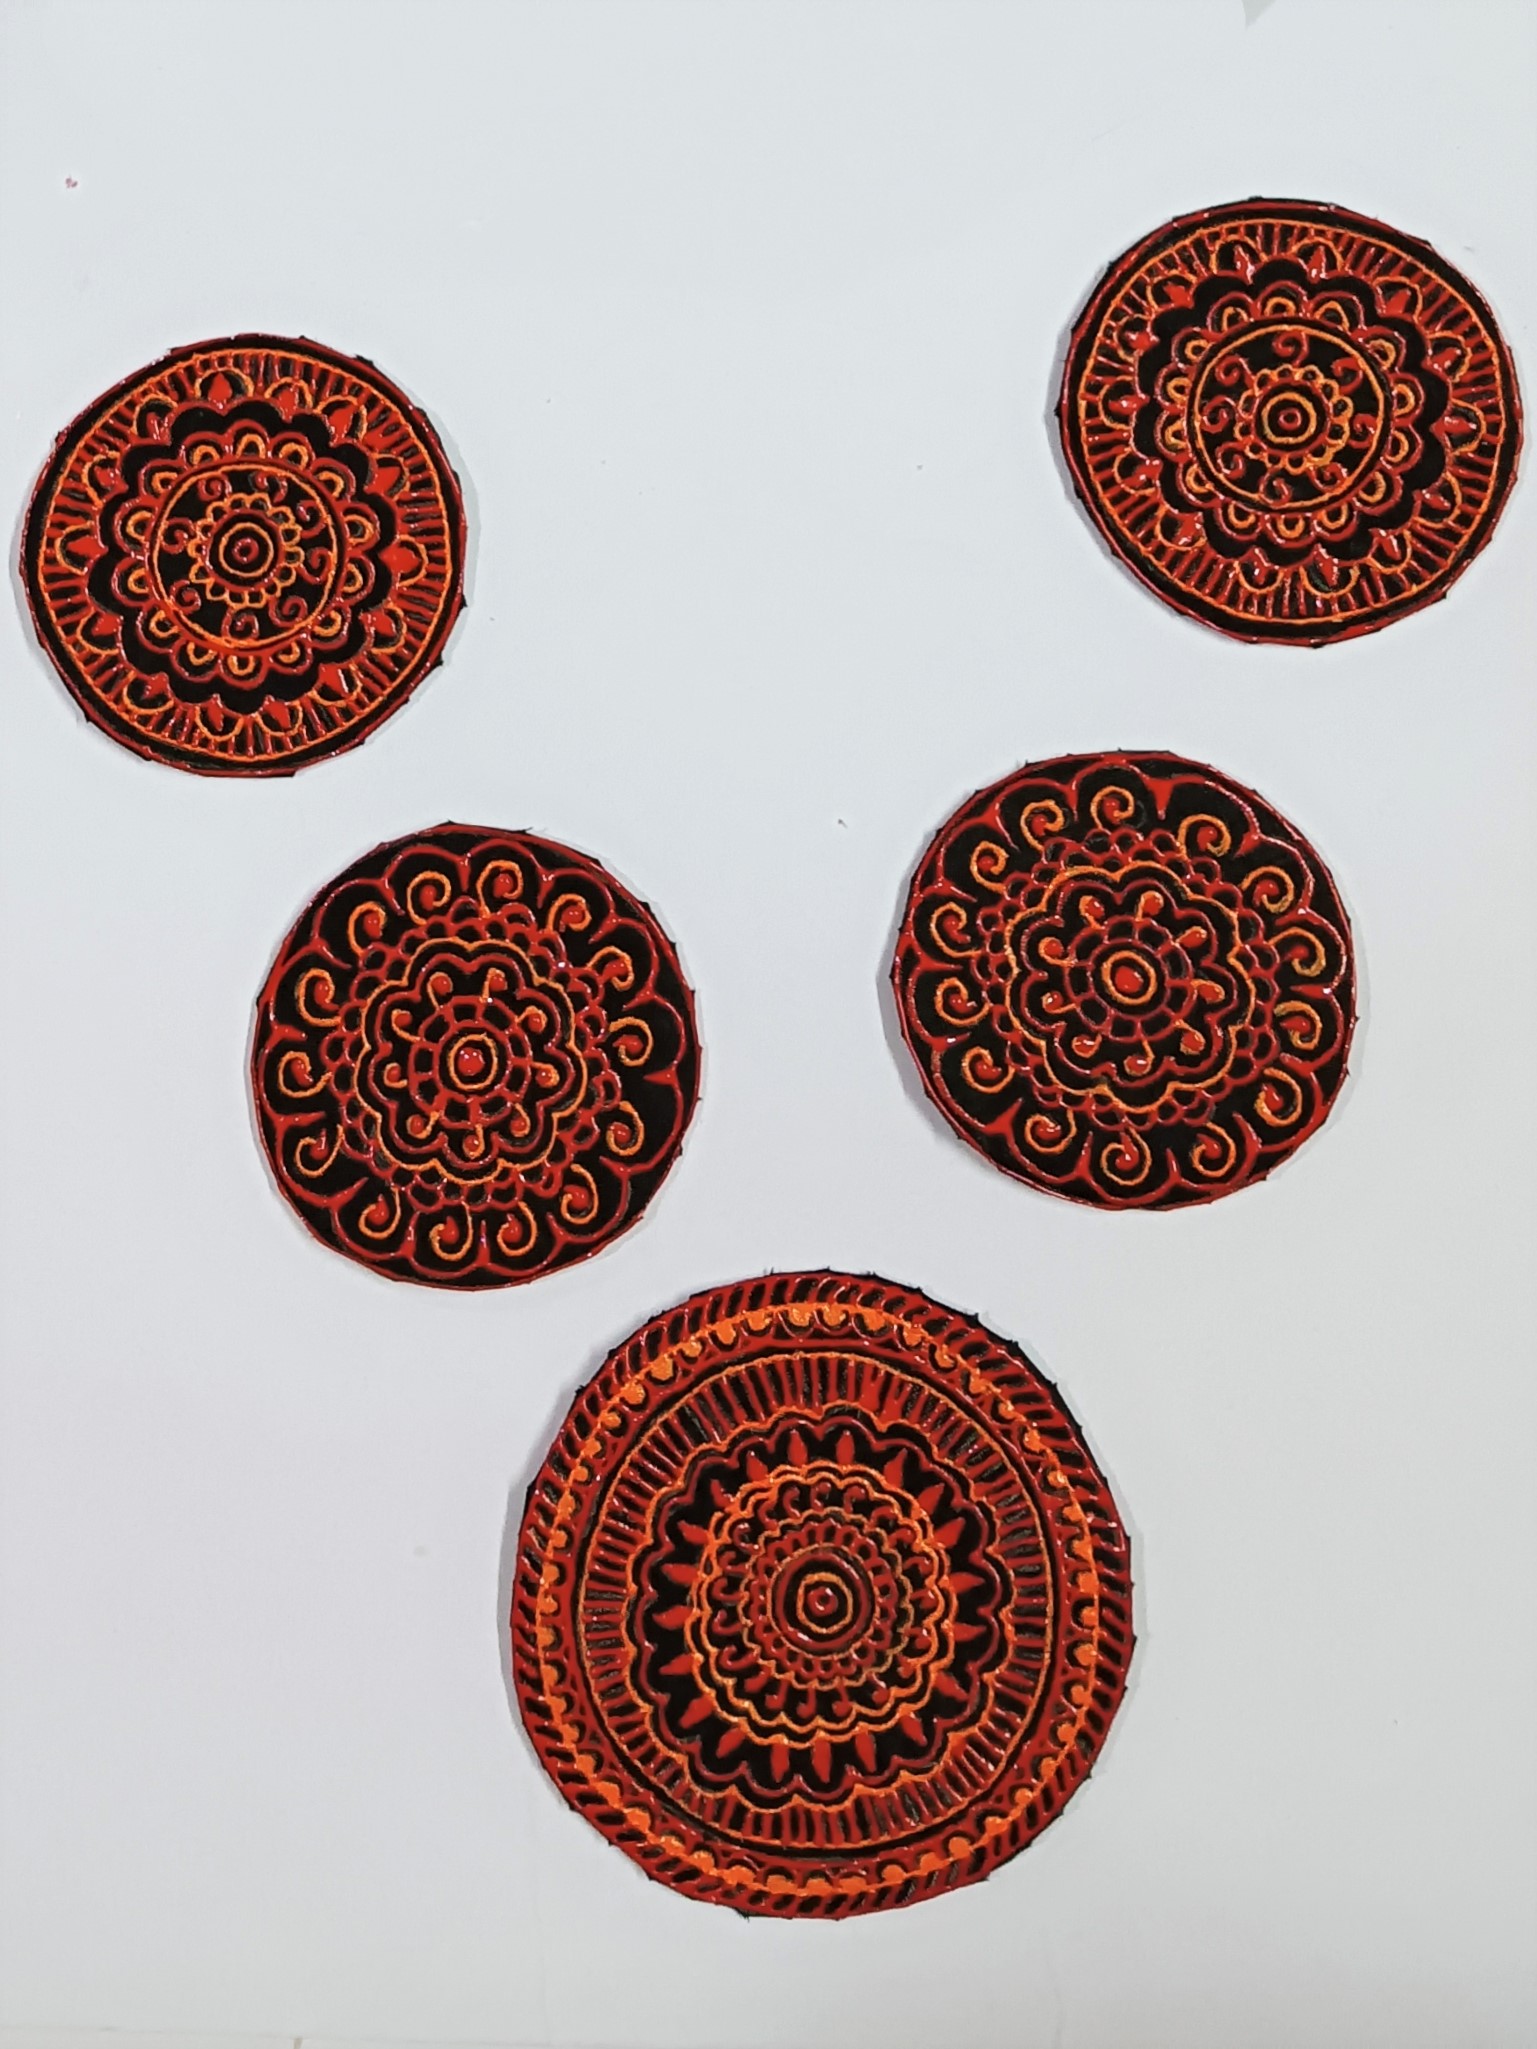
Take canvas sheet and plain black fabric , cut both in the size of the painted circles. Sandwich the canvas sheet in between the painted and plain fabric using Fabric Glue. Let it dry.

Attach woolen thread to the mandala using needle and thread.
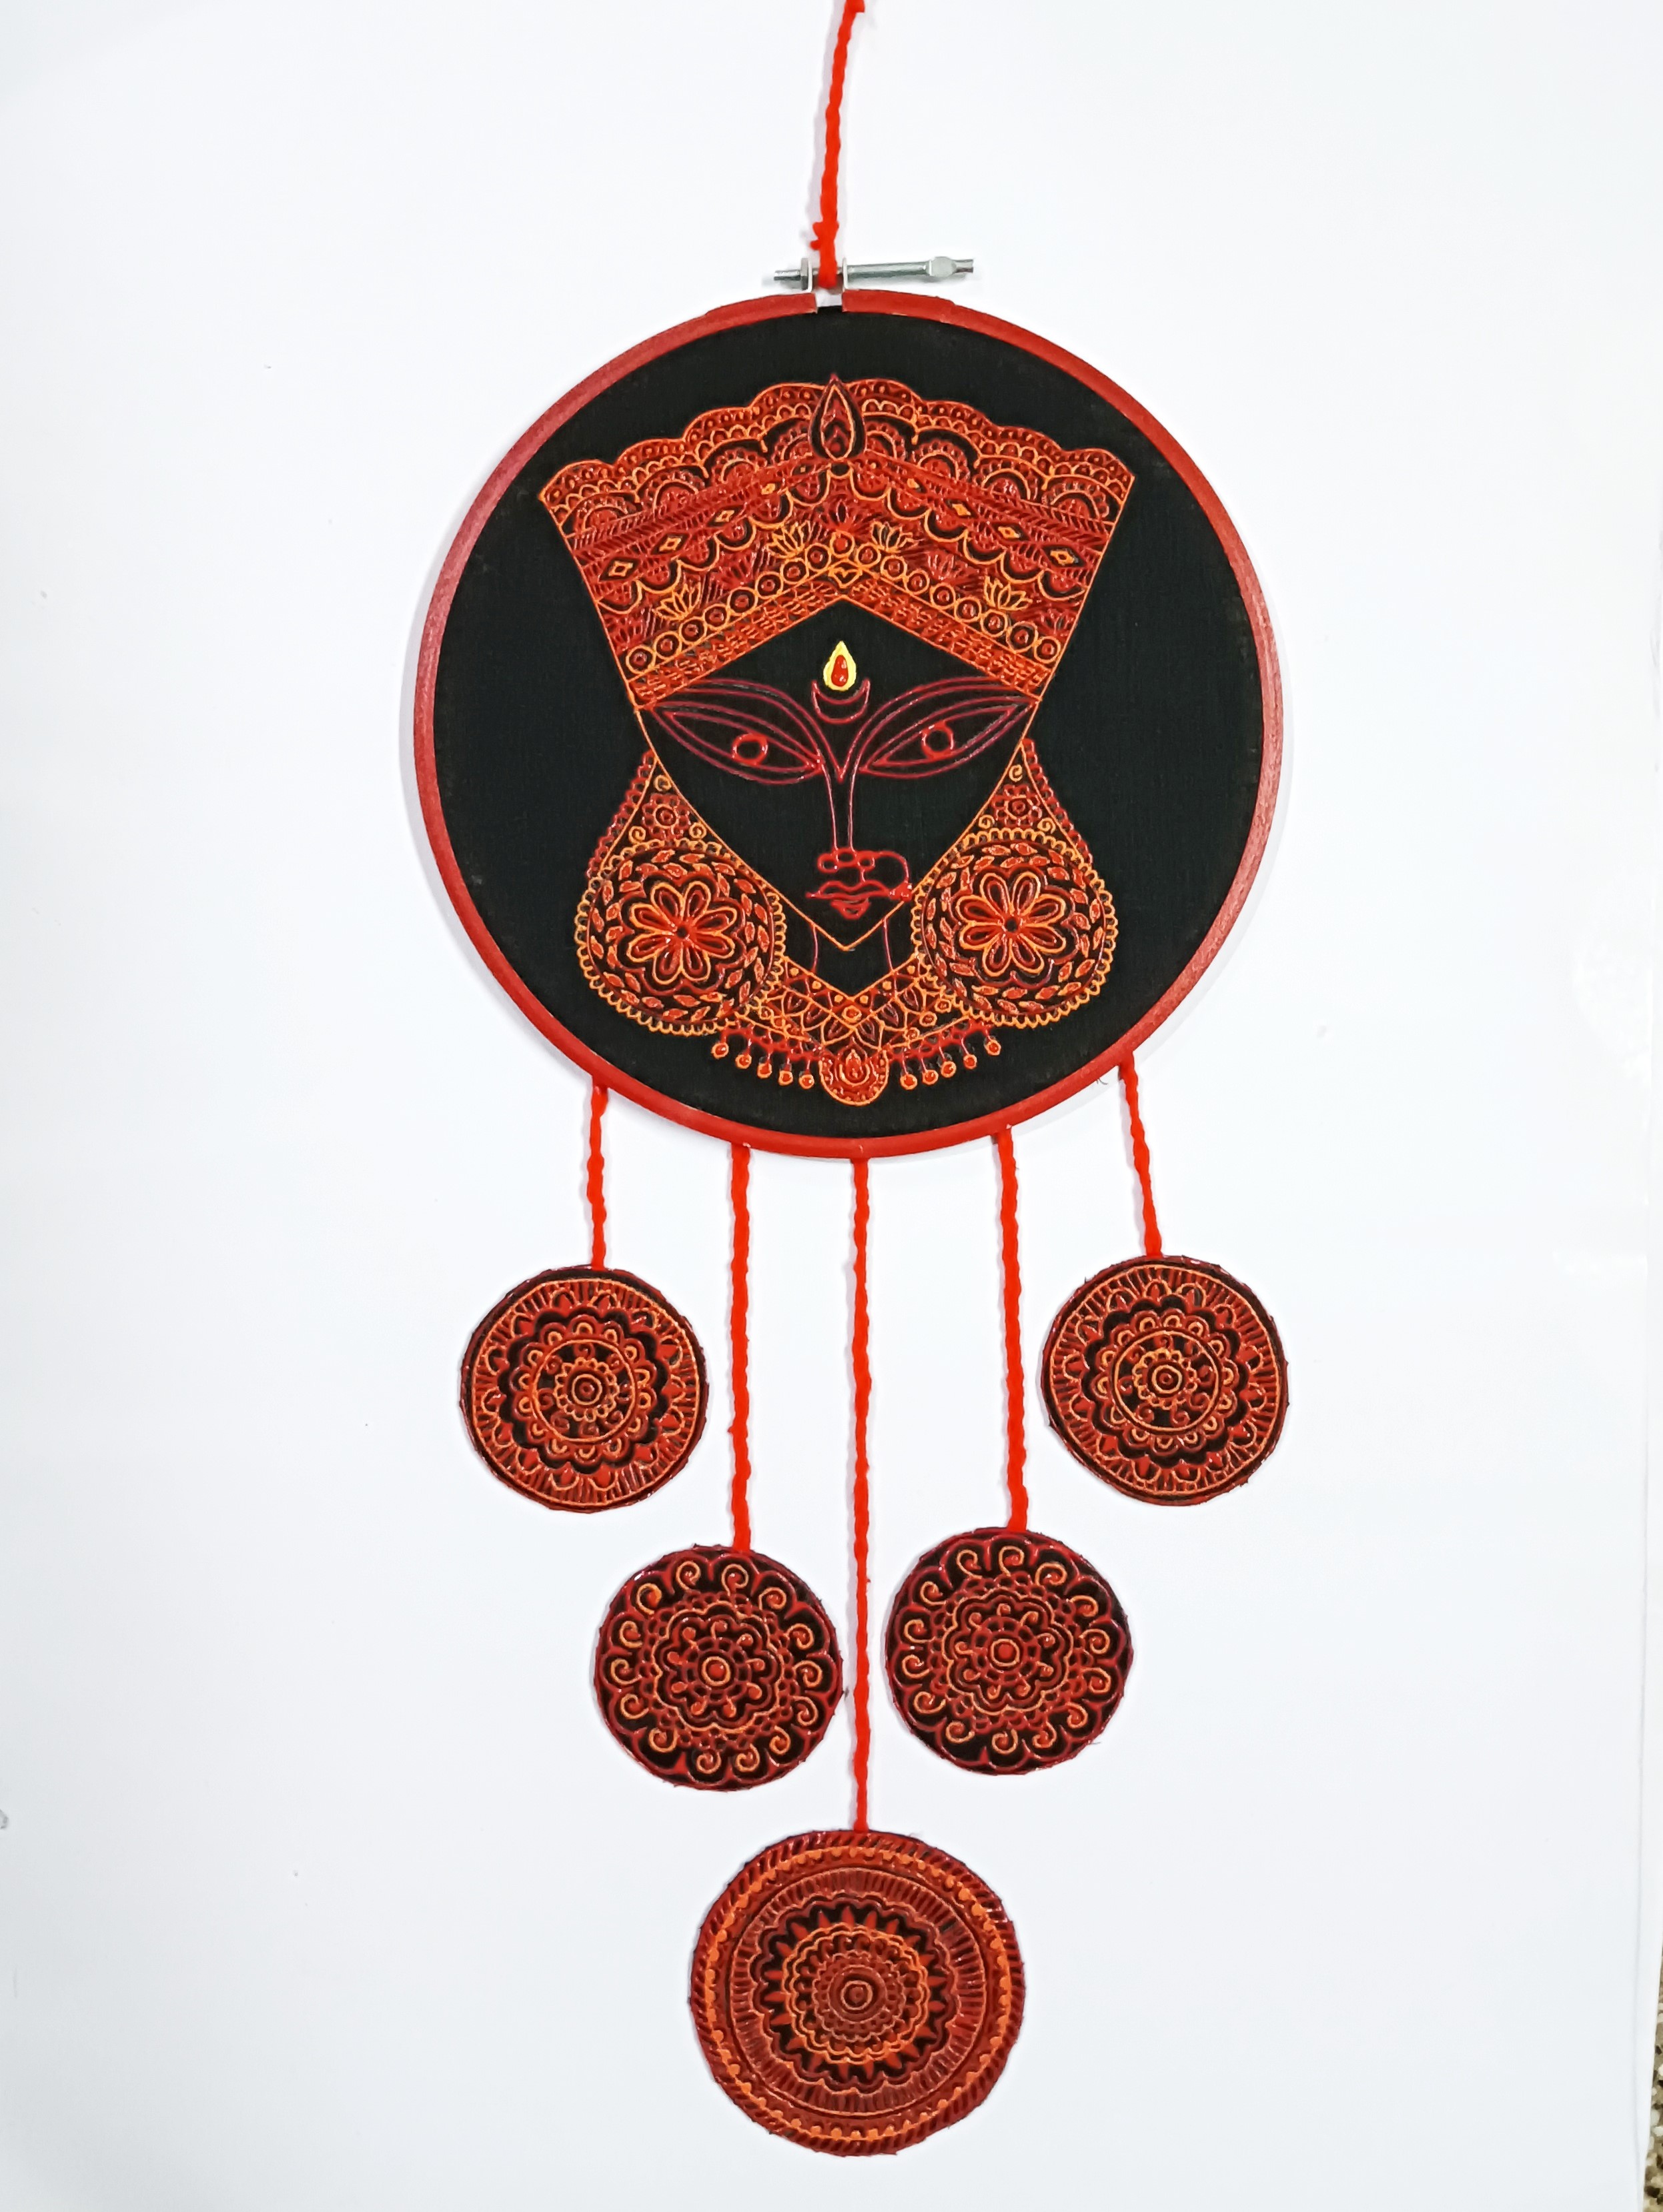
Attach the mandala circles to the ring neatly to complete the look. Refer to the image.


 +91 99676 55545